This page shows ongoing projects currently on the workbench. Updates will be provided over time as work and time permits. If you have any questions or further information, please let us know via our ‘Contact us’ section.
Please use the expandable titles below to see our progress.
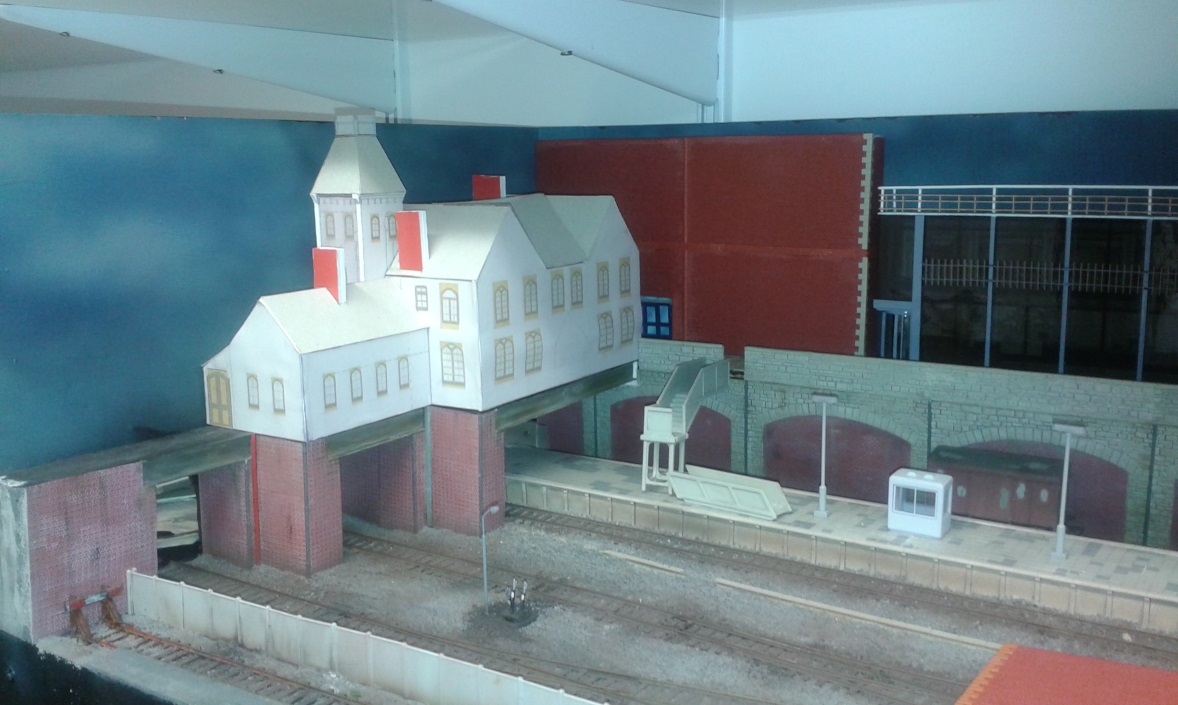
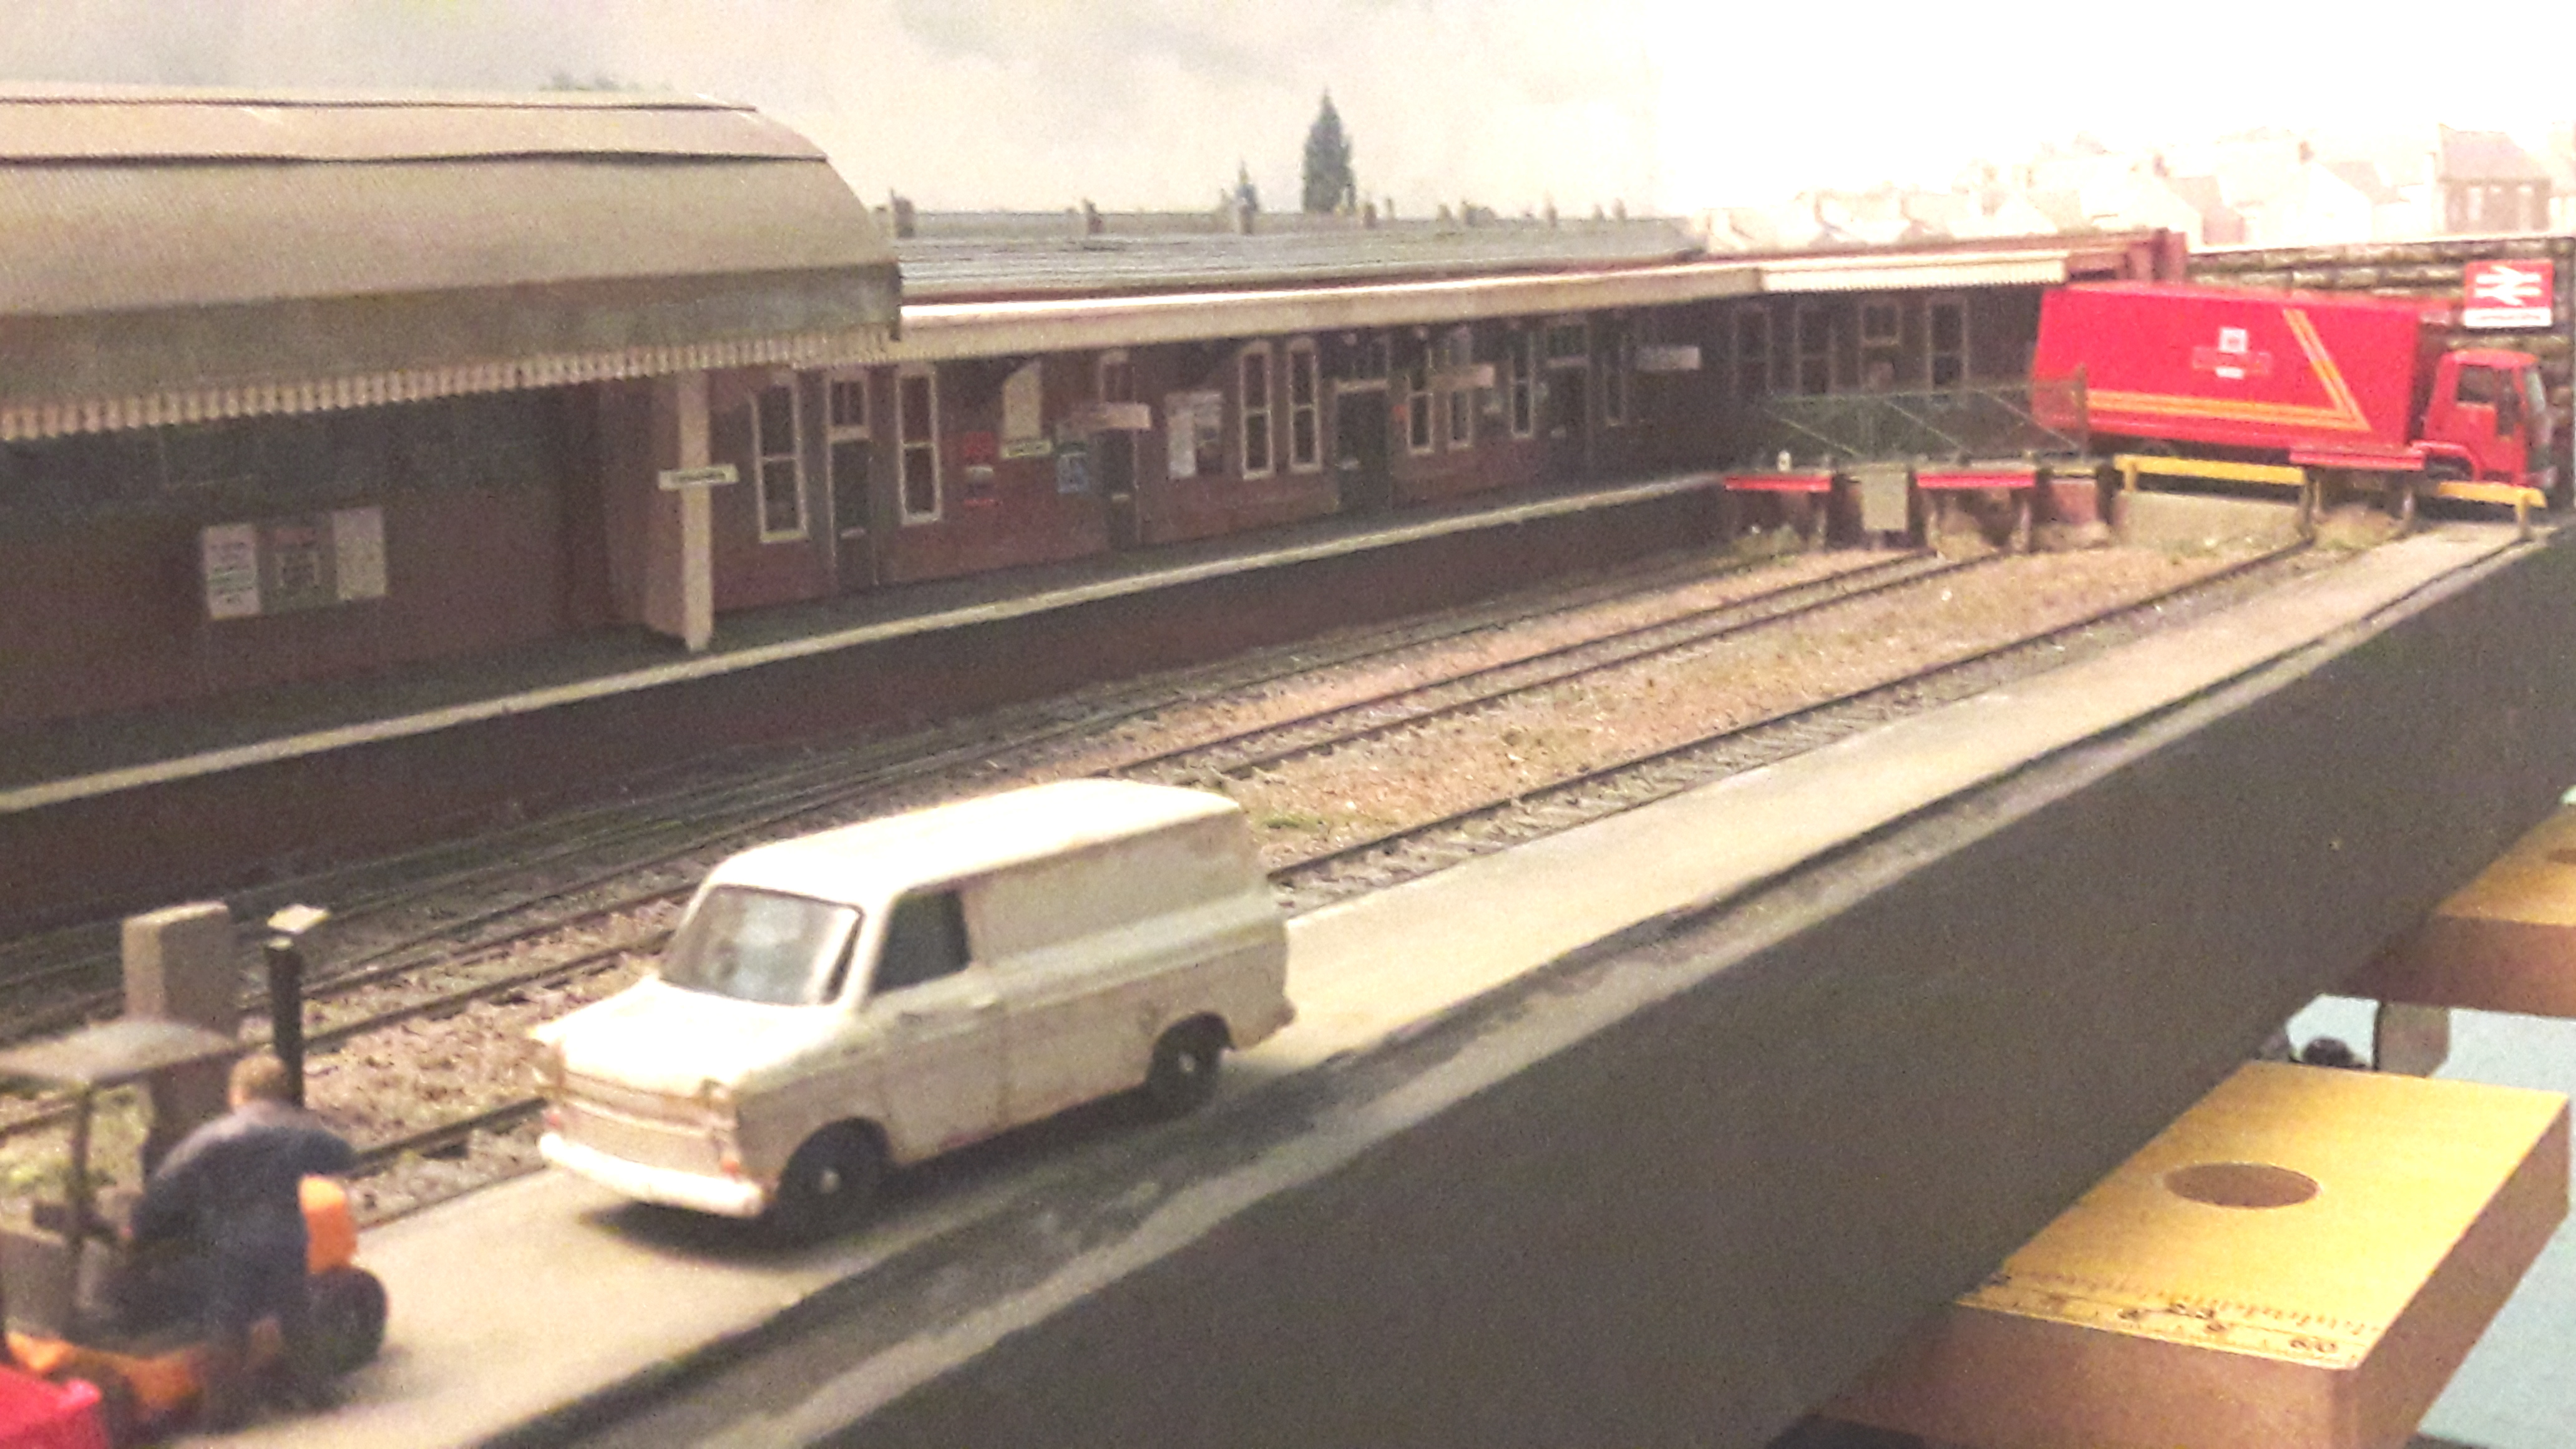
The premise for the station building at Devonport Road is that the overbridge station building has been sold on and has now, as in many other instances, been converted into a pub – in this case ‘Platform 5’.
We wanted to have an interesting prototype, fitting with the location. Enter Devonport Kings Road, the original LSWR station. From the glimpses in photos in books it was a little unusual architecturally and could fit the bill. However, clear photos were hard to find, with only a couple of examples being found on the internet.
http://www.cornwallrailwaysociety.org.uk/southern-route-devonport-kings-road-to-okehampton.html
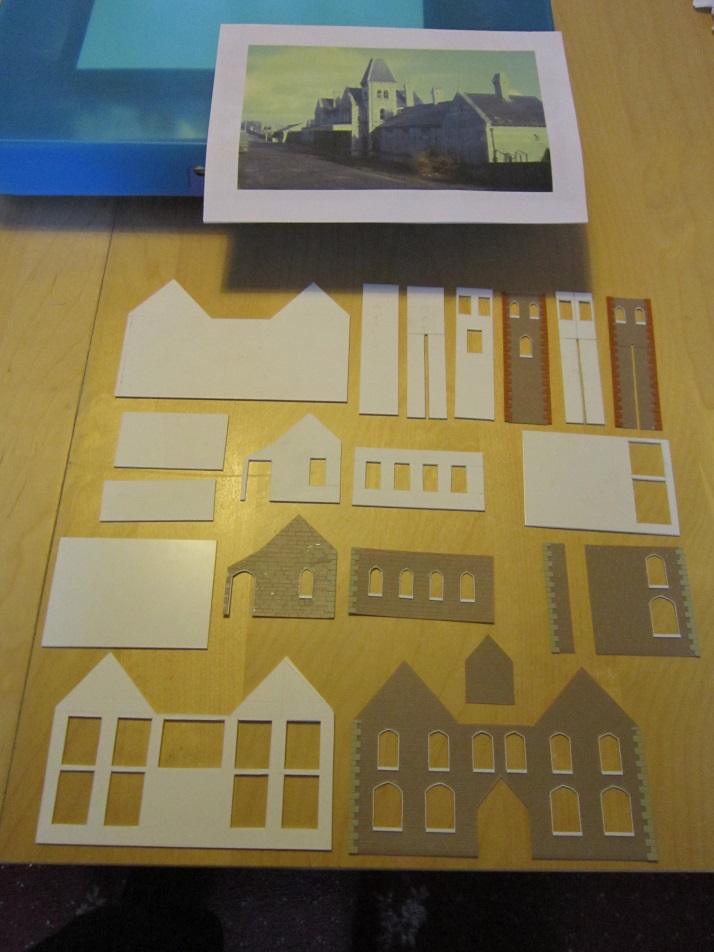
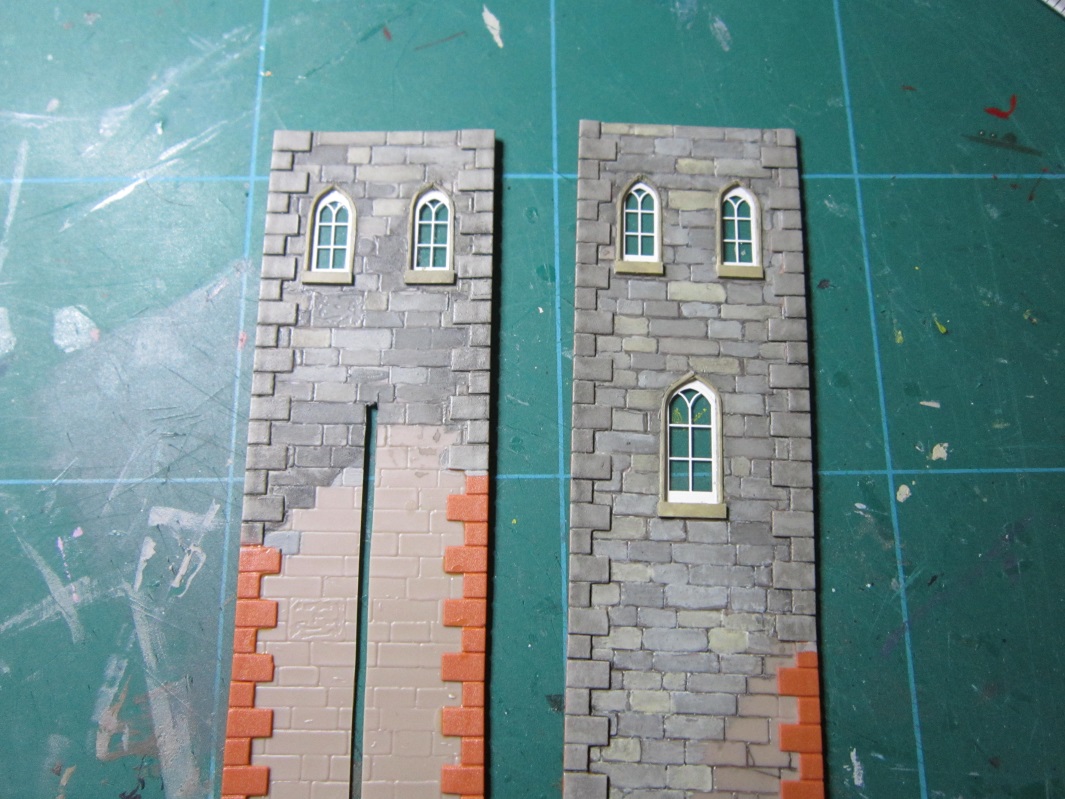
It was soon obvious that ornate windows would be required to carry off the model. A further internet search identified the Scale Link Bovey Tracy doors and window etch. GWR I know – but similar enough! Armed with a copy of the etch from the internet, scaled to approx. 1:76 a drawing was created of a representation of the original, showing the various elevations – I knew keeping my drawing board and my ‘O’ Level engineering drawing would come in useful one day! The doors and windows were photocopied and stuck on to the drawing to give an impression of the final building.
Given the scale of the building on paper, I was concerned that it might not look right in place on the layout. Therefore, a mock-up was created. The drawings were scanned and printed and pasted onto some old advertising display board from my wife’s shop. The individual pieces were then cut out using the drawings as a template and glued together:
The mock-up was then tested on the layout. This proved invaluable as it was determined that the building was too big to fit by 2mm and that one window on the end would have to be dropped as the wall of the access way would join in the middle of it! Much easier to fix at this stage rather than on a completed model.
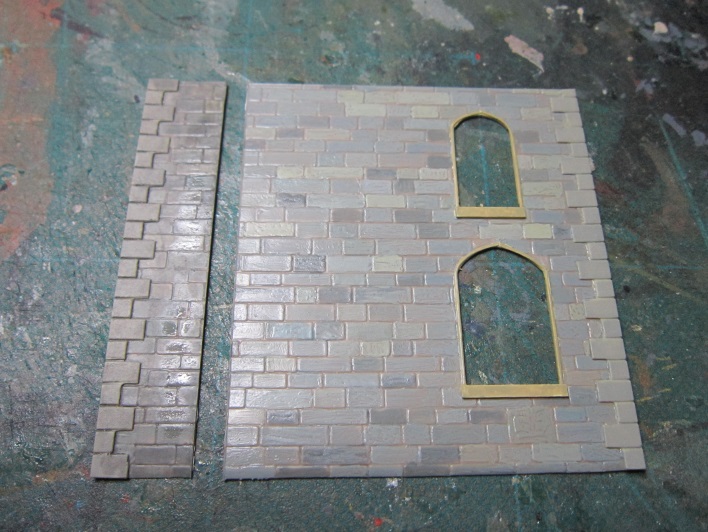
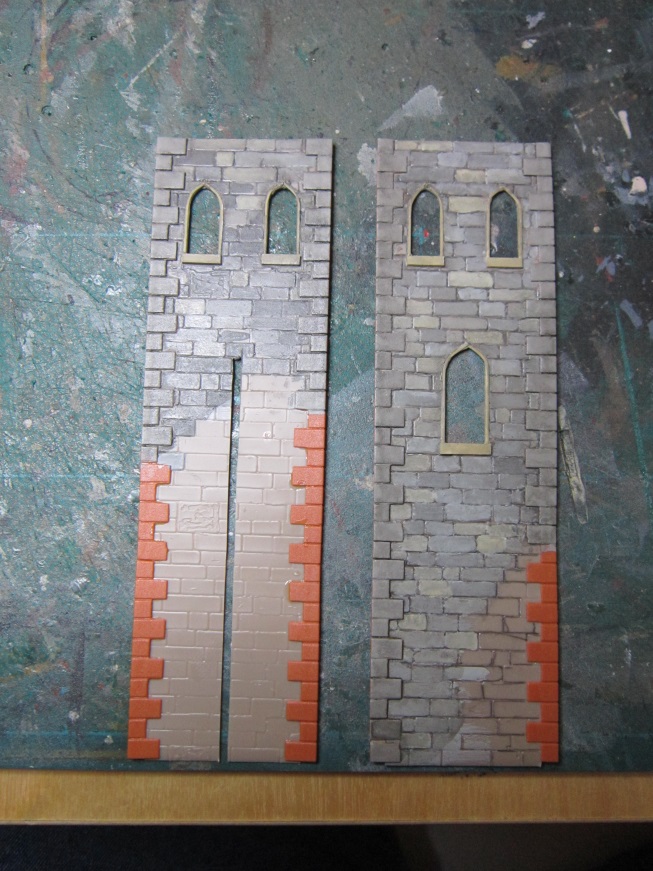
Construction was to be a combination of Slater’s 4mm embossed dressed stone overlaid on 1.5mm plastic card. A kit of parts was constructed from the original drawings, allowing for the size adjustment and interactions at corners, which utilised Wills’ quoin stones, supported internally by their corner fillets. Windows were to be attached directly to the inside of the embossed plastic card, hence the large openings in the supporting layer:
The stone walls were painted before being joined, each stone painted individually from a pallet mixed from just three Humbrol acrylic paints. Timely but worth the effort. A wash of a dirty dark mix of acrylic thinned with tap water was then applied to add mortar and weather at the same time. Window frames were from microstrip slowly bent into shape as it was glued in place. Windows were then attached, after having curtains applied, cut from an Argos catologue.
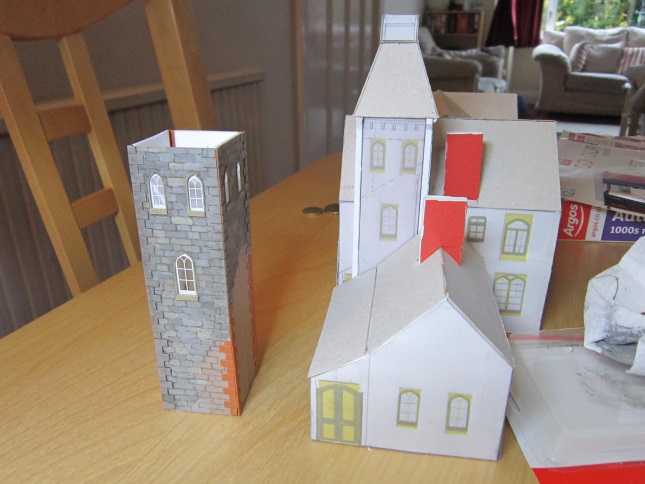
The various parts were then brought together, just like building any other plastic kit, to create the basic shell. This was then test fitted on the layout and any minor adjustments made and locators put in place (as the building will be removable from the layout for demonstrations).
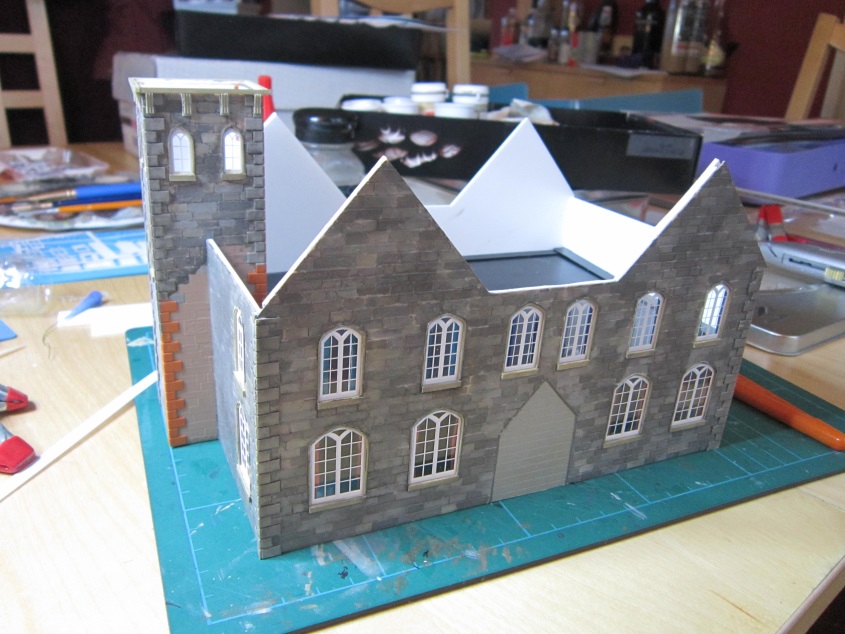
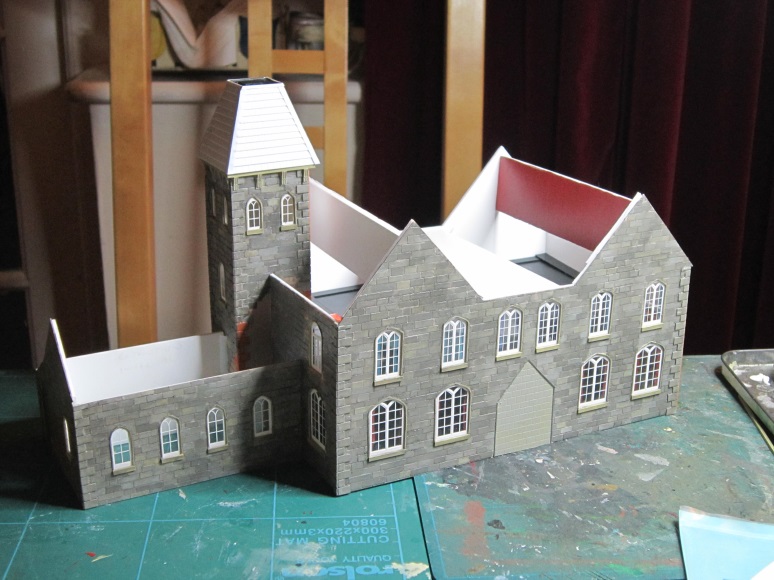
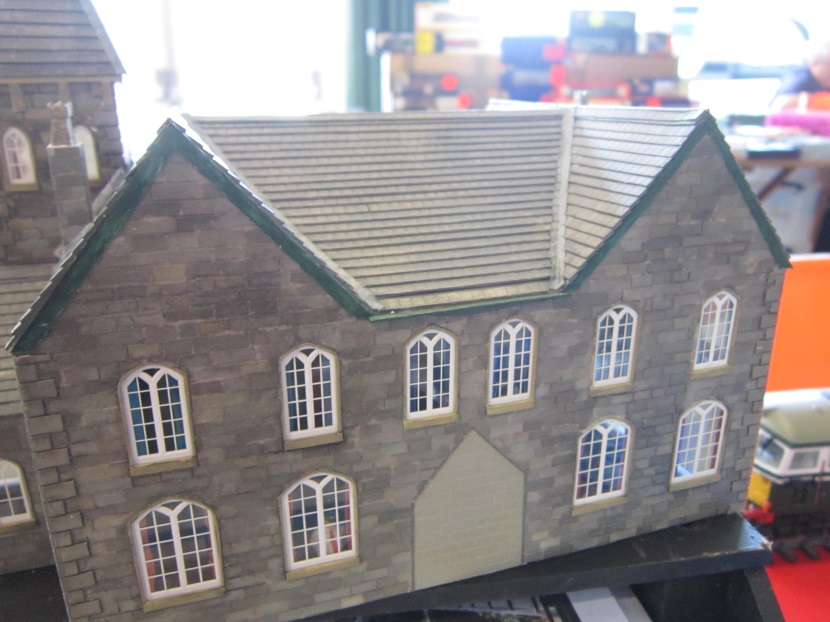
The next task was to create the roof sections. These were again using a base of 1.5mm plastic card, but overlaid with Slater’s individual rows of embossed tiles. Each row was cut out and overlaid on top of the previous row, offset by ½ a tile. Chimney stacks were a double layer of the advertising board covered in embossed stone. This is very strong and, being a plastic material throughout, means that the embossed card bonds quickly using normal solvents rather than when using a wooden core. As a point of interest, the breeze block section shows the change of use. This was where the original stairway to the platform exited the building, now replaced by a stairway from the adjacent Armada Centre!
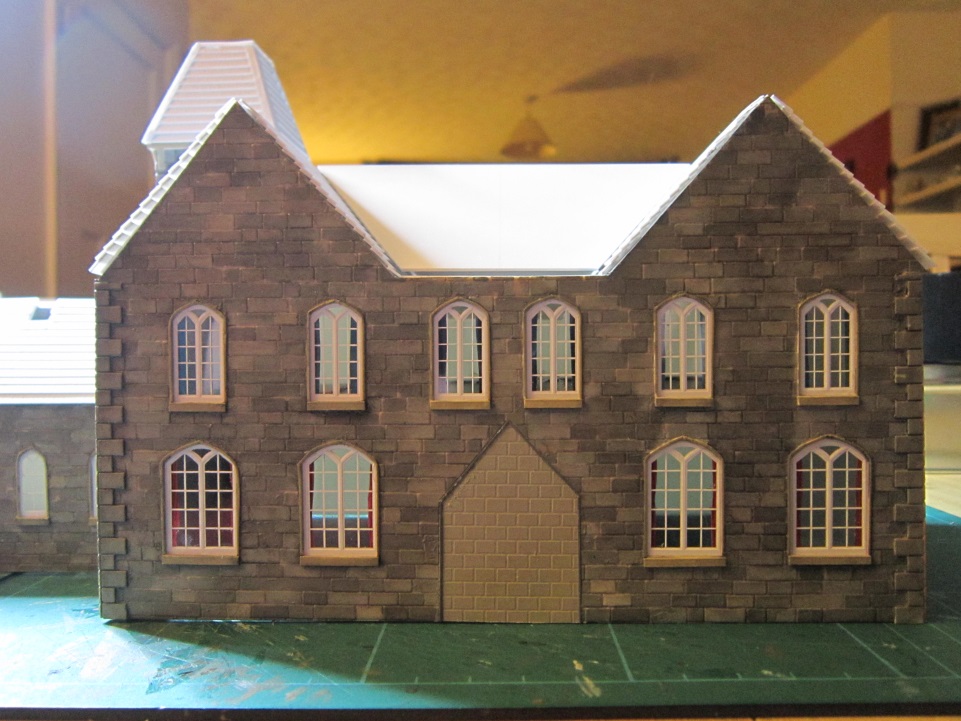
Roofing has now been completed and chimneys, complete with decorative pots from Howards Scenics, have been added. Barge boards and guttering are in place. Some small items will be added over time, including downpipes, signage, a decorative balustrade on the tower roof, internal partitioning and details, including a band rehearsing for the ‘Rockageddon’ festival!
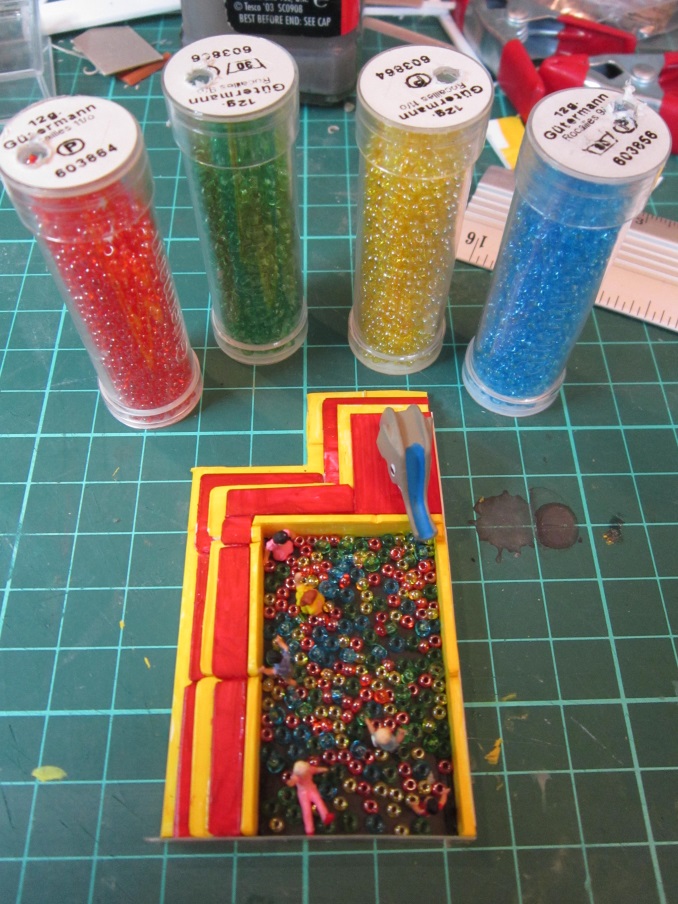
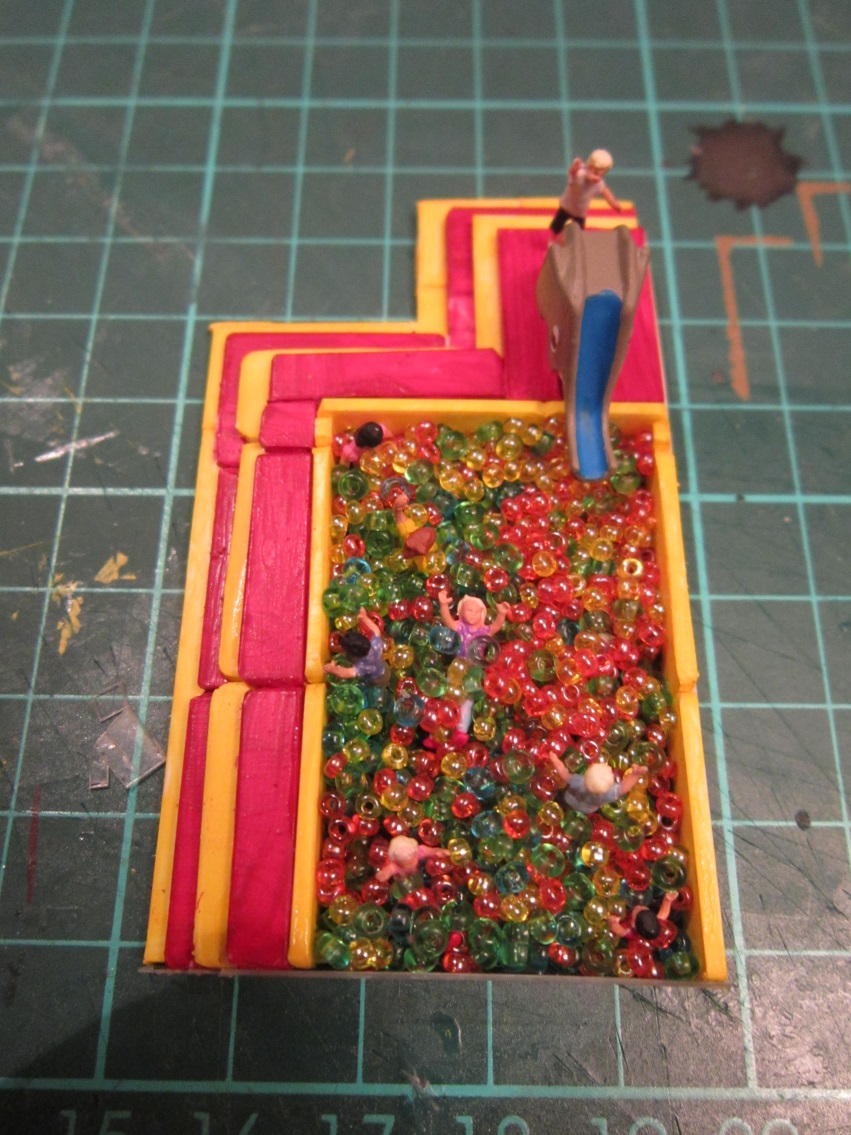
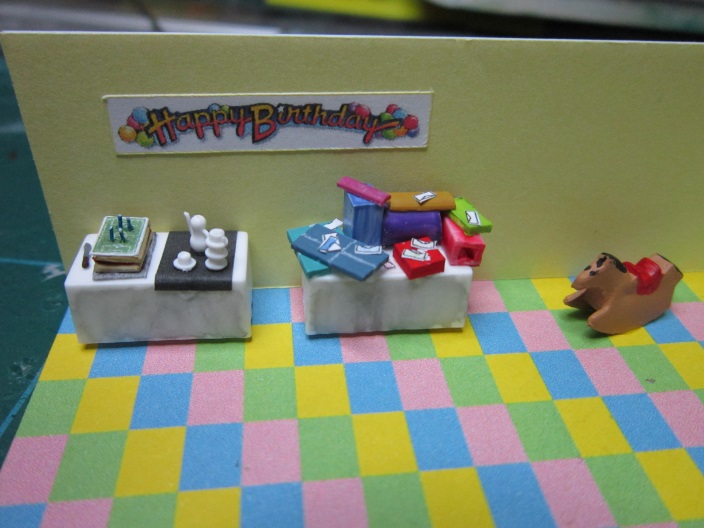
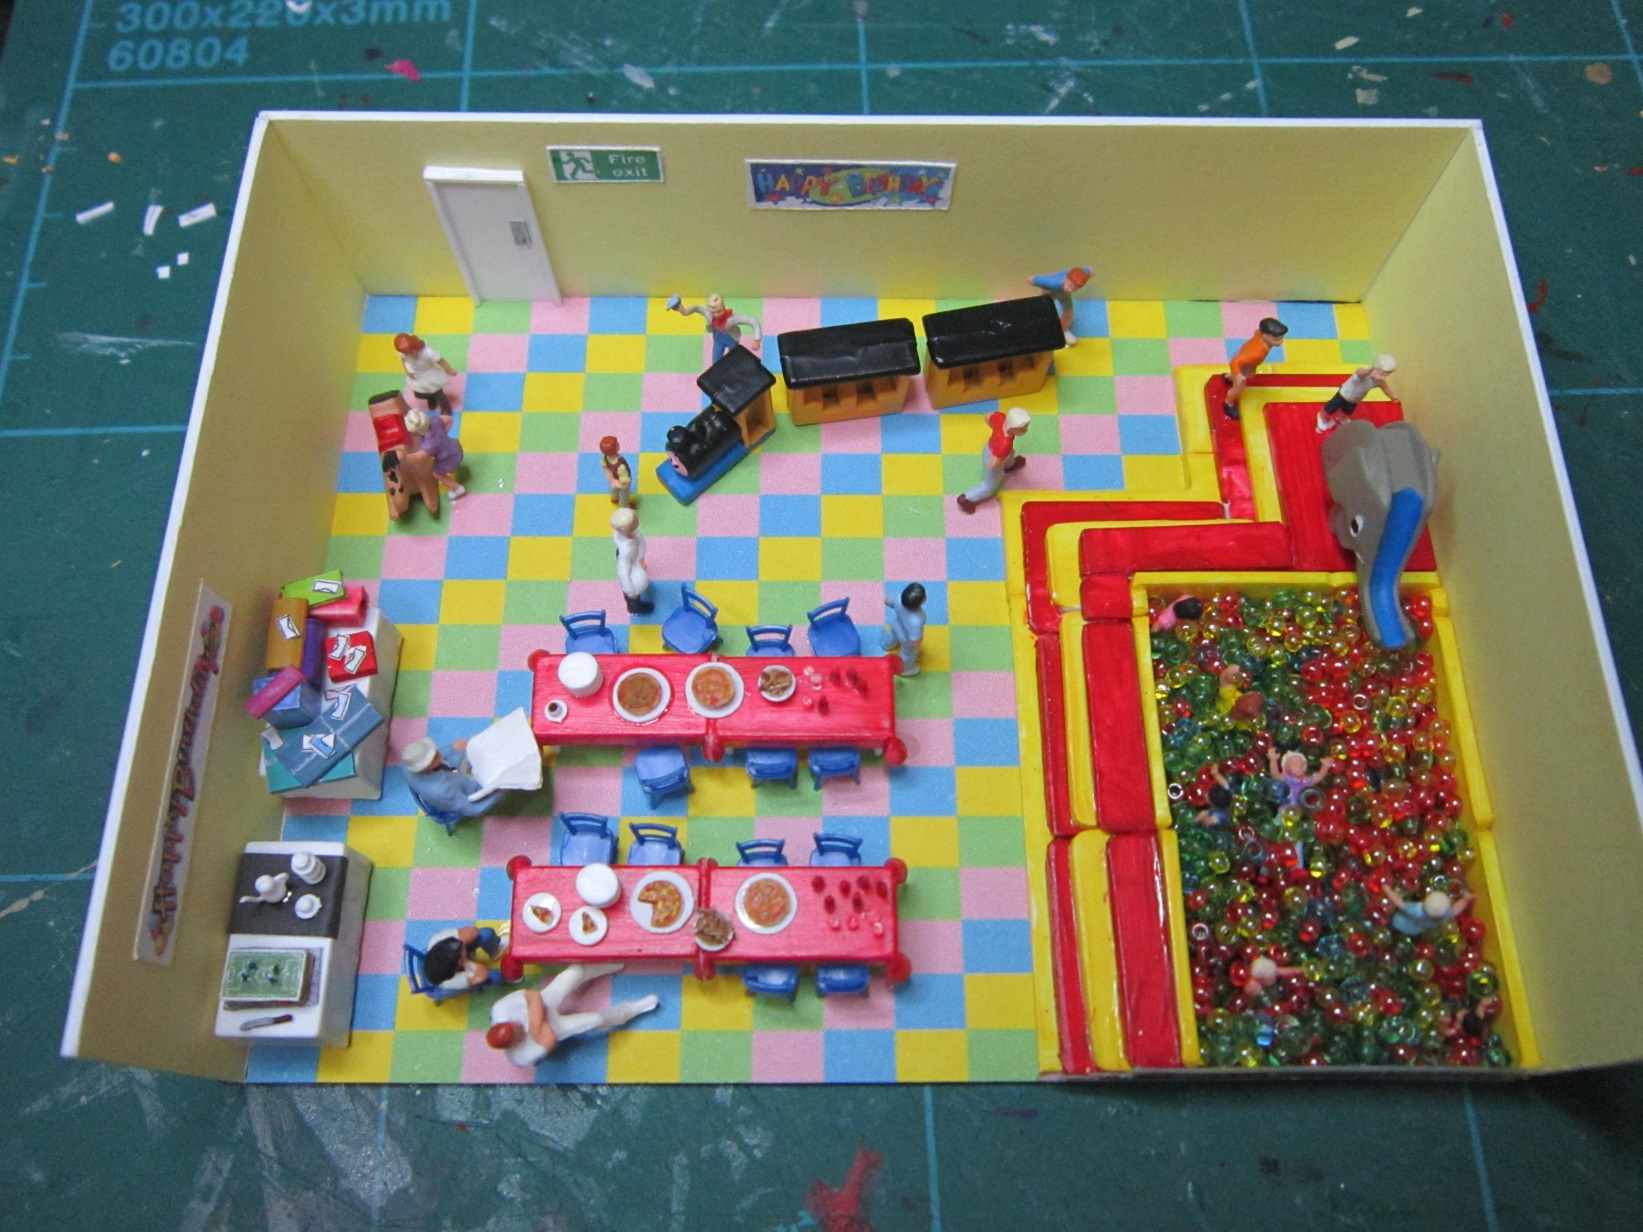
One of the rooms at the Devonport Road Leisure Centre is a soft play area, which has today been hired out for a birthday party. The main feature is the ball pool, which seems to be great fun for those immersing themselves before they eat their pizza & chips and drink their bottles of coke!
The idea of having a ball pool was, as usual, one of those great ideas … at the time. A bit of a challenge after though! Various options were tried to get the coloured balls that would be required to make it work. These included liquid lead, cous cous and ballast but they either weren’t sufficiently ball shaped or wouldn’t take paint. In the end browsing in the local haberdashery, waiting for my wife to choose some wool, I happened upon some very small pastel coloured beads. The best option – not perfect but good enough. The soft mats surrounding the pool area are slabs of plastic card which have been abraded with a nail file to remove all sharp edges – don’t want to hurt any of those Preiser children!
The rest of the party was a combination of Preiser pieces, plastic card and computer printed images printed via Excel, where it is easy to adjust the pint scale on a trial and error basis until the resultant image is the correct size, e.g. birthday cards and banners and football pitch birthday cake. Walls and floors are also printed and fixed in place using 3M Craft Mount.

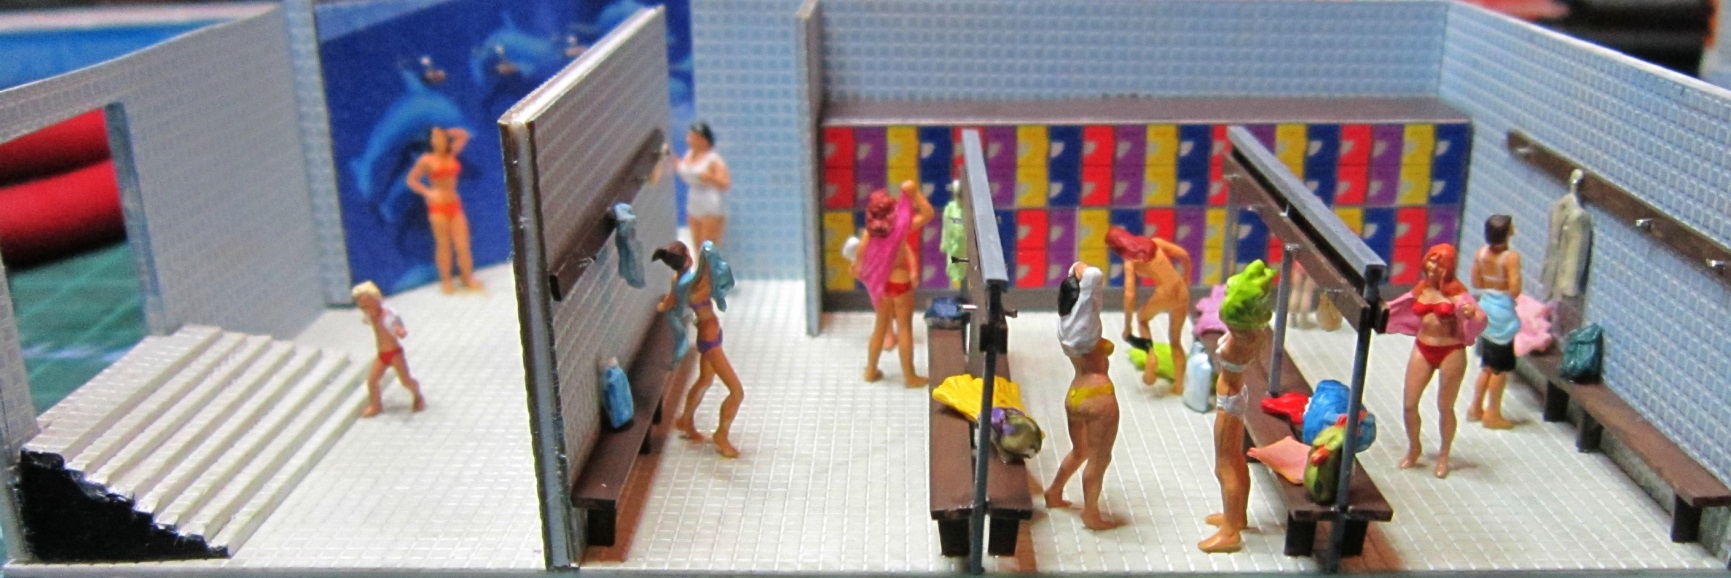
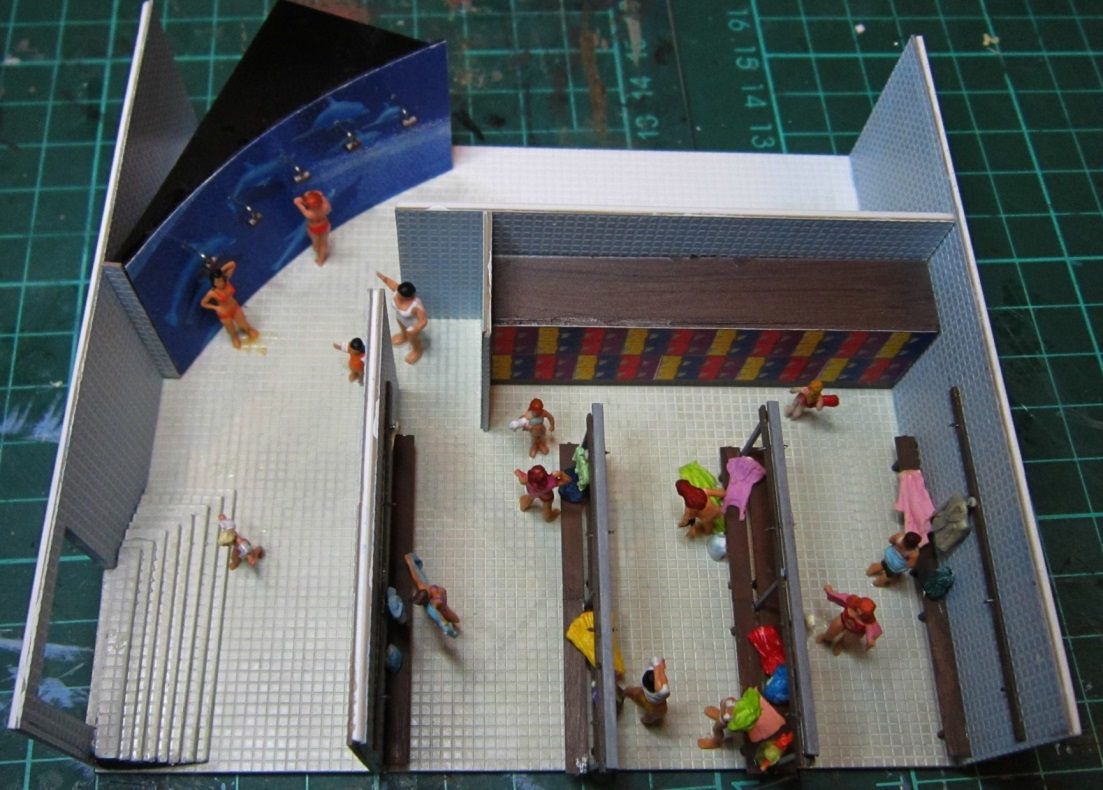
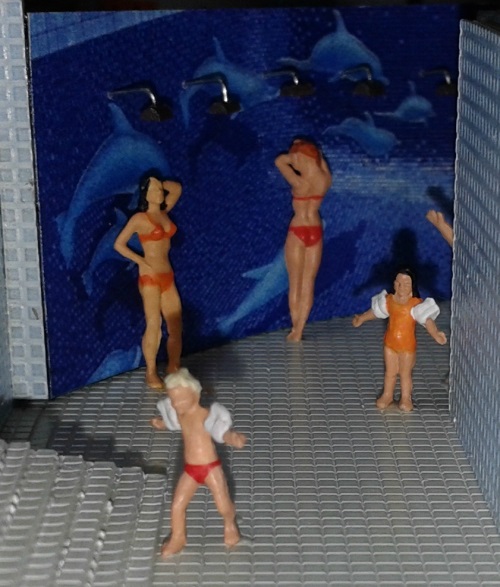
Devonport Leisure Centre Pool has an exit through to the changing rooms, so this area formed the next challenge. Again this was an area where no proprietary equipment was available so out came the plastic card, plastic rod and staples!
The availability of suitable figures meant that the ladies changing room was going to have to be modelled as, surprisingly, the German manufacturers only seem to model ladies in various states of undress/changing and a lot of these needed costumes/underwear adding to make them useable and ensure that no naughty bits are on show!
Google again came in handy proving a suitable image to be played with for the lockers and a search on ‘swimming pool mosaic’ produced the dolphins for the showers – the showers themselves being cut down staples and plastic rod. Clothes were from a box of Preiser office equipment – of course!
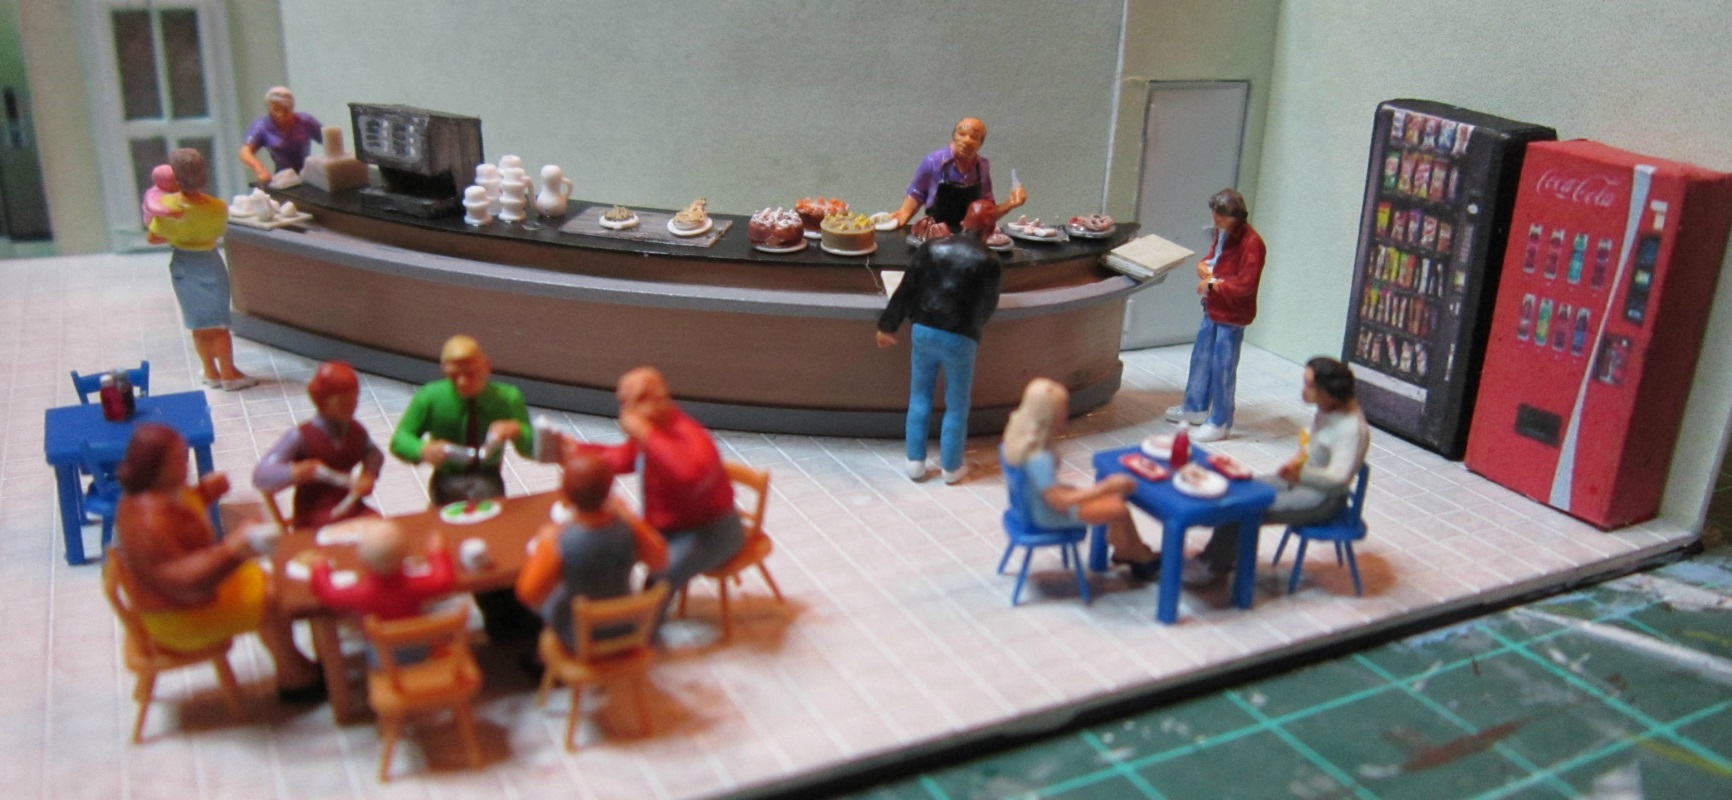
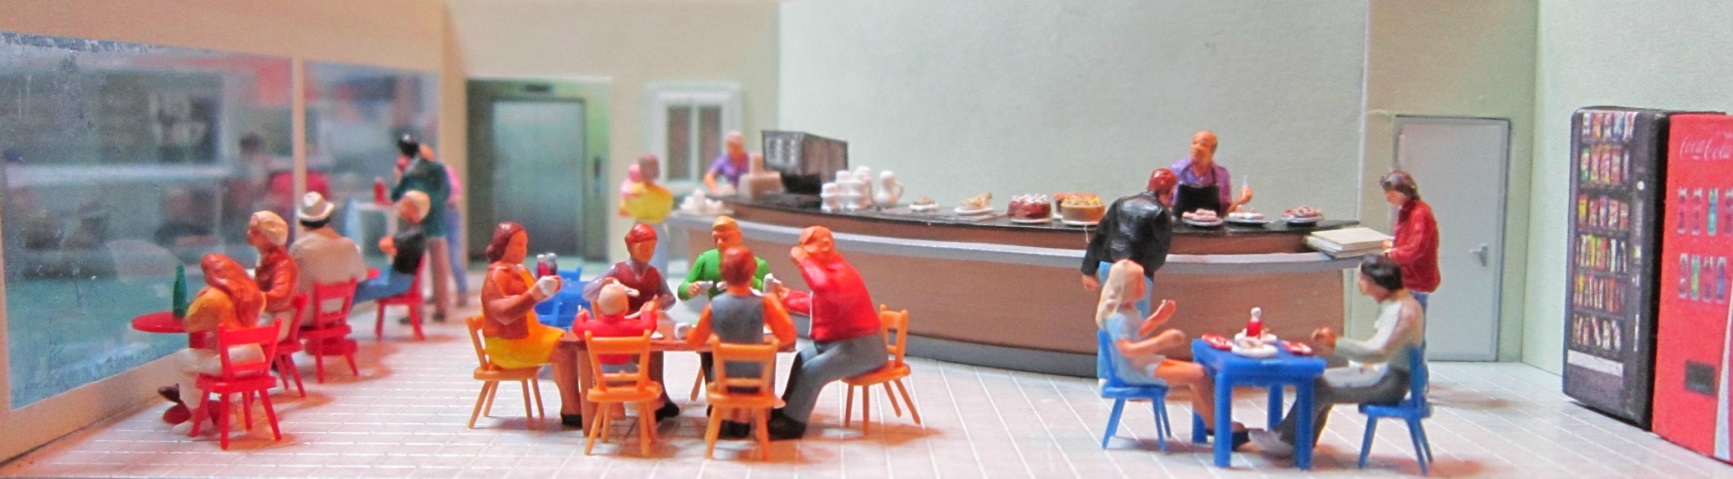
The restaurant is on the top floor with picture windows overlooking the swimming pool. Again much use has been made of various Preiser pieces, including crockery, food, bottles, tables, chairs and figures. It was decided to move away from right angles in this build and the kitchen area was walled off on an arc to create a bit more interest. Of course this meant that the counter had to follow suit, which was fun when trying to get the different sections of plastic card cut in parallel.
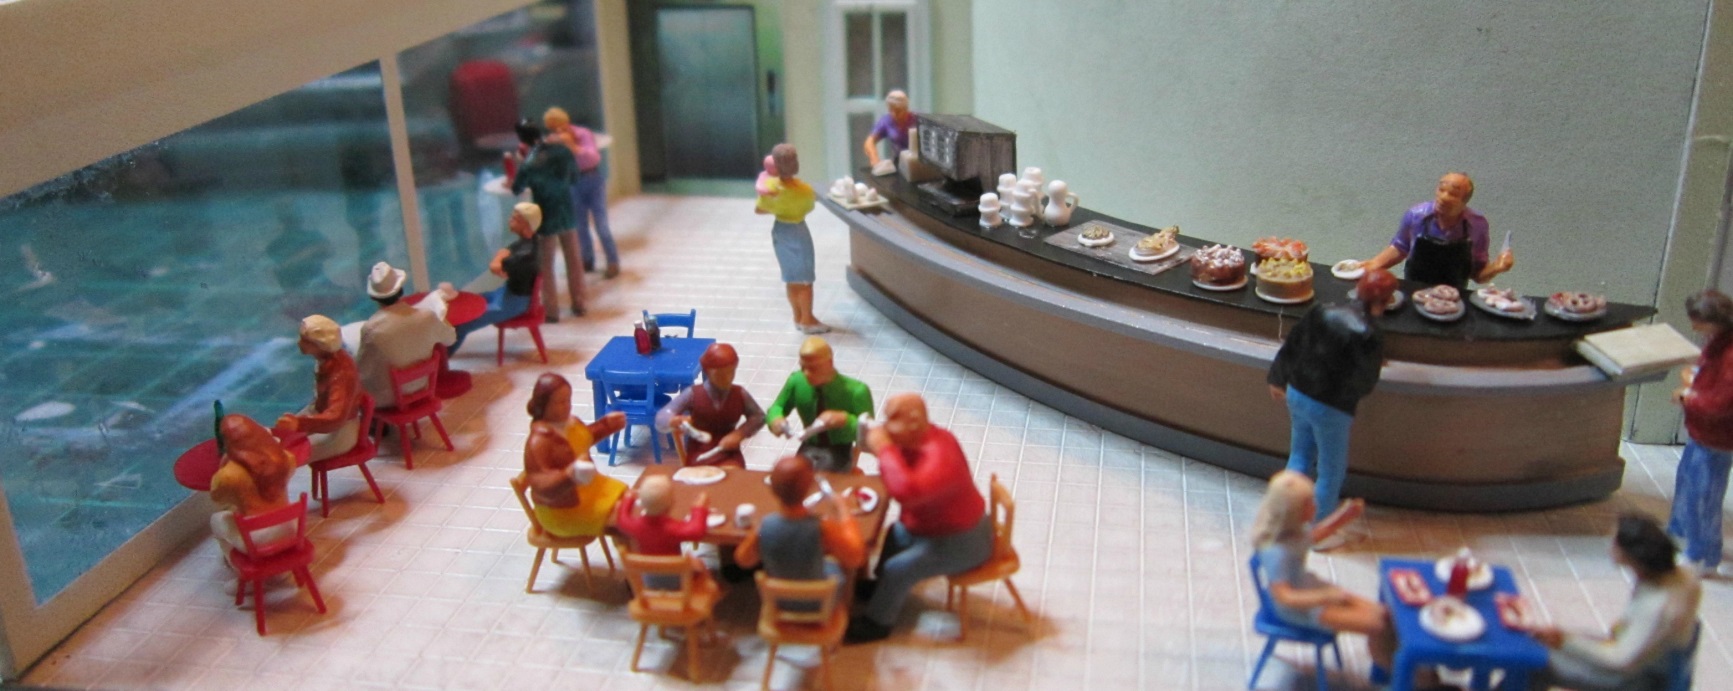
The lift was another Google image. The vending machines were picked up at the Minehead show and fit in nicely.
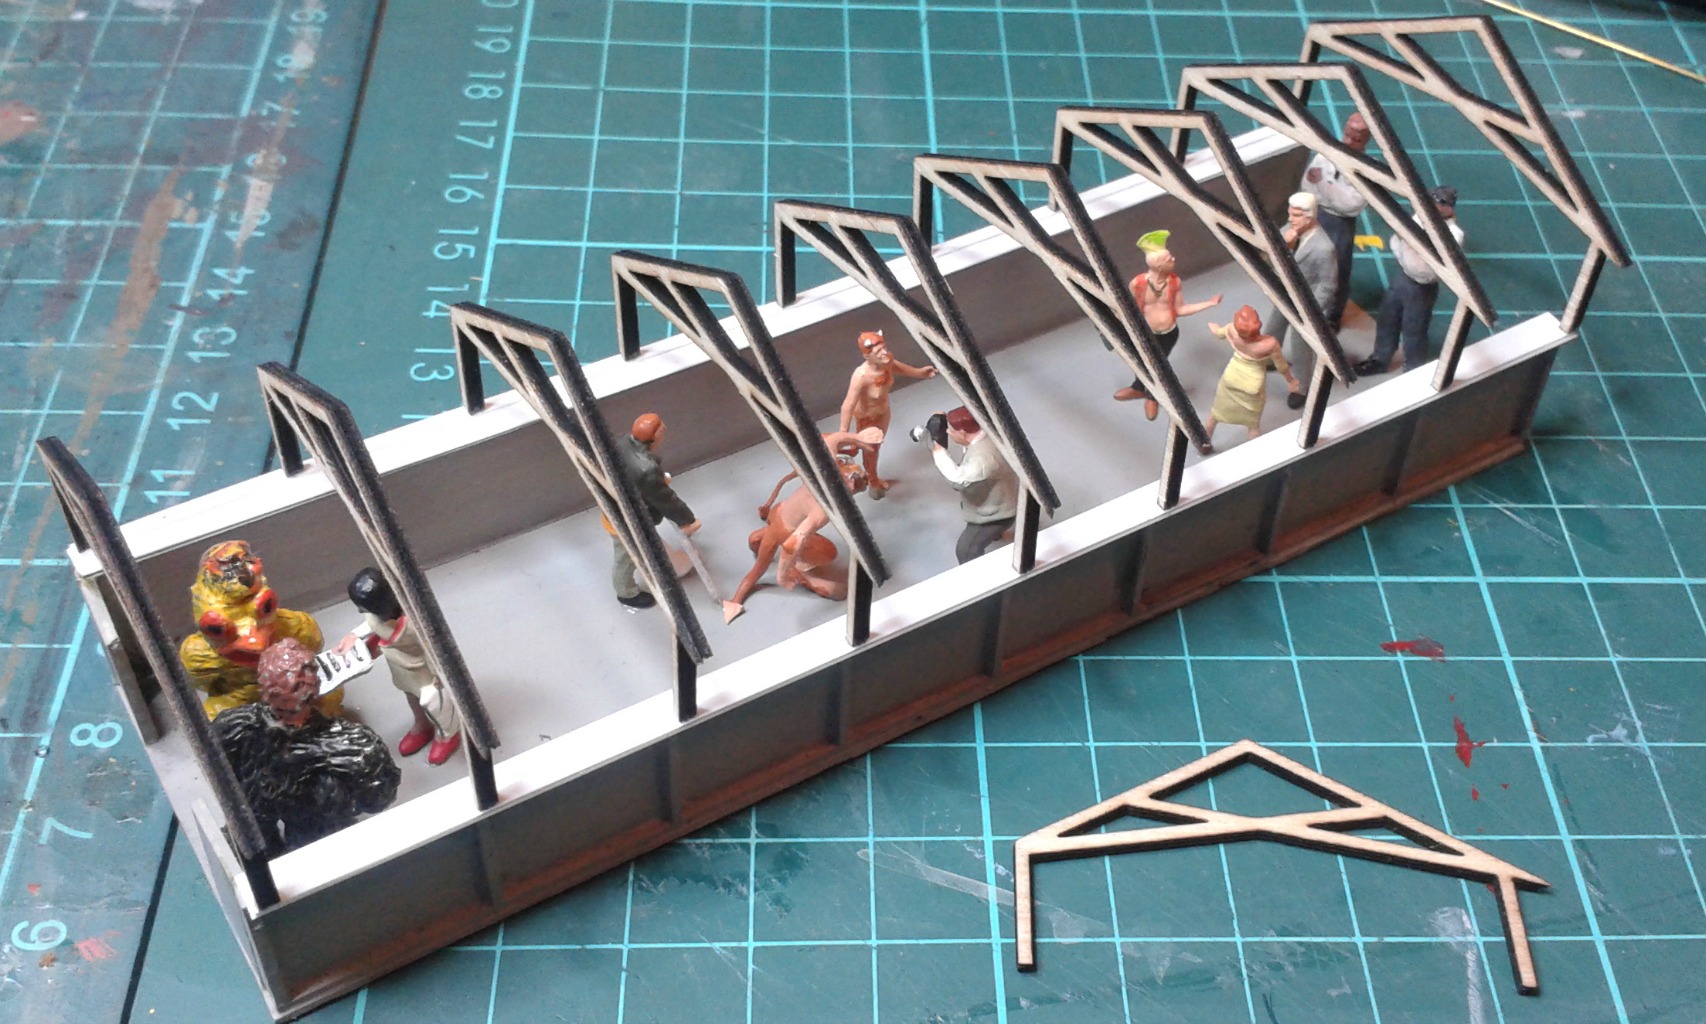
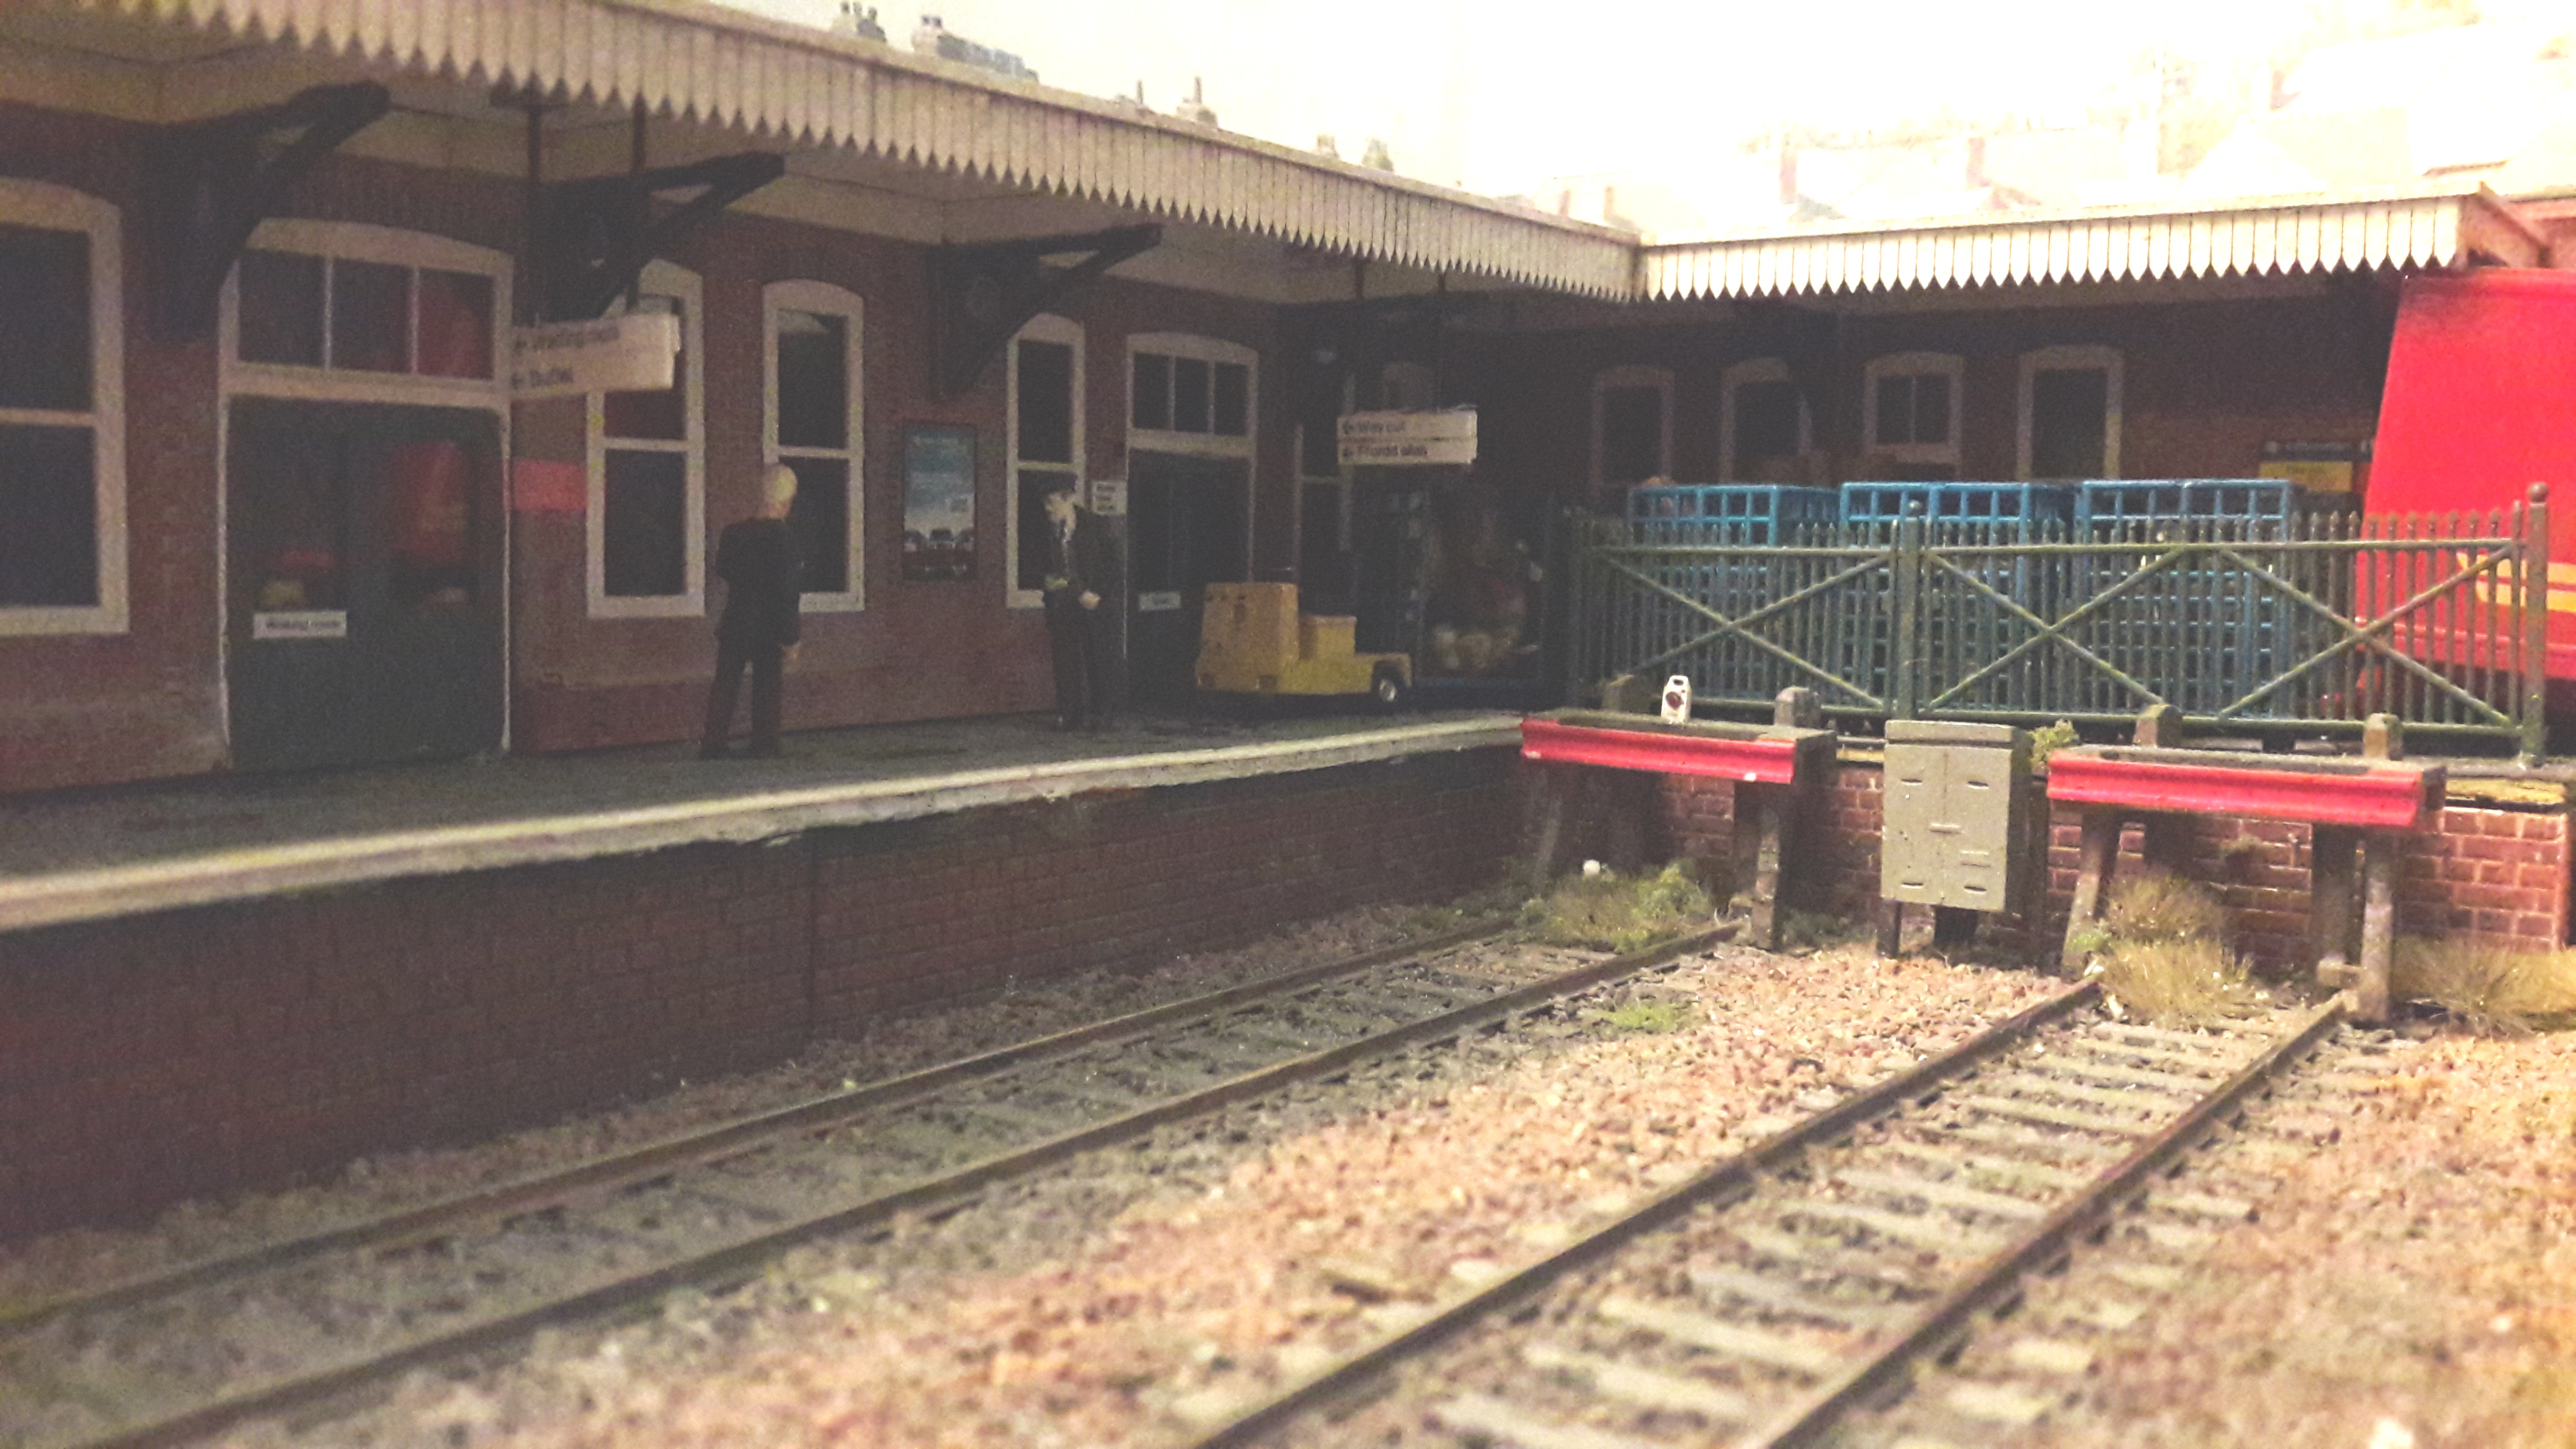
The footbridge walkway to the rear entrance of the old Devonport Road station building is modelled on the old structure at Exeter Central but in a state of disrepair. As the old station building is now a pub, a small cameo has been created by using this entrance as a queue for the ‘Rockageddon Festival’ taking place in the pub. With bouncers on the door, the queue is full of ‘characters’ awaiting the night’s musical festivities!
In order to show this off the walkway has been modelled as having lost its roof, but with the roof supports still in place. On the real building these were, as the rest of the structure, of cast concrete. The challenge here being how to create over a dozen identical complex sets of rafters. Answer – our first foray into laser printing. Having drawing out a large scale and full size drawing of what was wanted, with key dimensions, it was over to my daughter to put to use the CAD skills gained through her Product Design degree - I knew it would be worthwhile in the end! CAD files were then sent off to Tim Horn on the Wednesday and the pieces, cut from 1.5mm MDF, arrived on Friday morning – now that’s what I call service!!
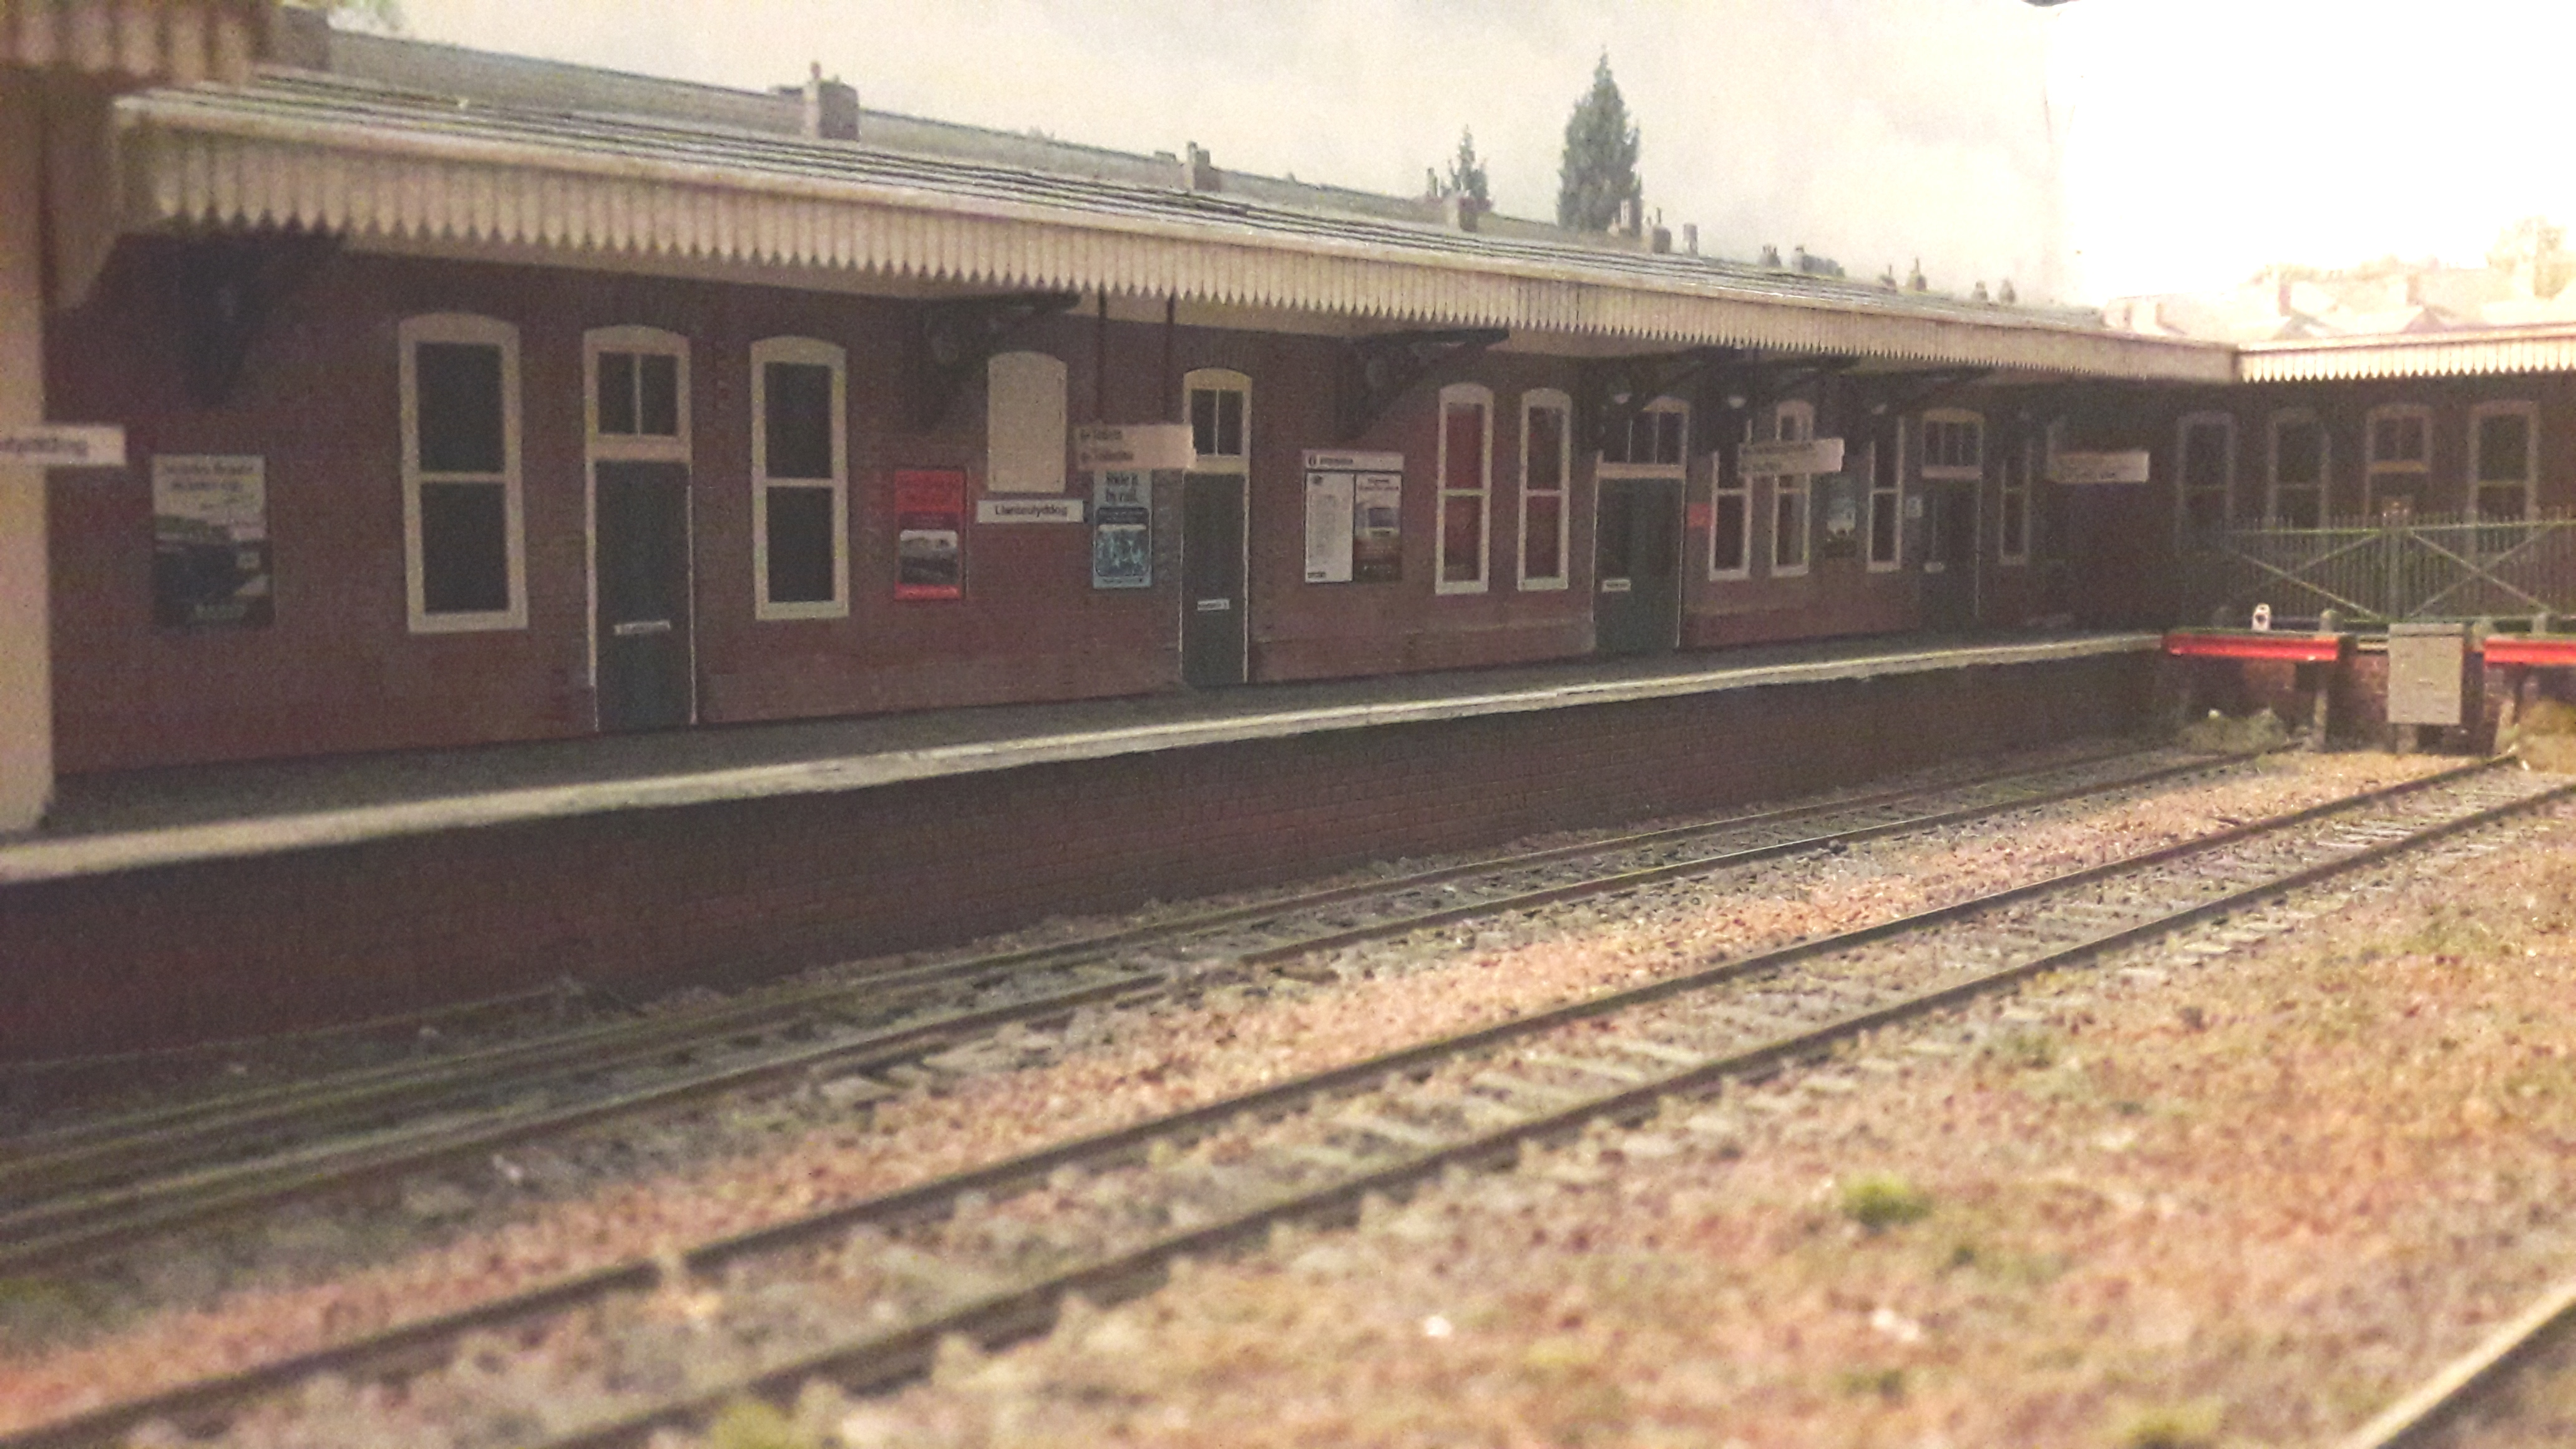
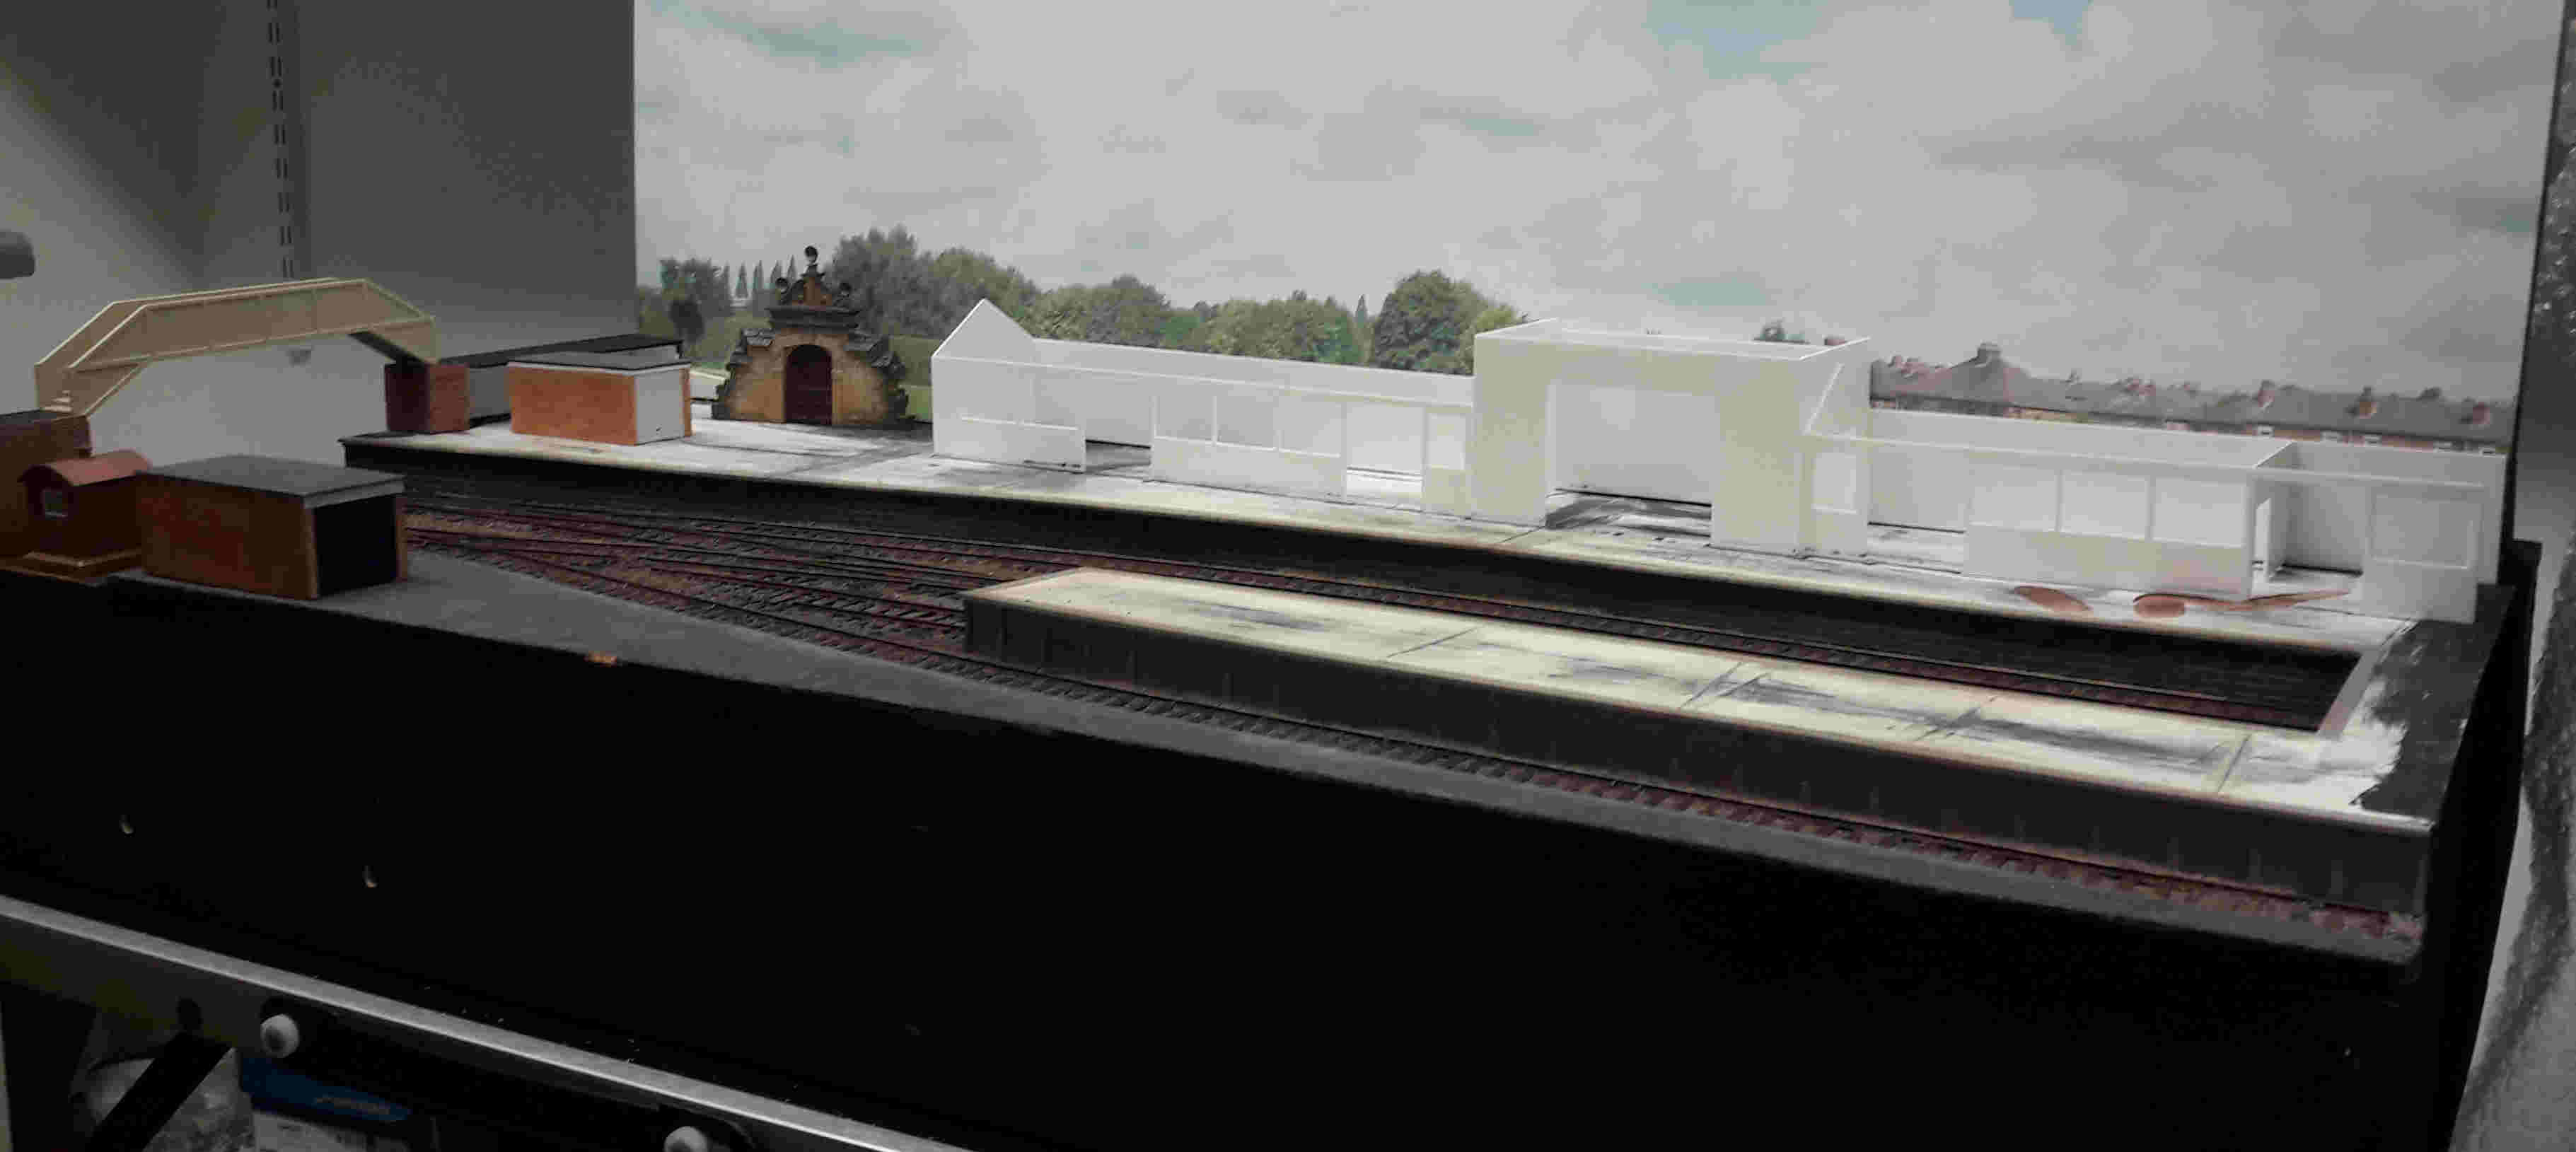
The station building for Llanteulyddog needed to be in low relief given the lack of space available and, ideally, needed to form an ‘L’ shape to create a scenic end to the board.
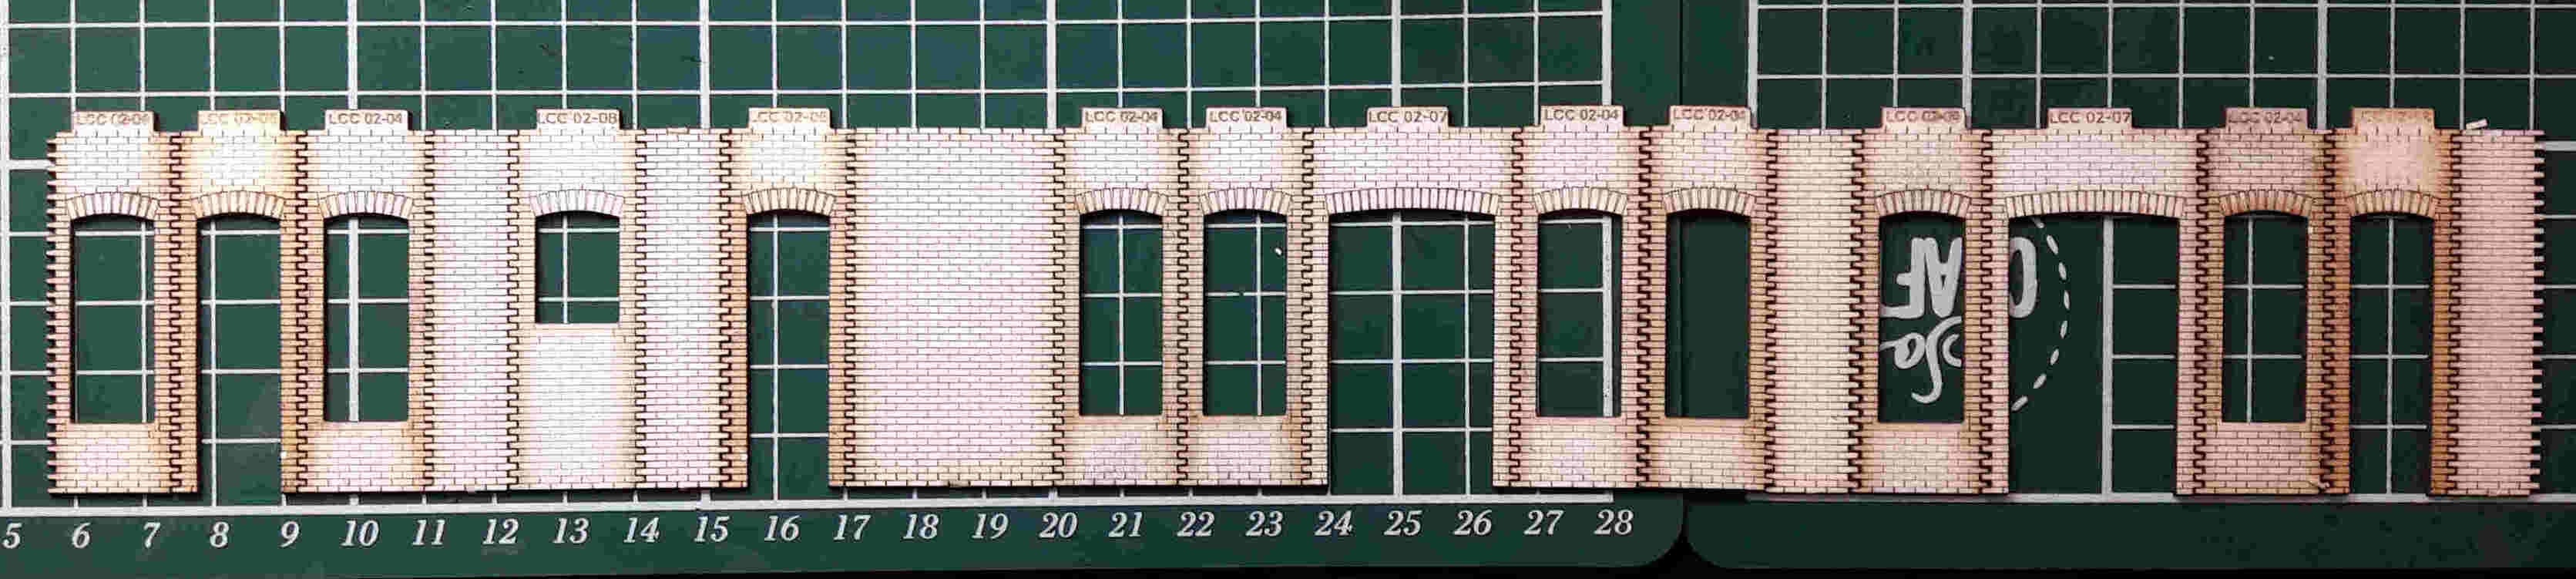
In searching for a suitable signal box, I came across laser cut micro ply kits by ‘L Cut Creative’. Looking at their method of production, with individual wall panels for doors, windows, walls etc. I saw an opporunity to take a ‘building bundle’ kit of parts and use them to create a station building ‘Taylor-made’ to fit the space available and that met the other criteria for the build. The ‘early 20th century small station’ was chosen as the donor kit, good value at £12.99, supplemented with two station canopy kits (no connection other than as a satisfied customer).
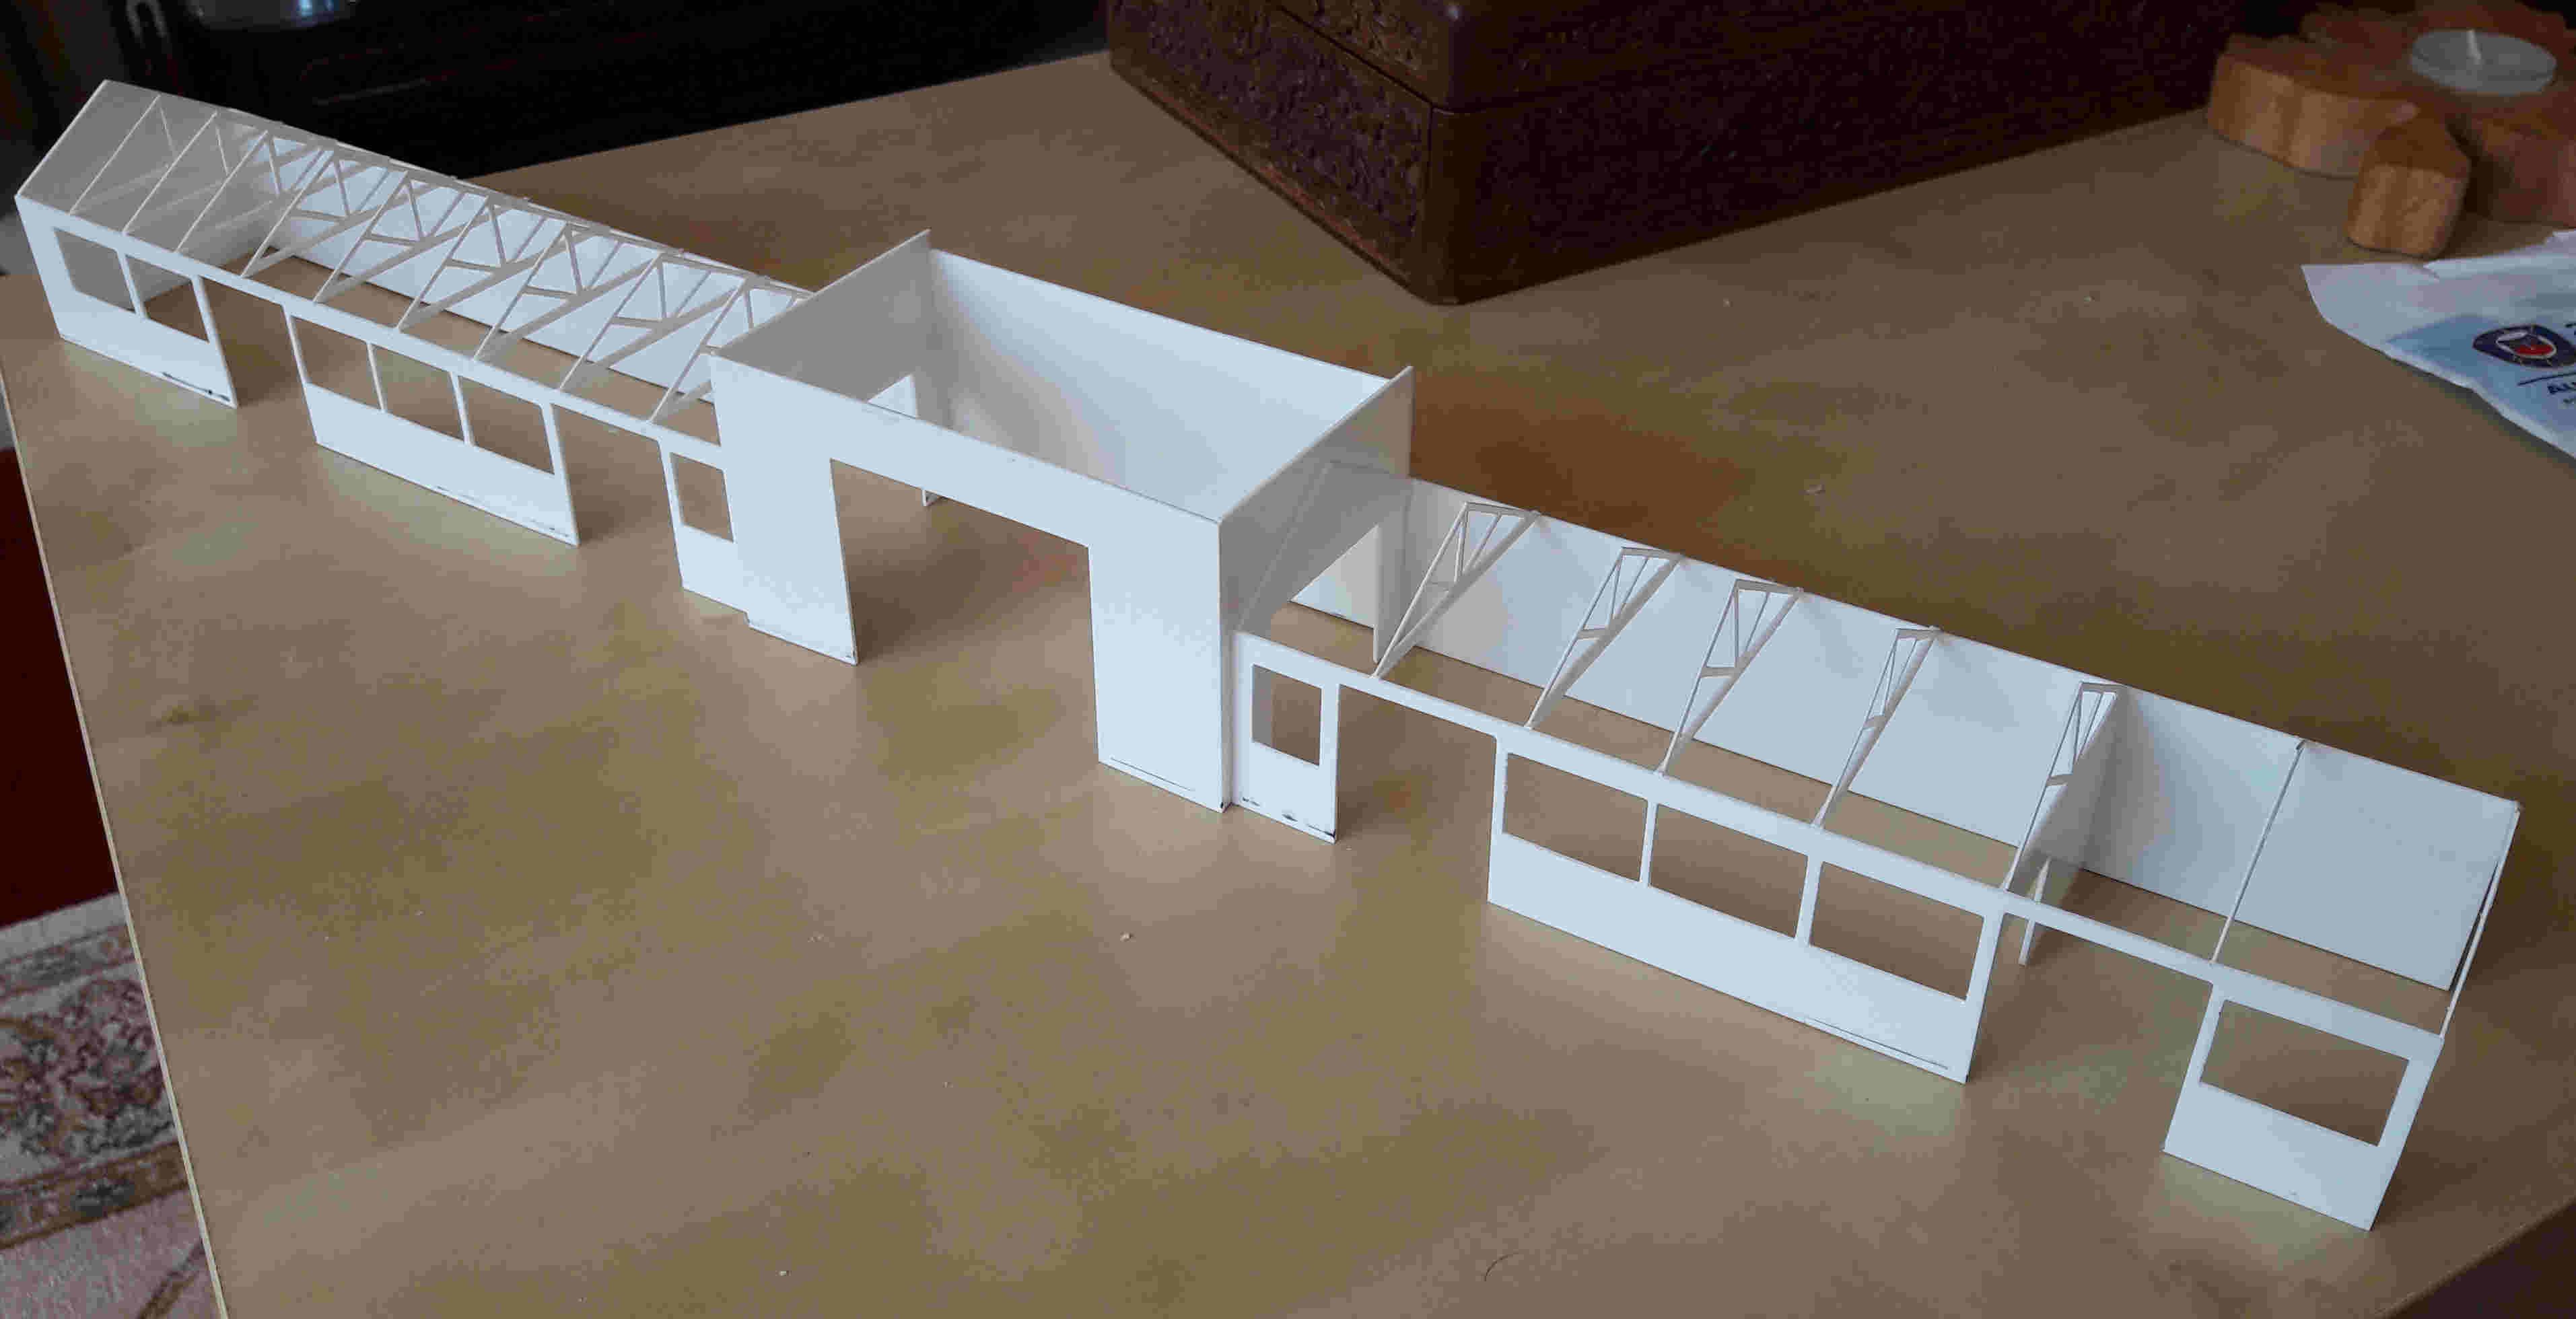
When the kit arrived its potenatial was obvious, although I did have a concern about the mortar course as this was very finely etched. Panels were cut out and arrangements tried before the final design was found, as shown below:
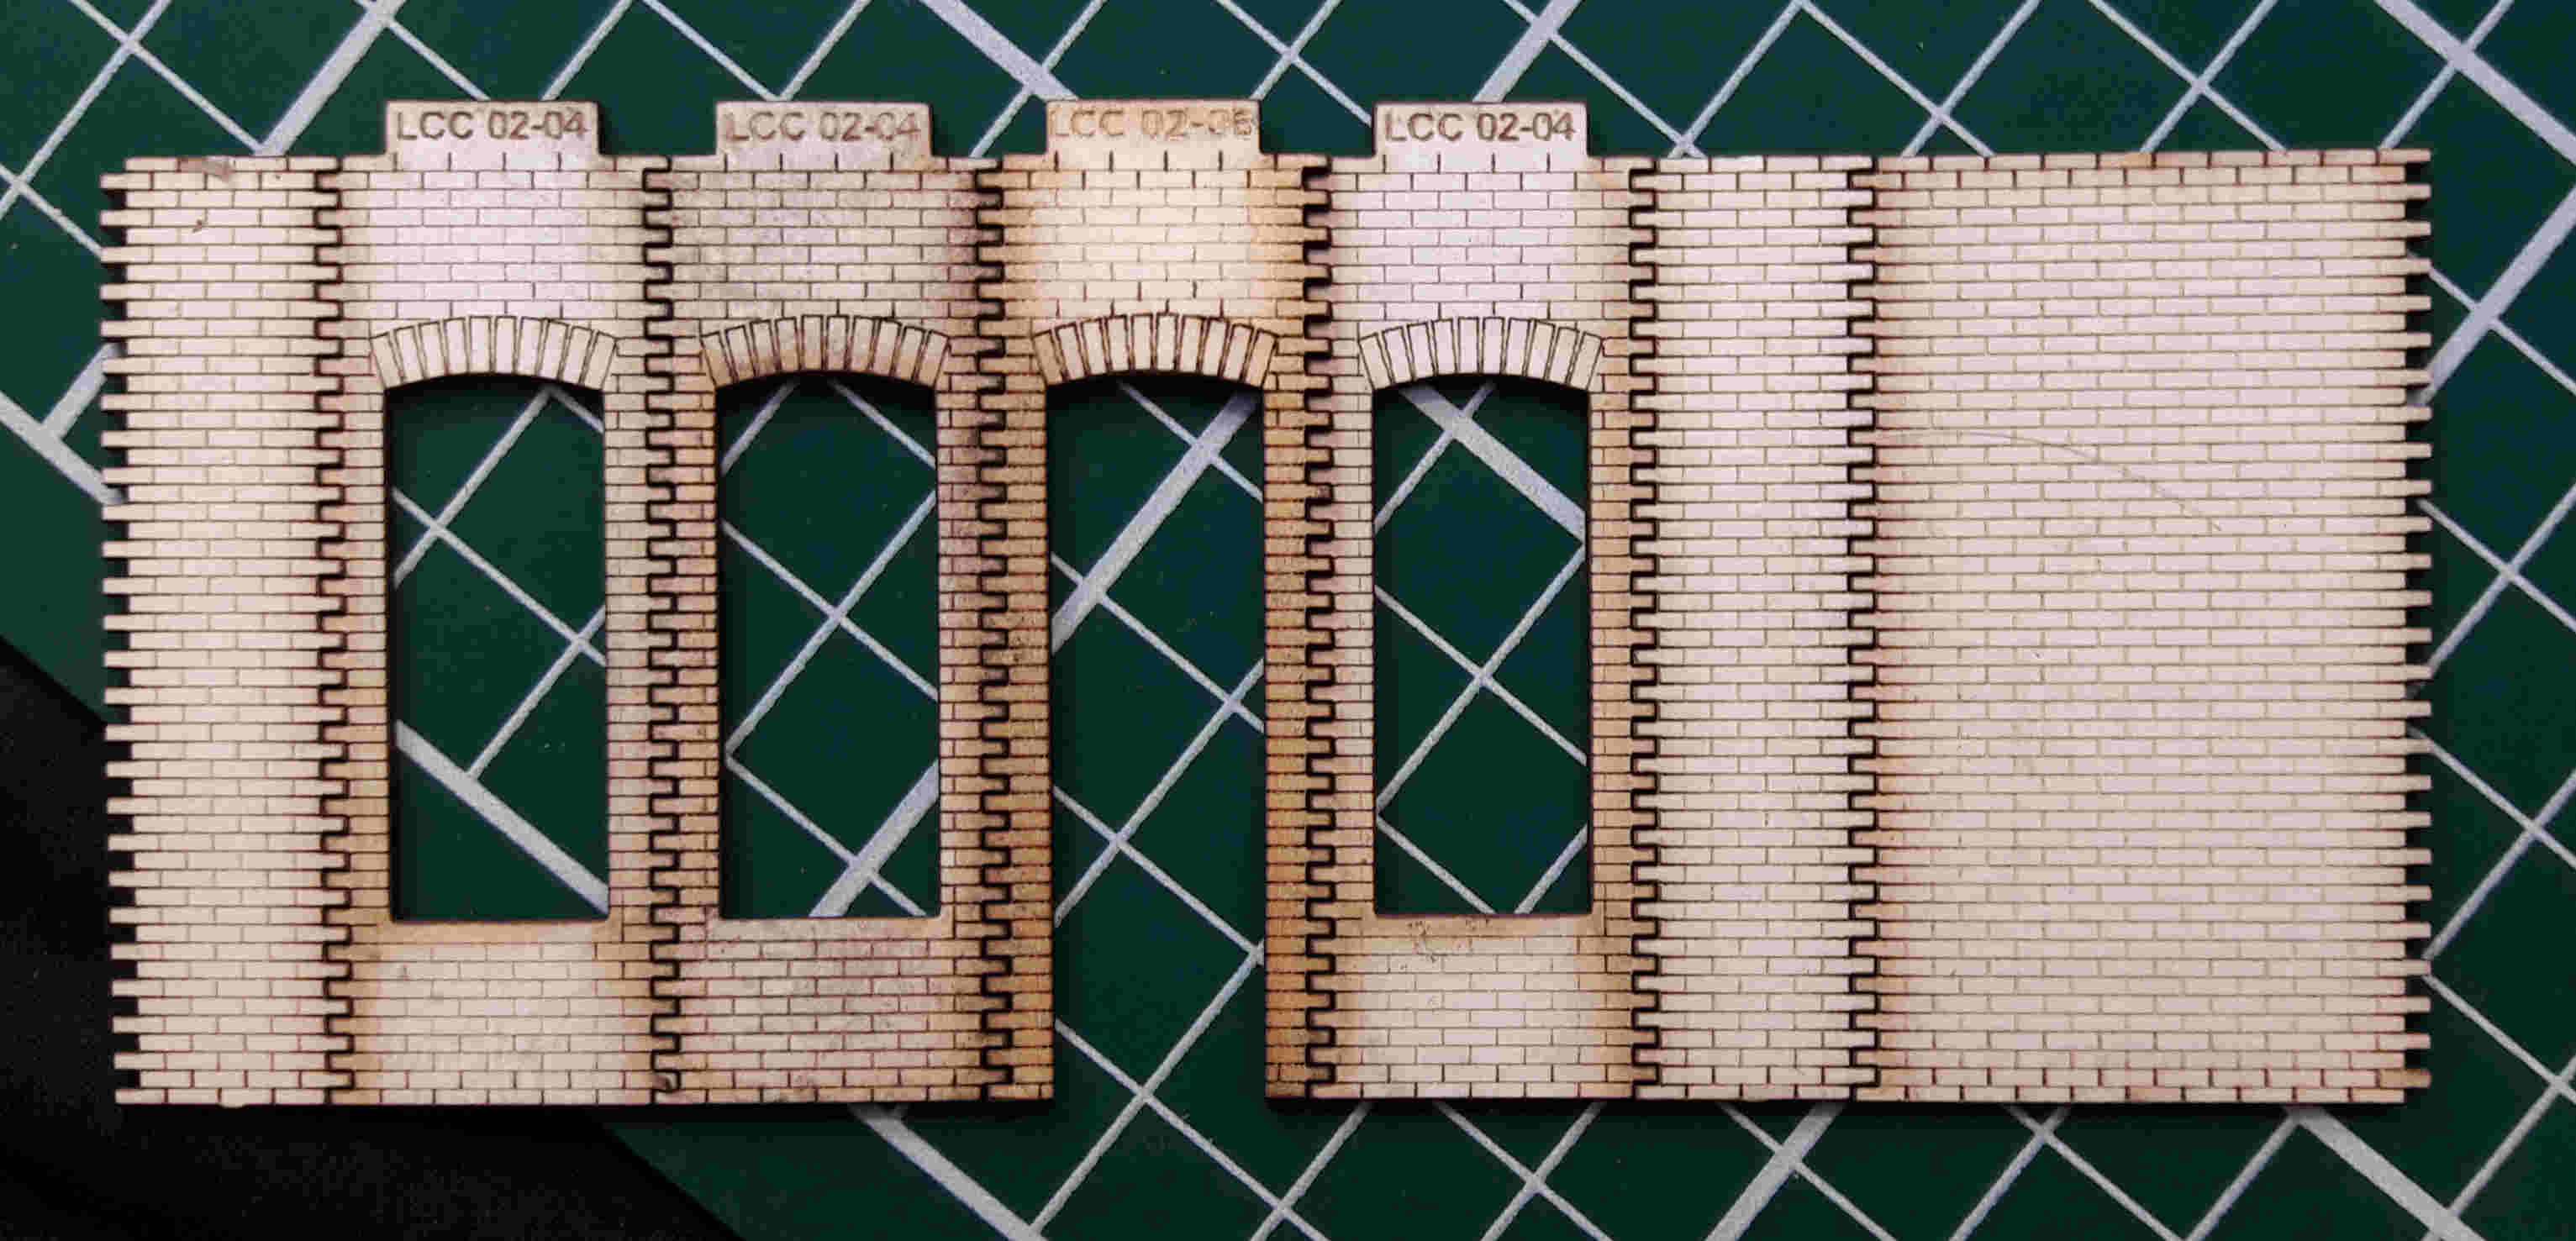
Construction was very straight forward using Deluxe Products’ Superphatic glue. All walls were put together, with each section flat before they were joined. End sections were cut down from the kit parts to give a small amount of depth. These were then sprayed with Halfords red primer to give a base brick colour, over which a quite thick coat of fawn acrylic paint (by Inscribe) was painted all over the brickwork before being gently removed using damp kitchen towel, always working in small sections with a downwards motion to reflect natural weathering. Doors and windows were given a coat of white Halfords primer and then doors were picked out in a dreary BR blue colour as evidenced in pictures of both Camarthen and Haverfordwest stations in the era being modelled (circa 1990). These were glazed, clear styrene fixed with ‘Glue ‘n’ Glaze’, before being glued in place.
Meanwhile the canopy kits were adjusted to fit and constructed as per the instructions, given a coat of white primer and then individual roof planks painted and weathered. This was fixed to the walls before the roof was measured and added. I wasn’t happy with the ‘flat’ profile of the etched tiles in the kit but these were used as a base and strips of cut tiles from recycled shiny/heavy junk mail paper added, which gives a necessary element of texture.
Signage and posters were added from the Scalescenes print at home range, which even allowed some to be created in Welsh for bilingual signage.
In searching for a suitable signal box, I came across laser cut micro ply kits by ‘L Cut Creative’. Their large signal box looked ideal for the space available.
The brick wall sections were put together, using Deluxe Materials Superphatic glue at the Minehead show and then tried out on the layout but, despite checking the kit's advertised dimensions, it was found to be too wide, fouling certain items of rolling stock on the mainline! The fix was to make the signal box slightly low relief by removing about 8mm from the rear of the building, basically anything past the lower access door:
This structure was then sprayed with Halfords red primer to give a base brick colour, over which a quite thick coat of fawn acrylic paint (by Inscribe) was painted all over the brickwork before being gently removed using damp kitchen towel, always working in small sections with a downwards motion to reflect natural weathering. These were glazed, clear styrene fixed with ‘Glue ‘n’ Glaze’, before being glued in place.
The stairs and balcony were constructed to represent the box at Haverfordwest, rather than as the kit intended. A removable roof was then constructed using the parts from the kit as a former. Over this were laid strips of tiles from shiny/thick junk mail. The front roof was made using individually cut tiles, whilst the rear roof is strips of cut tiles. the latter was certainly quicker but the individual tiles do give a bespoke finish - even though the public at the Weston super Mare show did think I was mad cutting and sticking each individual tile!
An iterior was constructed from L Cut bits and added. Lighting will be included once some suitable LEDs can be obtained.
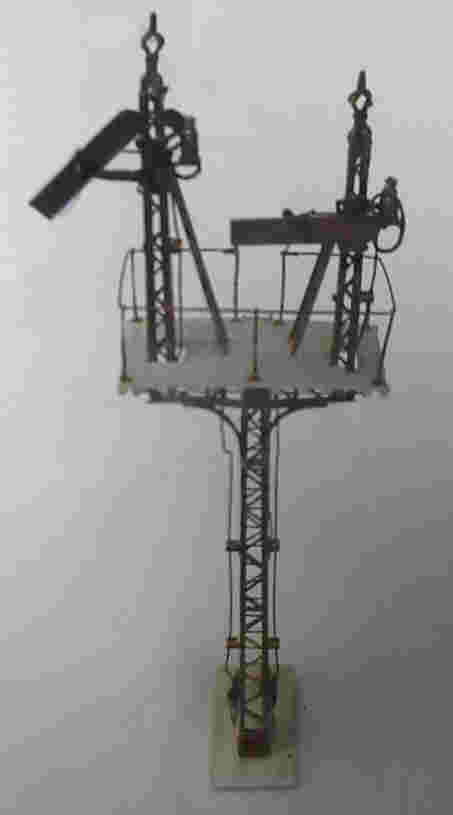
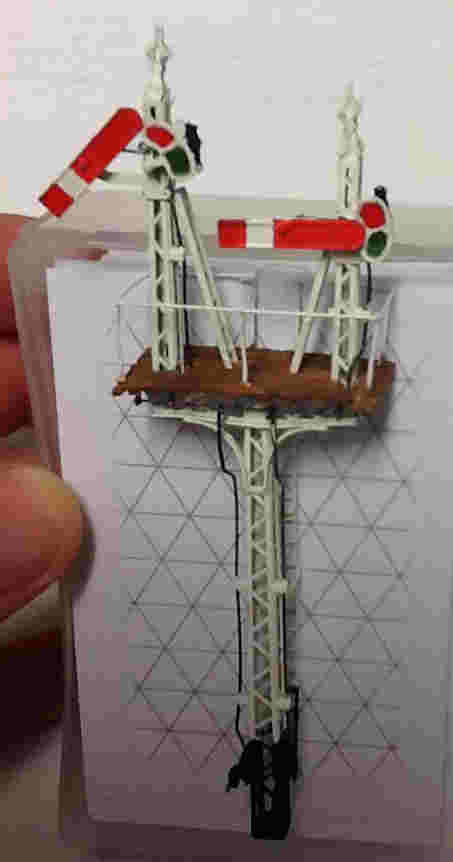
Friends and fellow modellers of ours from Wiltshire are building a model of Savenake station. The signal for the junction at the station throat is however something different and not often seen on Britain's railways, it is a somersault junction signal. Unlike a typical signal where the arm pivots at one end, on a somersault signal it does so in the middle.....this will all become clear if you look at the attached pictures.
They managed to source a brass kit of the signal from of all places.....Australia!!! Customization was asked to build the signal. The kit itself was in our opinion very well laid out with the instructions covering all the major construction areas and some very useful build tips. The key was to ensure all the holes were drilled out so that parts and critically the wire runs could pass through. As a brass kit the construction was by soldering.
The signal for the main is somersaulted, so to speak!!!
Here are pictures of the completed signal awaiting the paint shop and the final version ready for the layout.
Look out for the completed layout when it is on the exhibition circuit, initially we understand in the Wiltshire area.
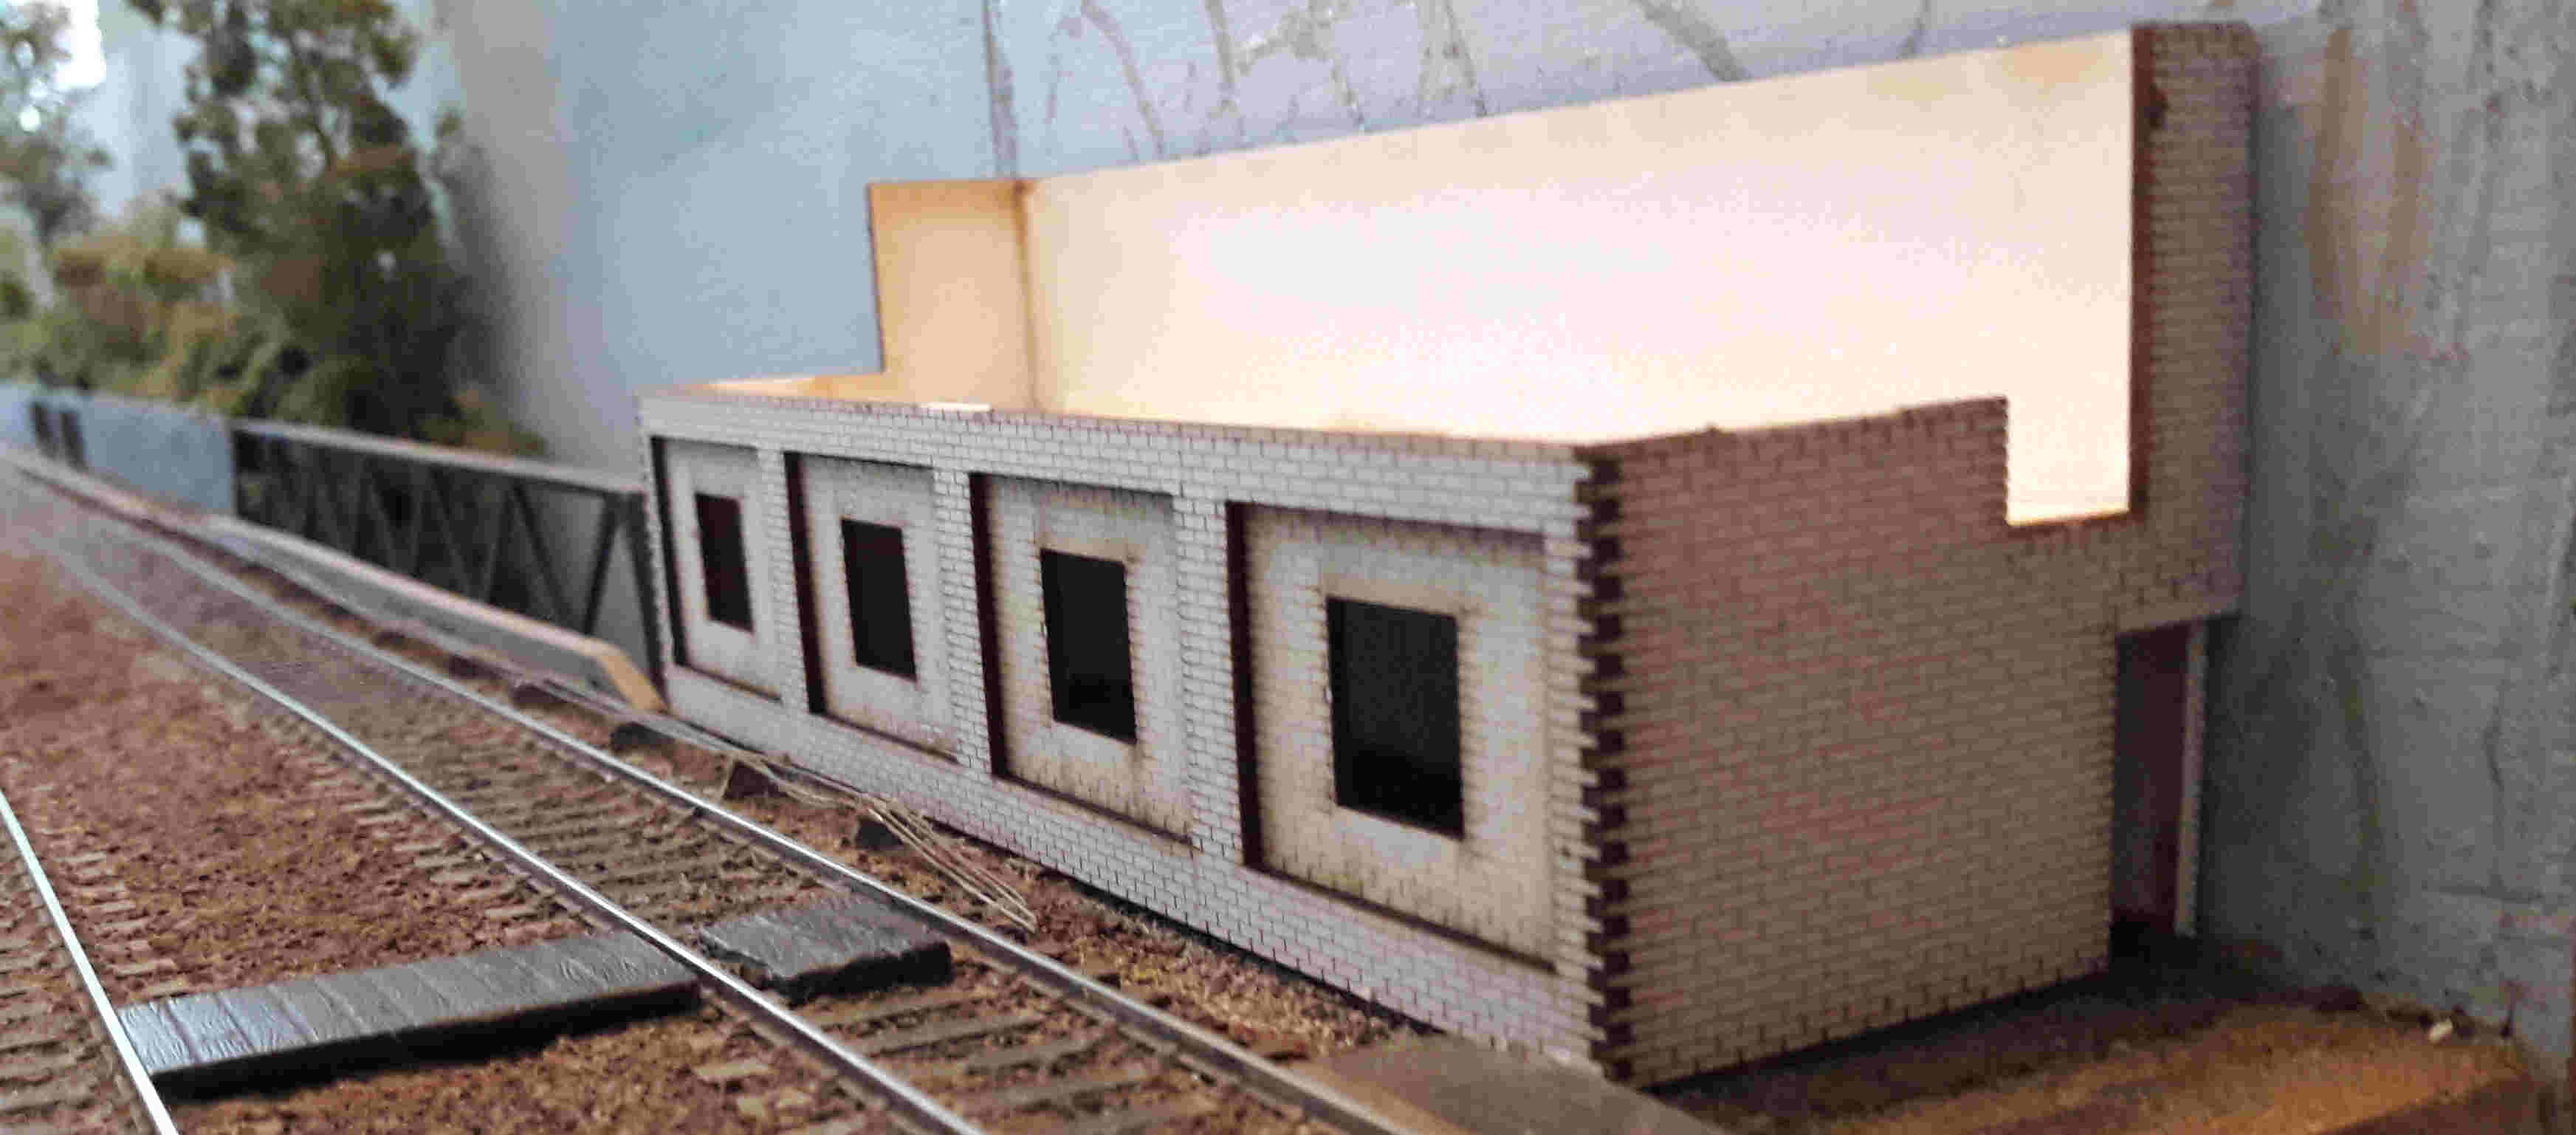
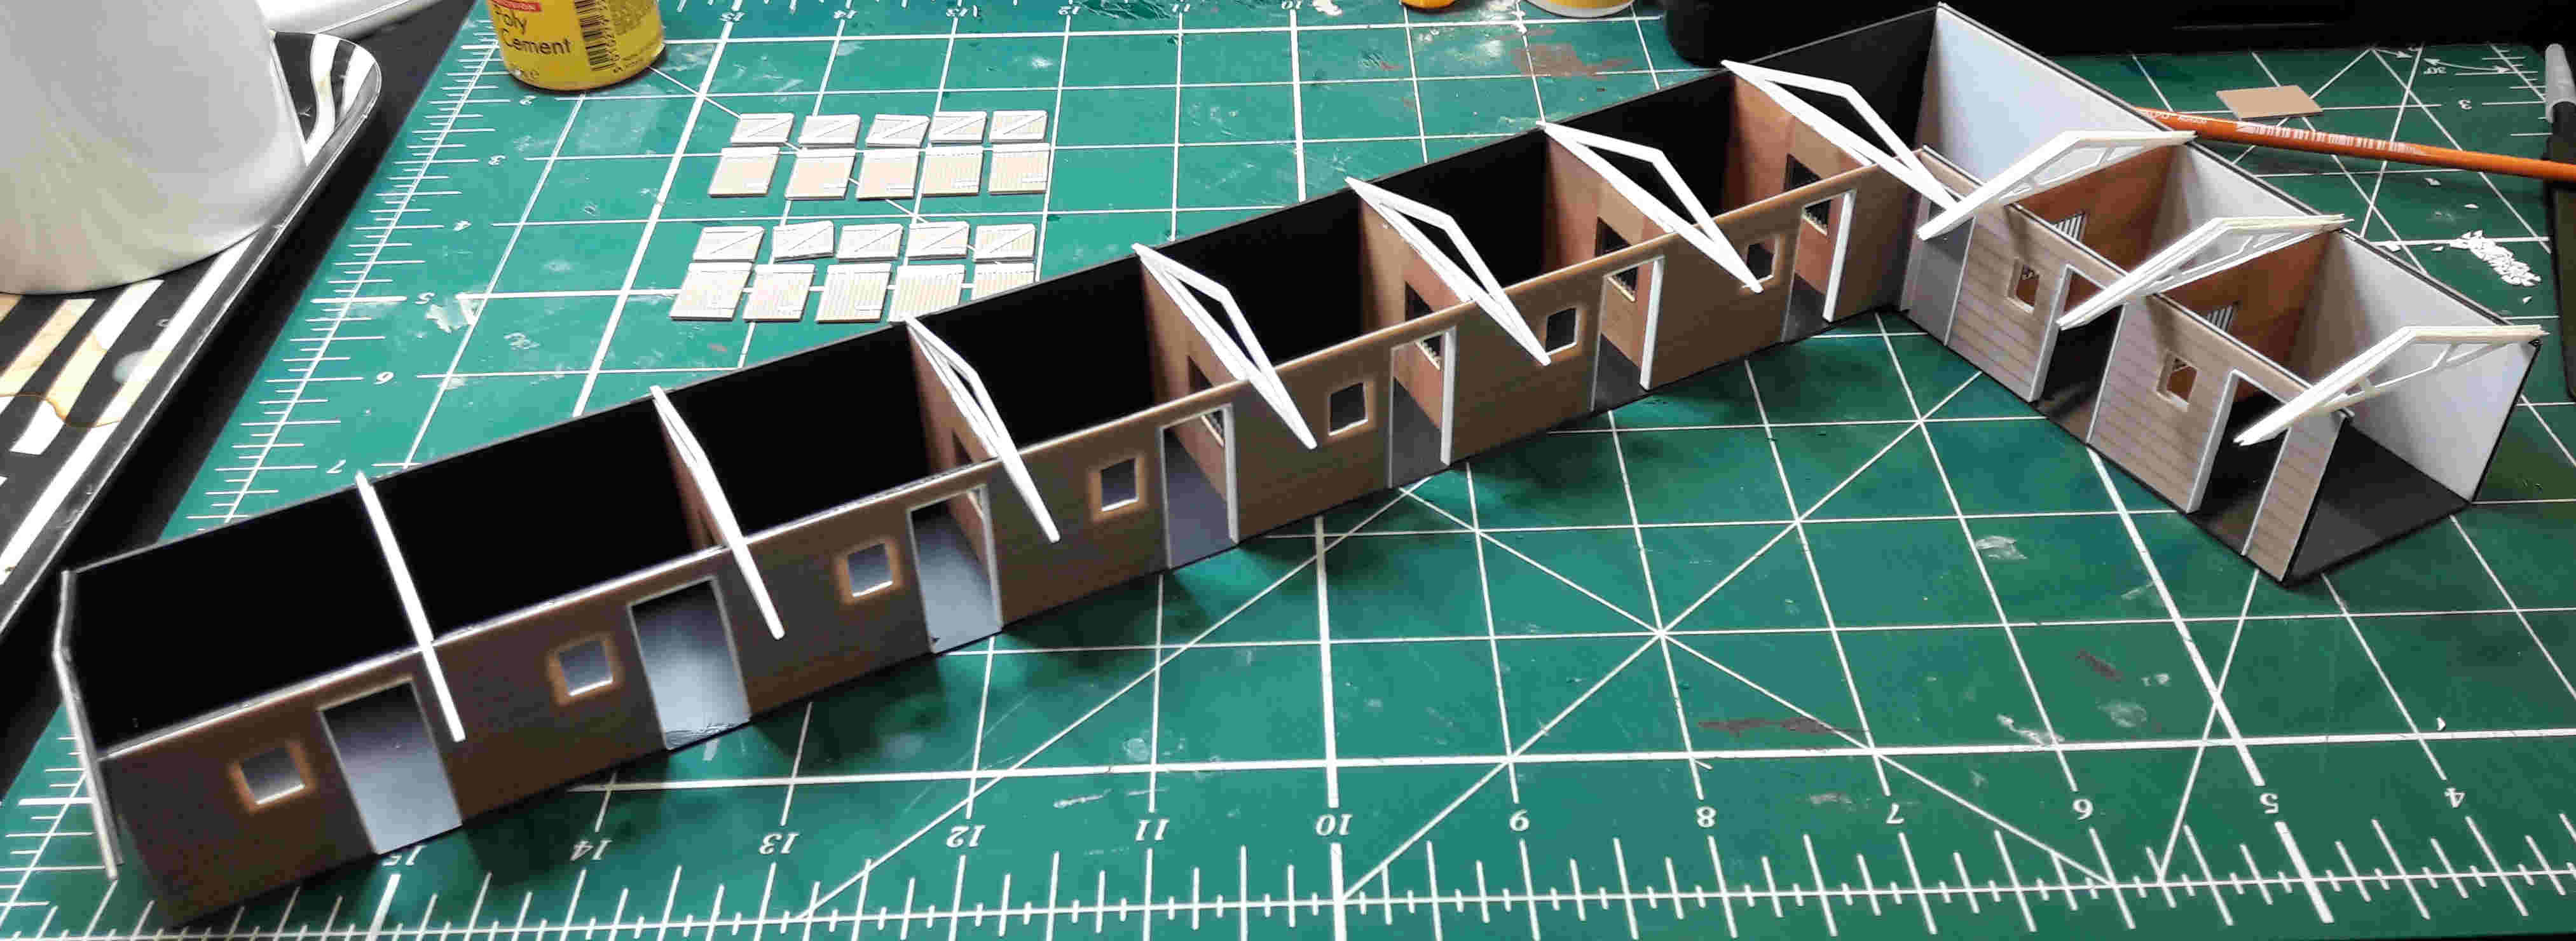
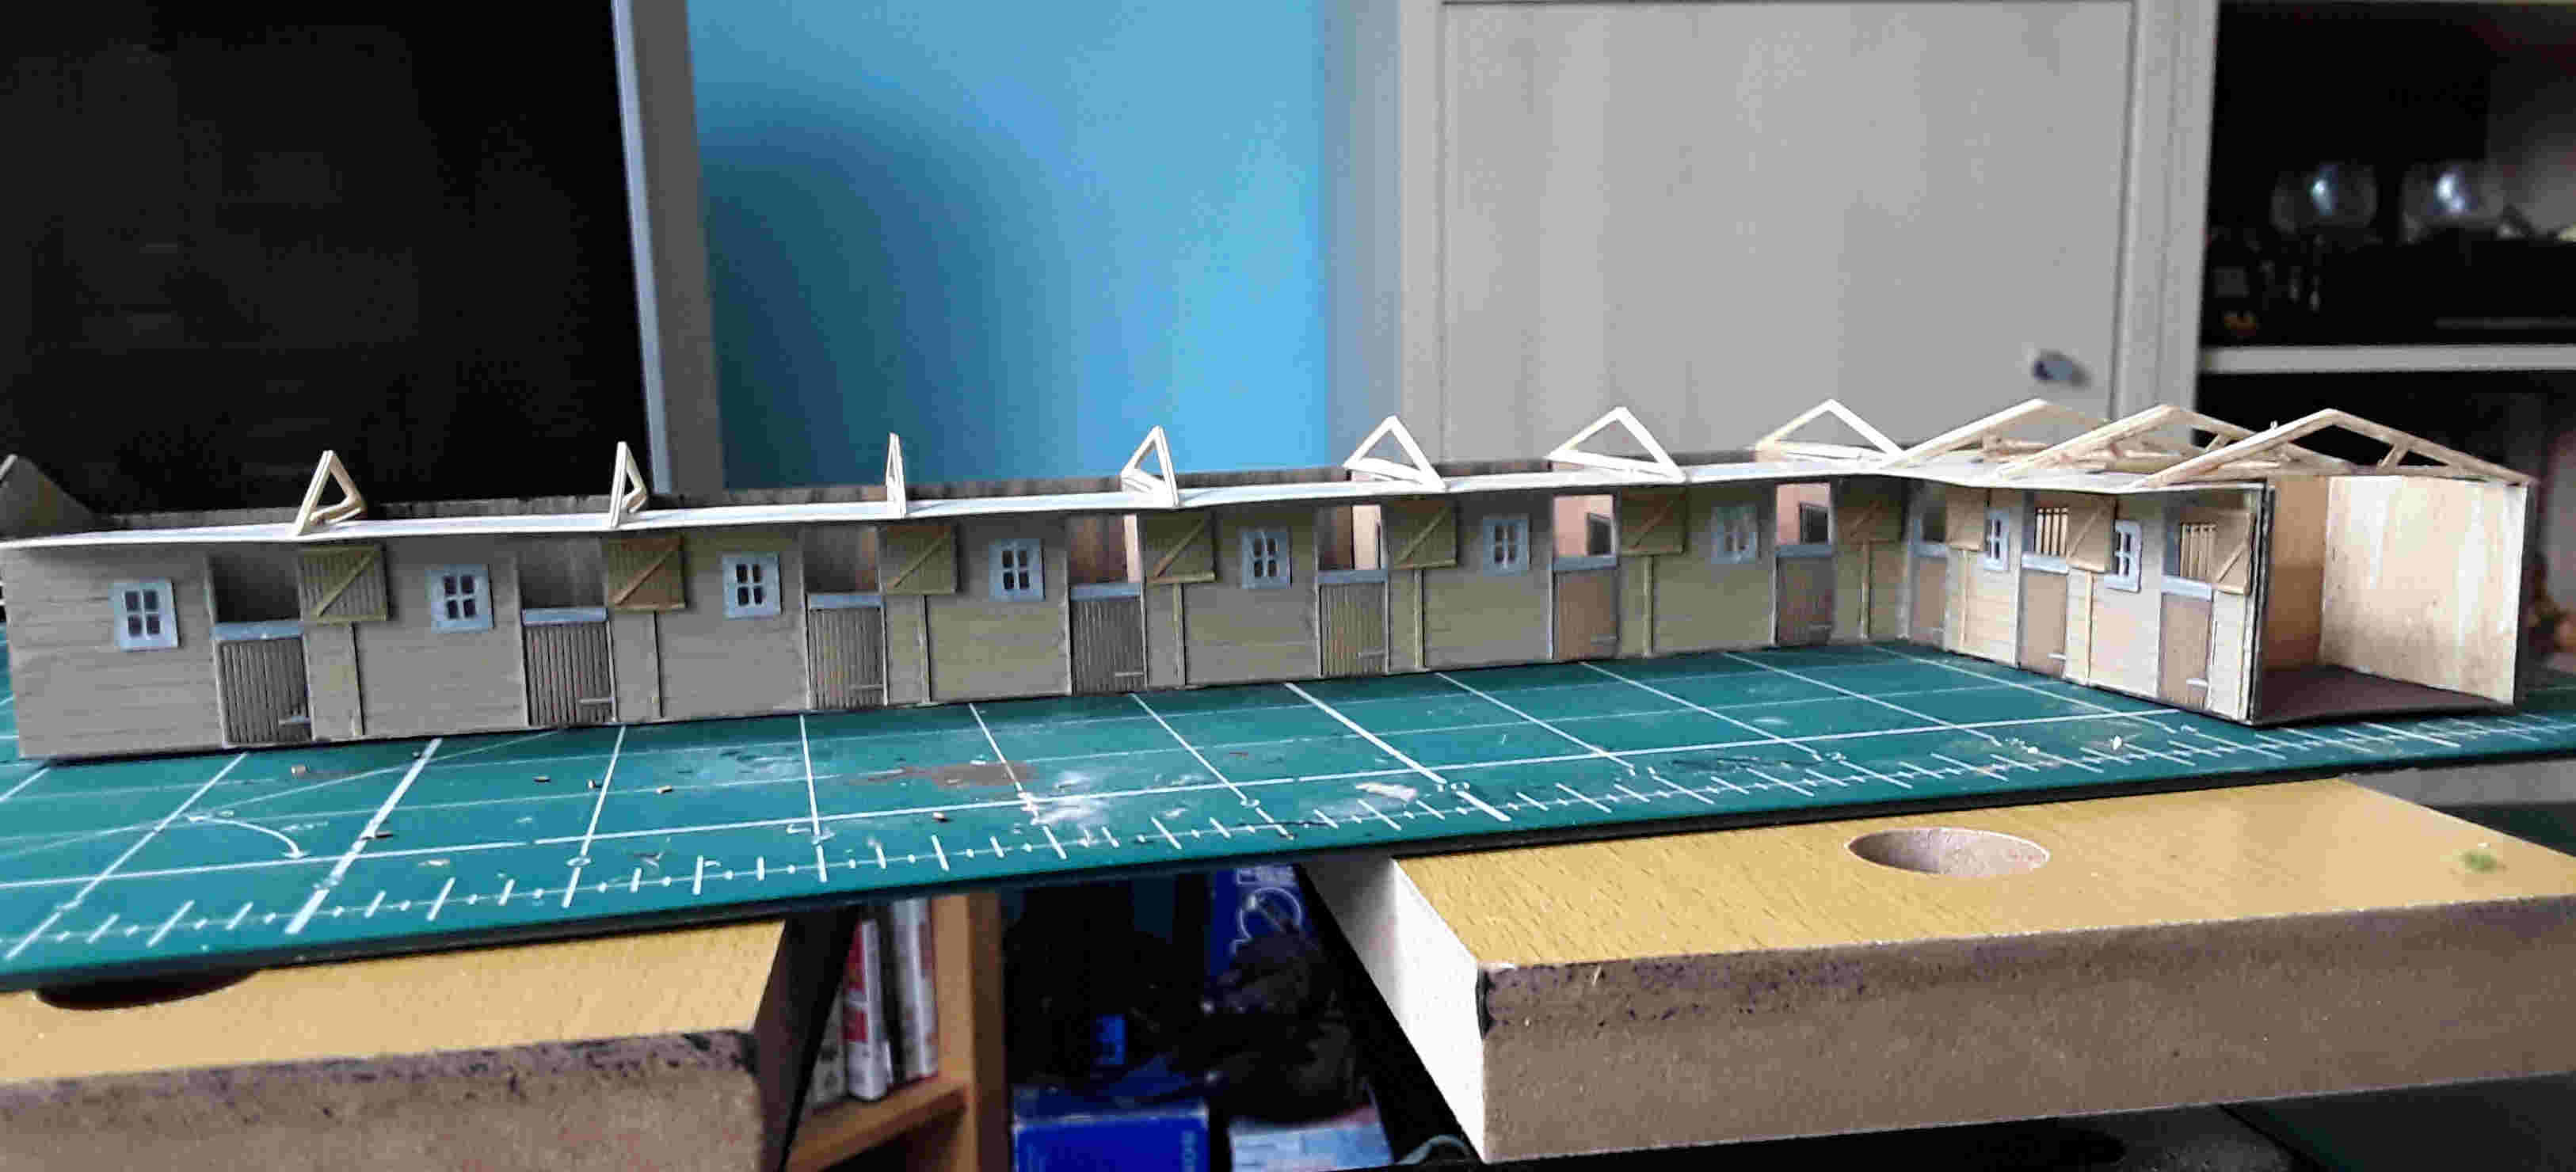
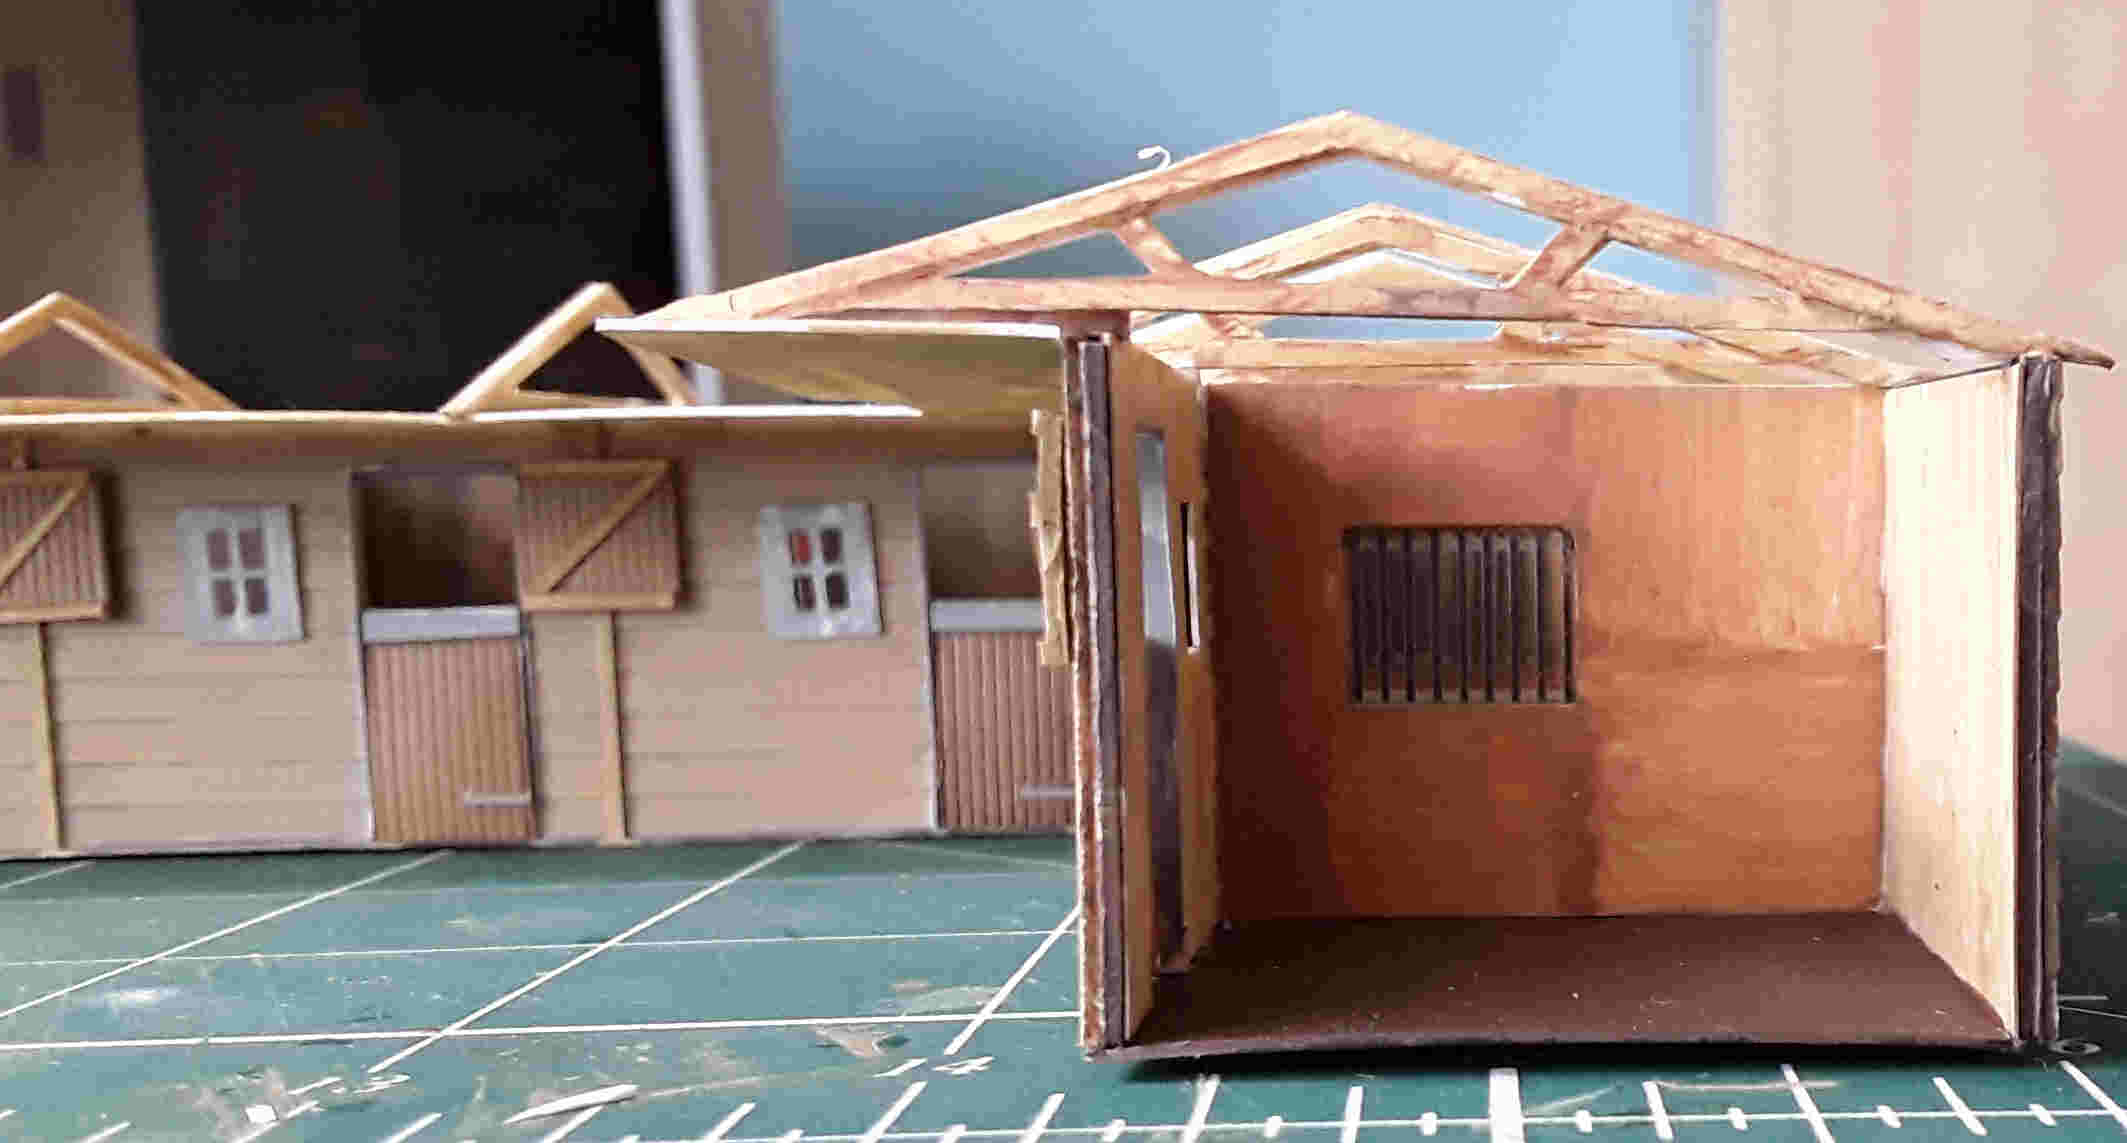
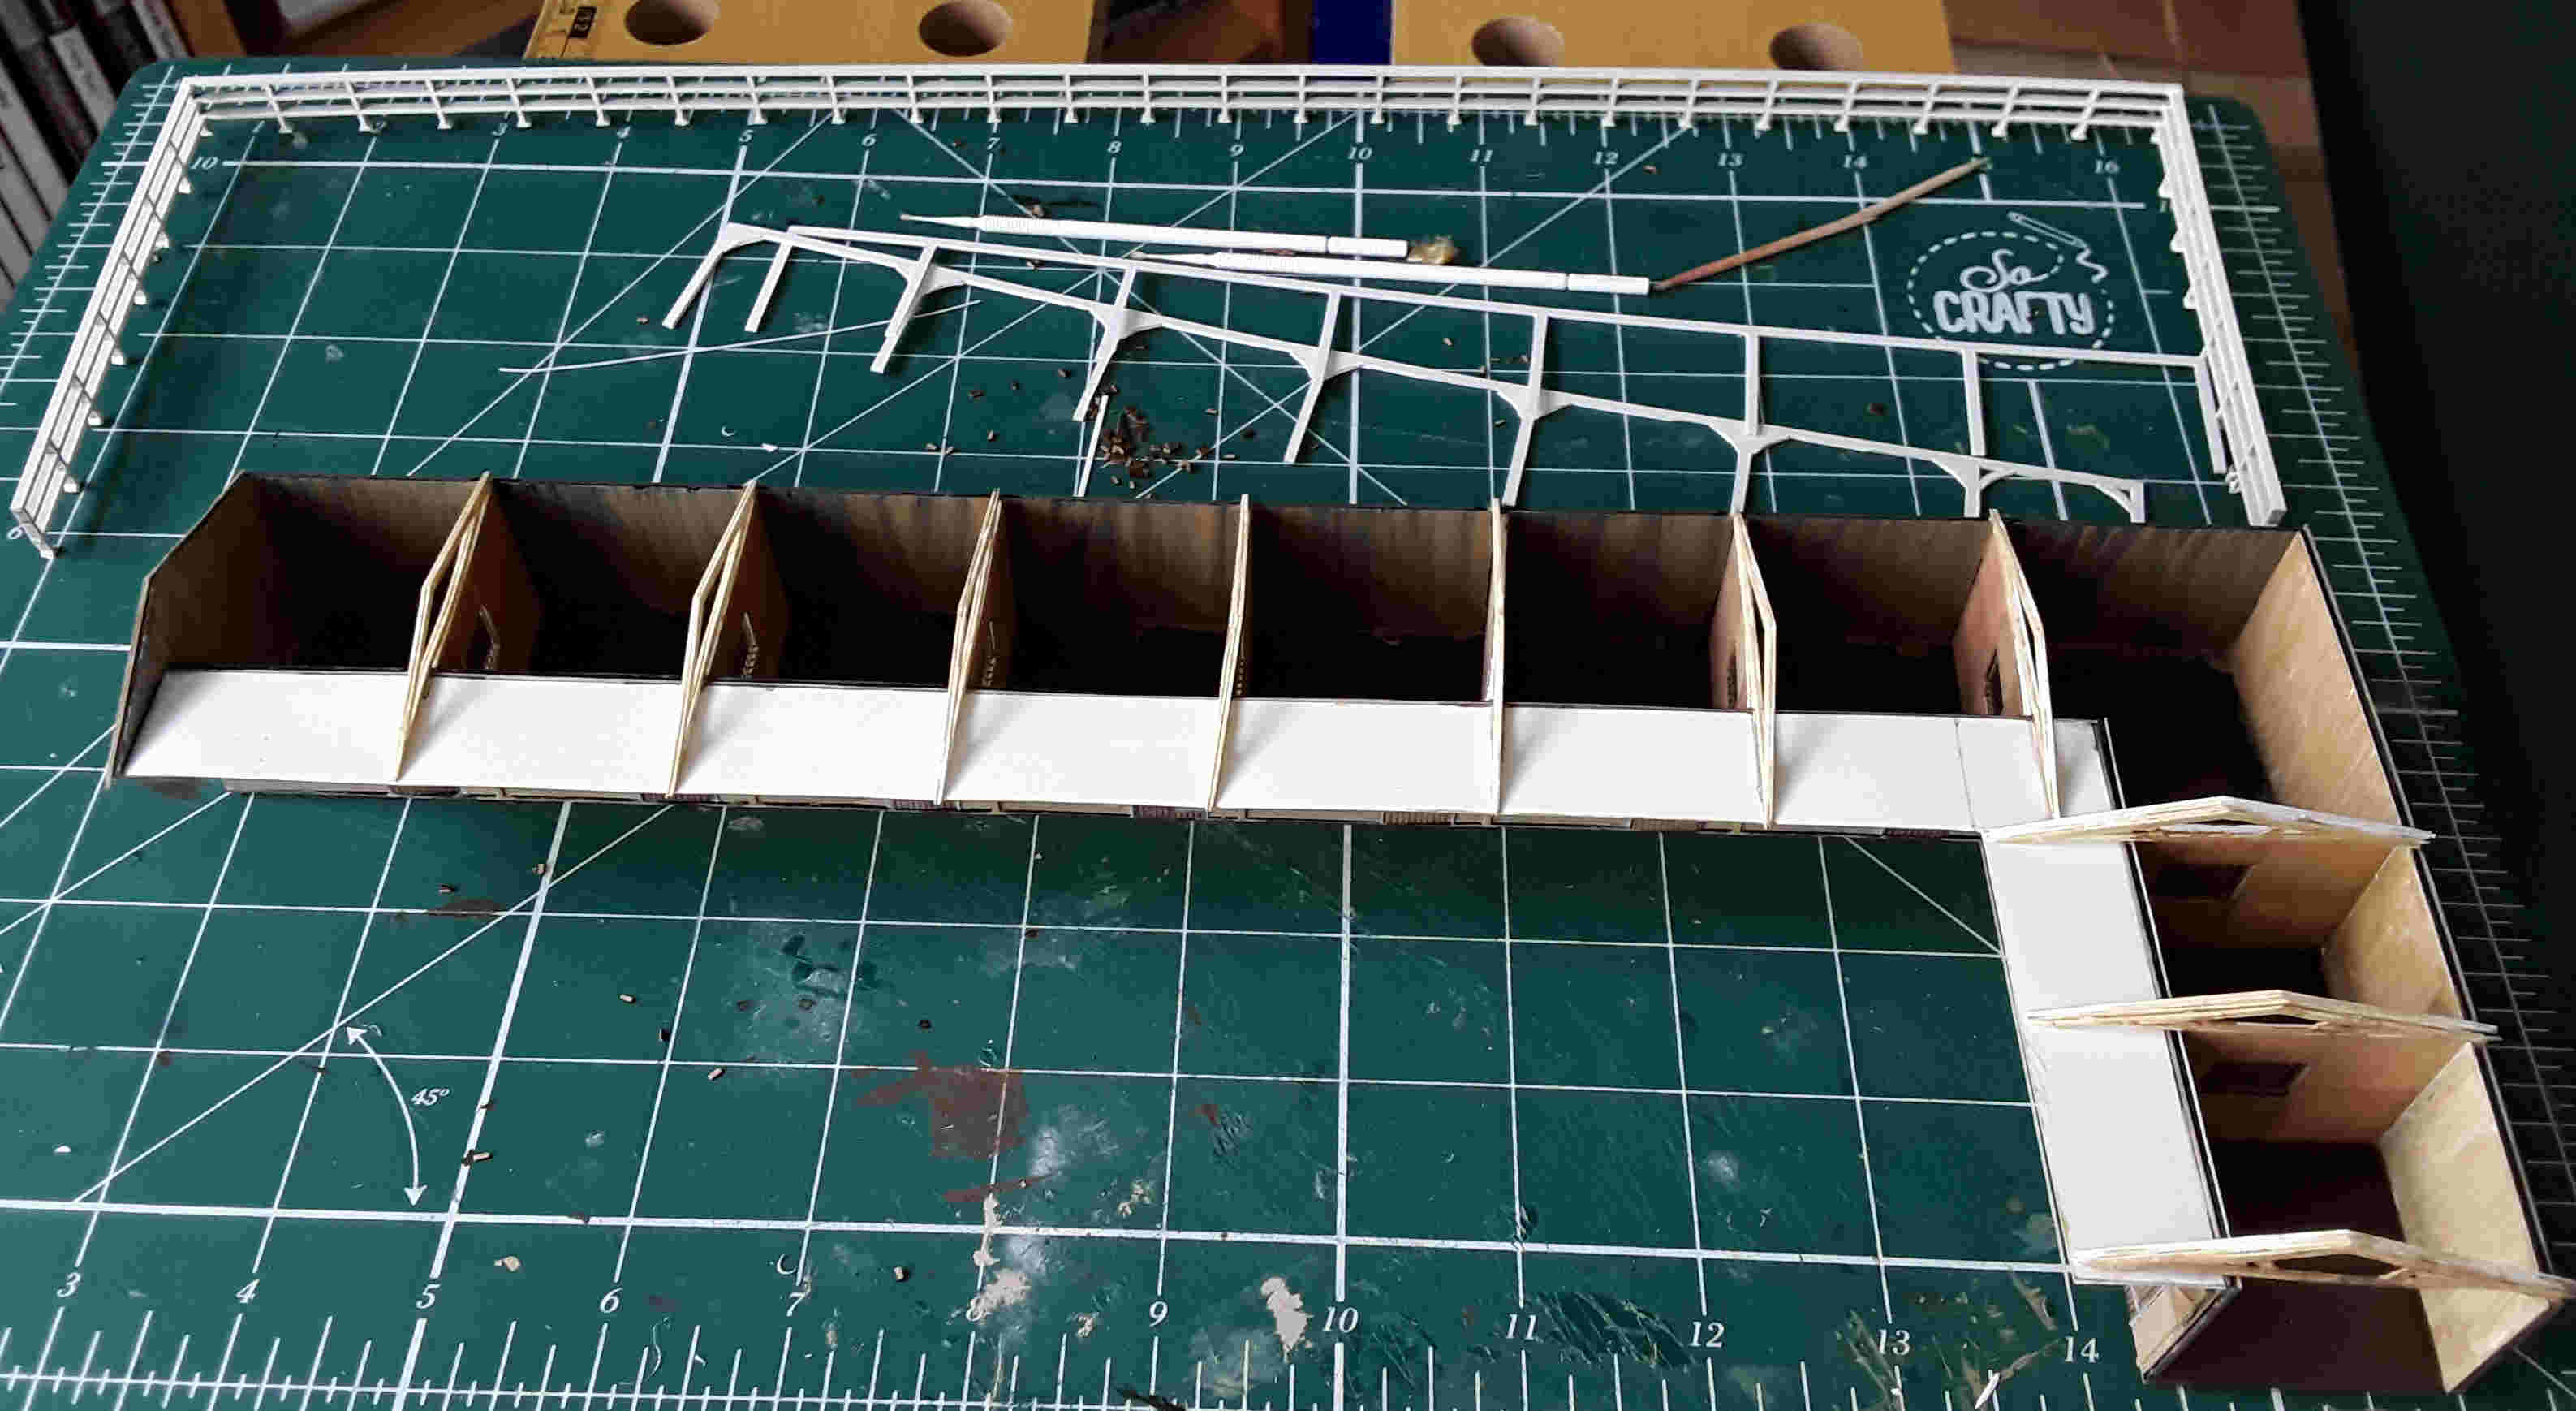
As is our normal tradition, we are looking to make the fiddle yards on Llanteulyddog fully scenic, with an elemnet of 'cut through buildings'. The first of the buildings, for what will be a six inch slice through the Welsh countryside, is the Llanteulyddog Equestrian Centre stable block.
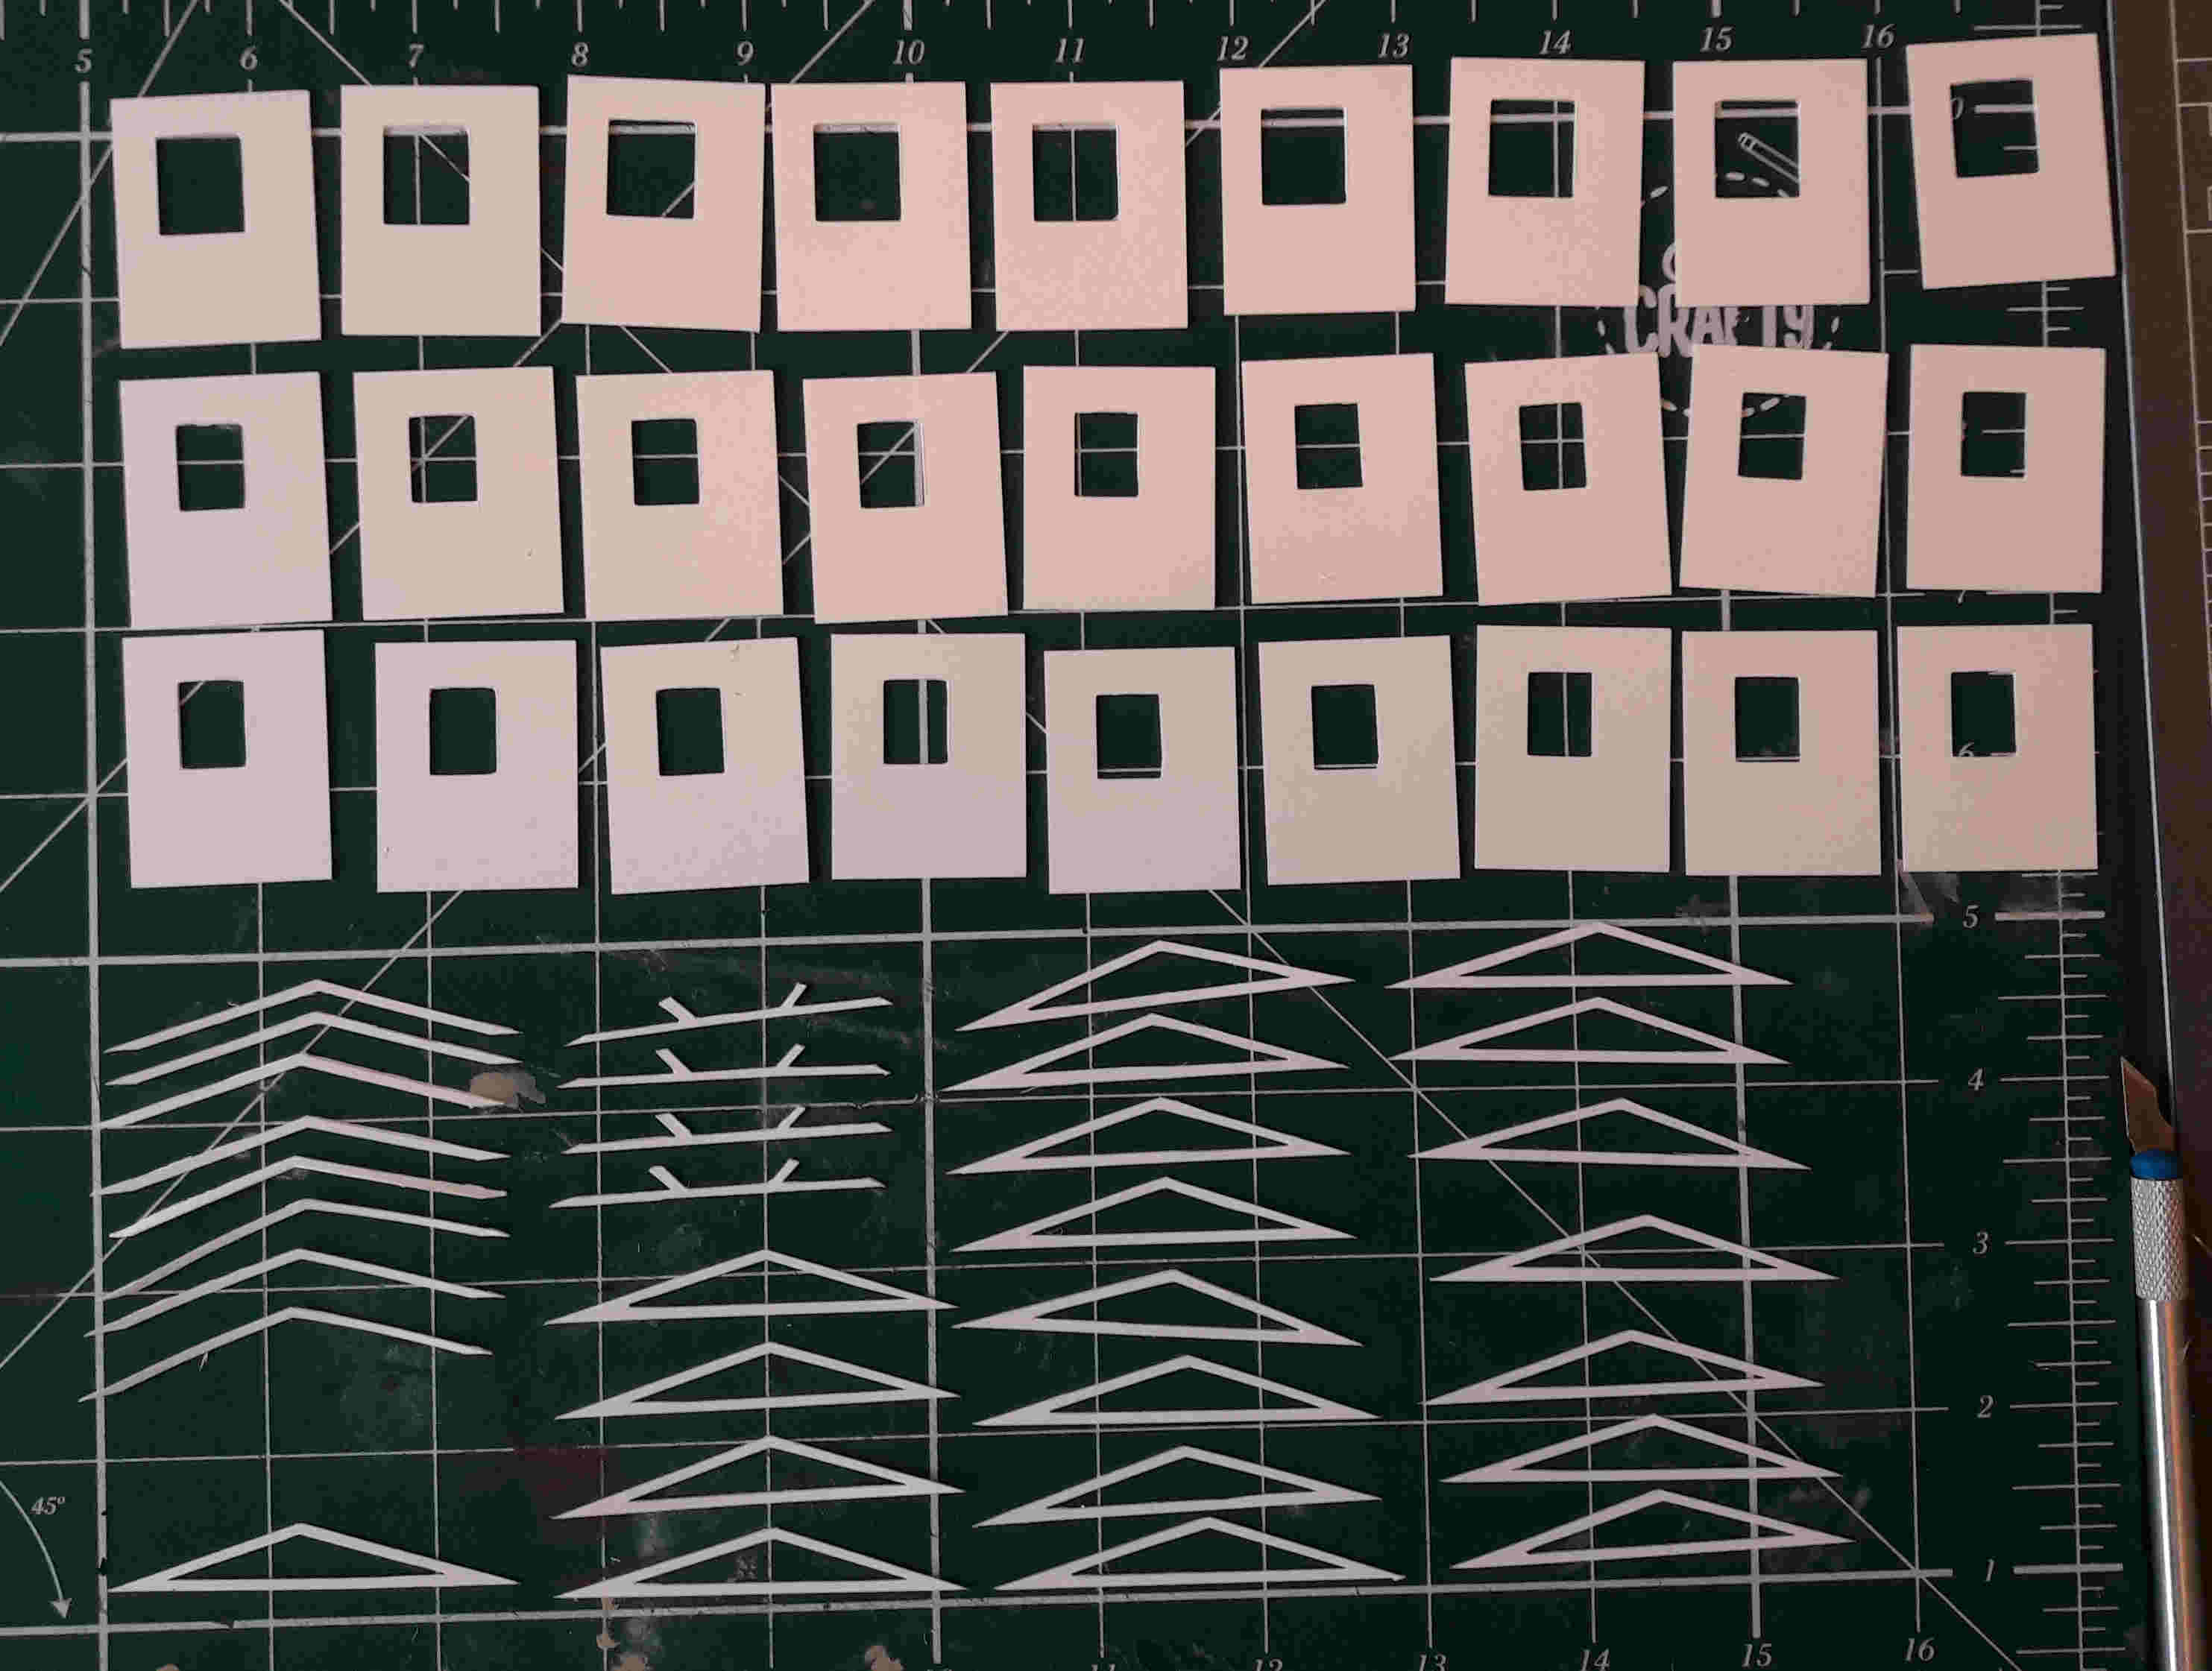
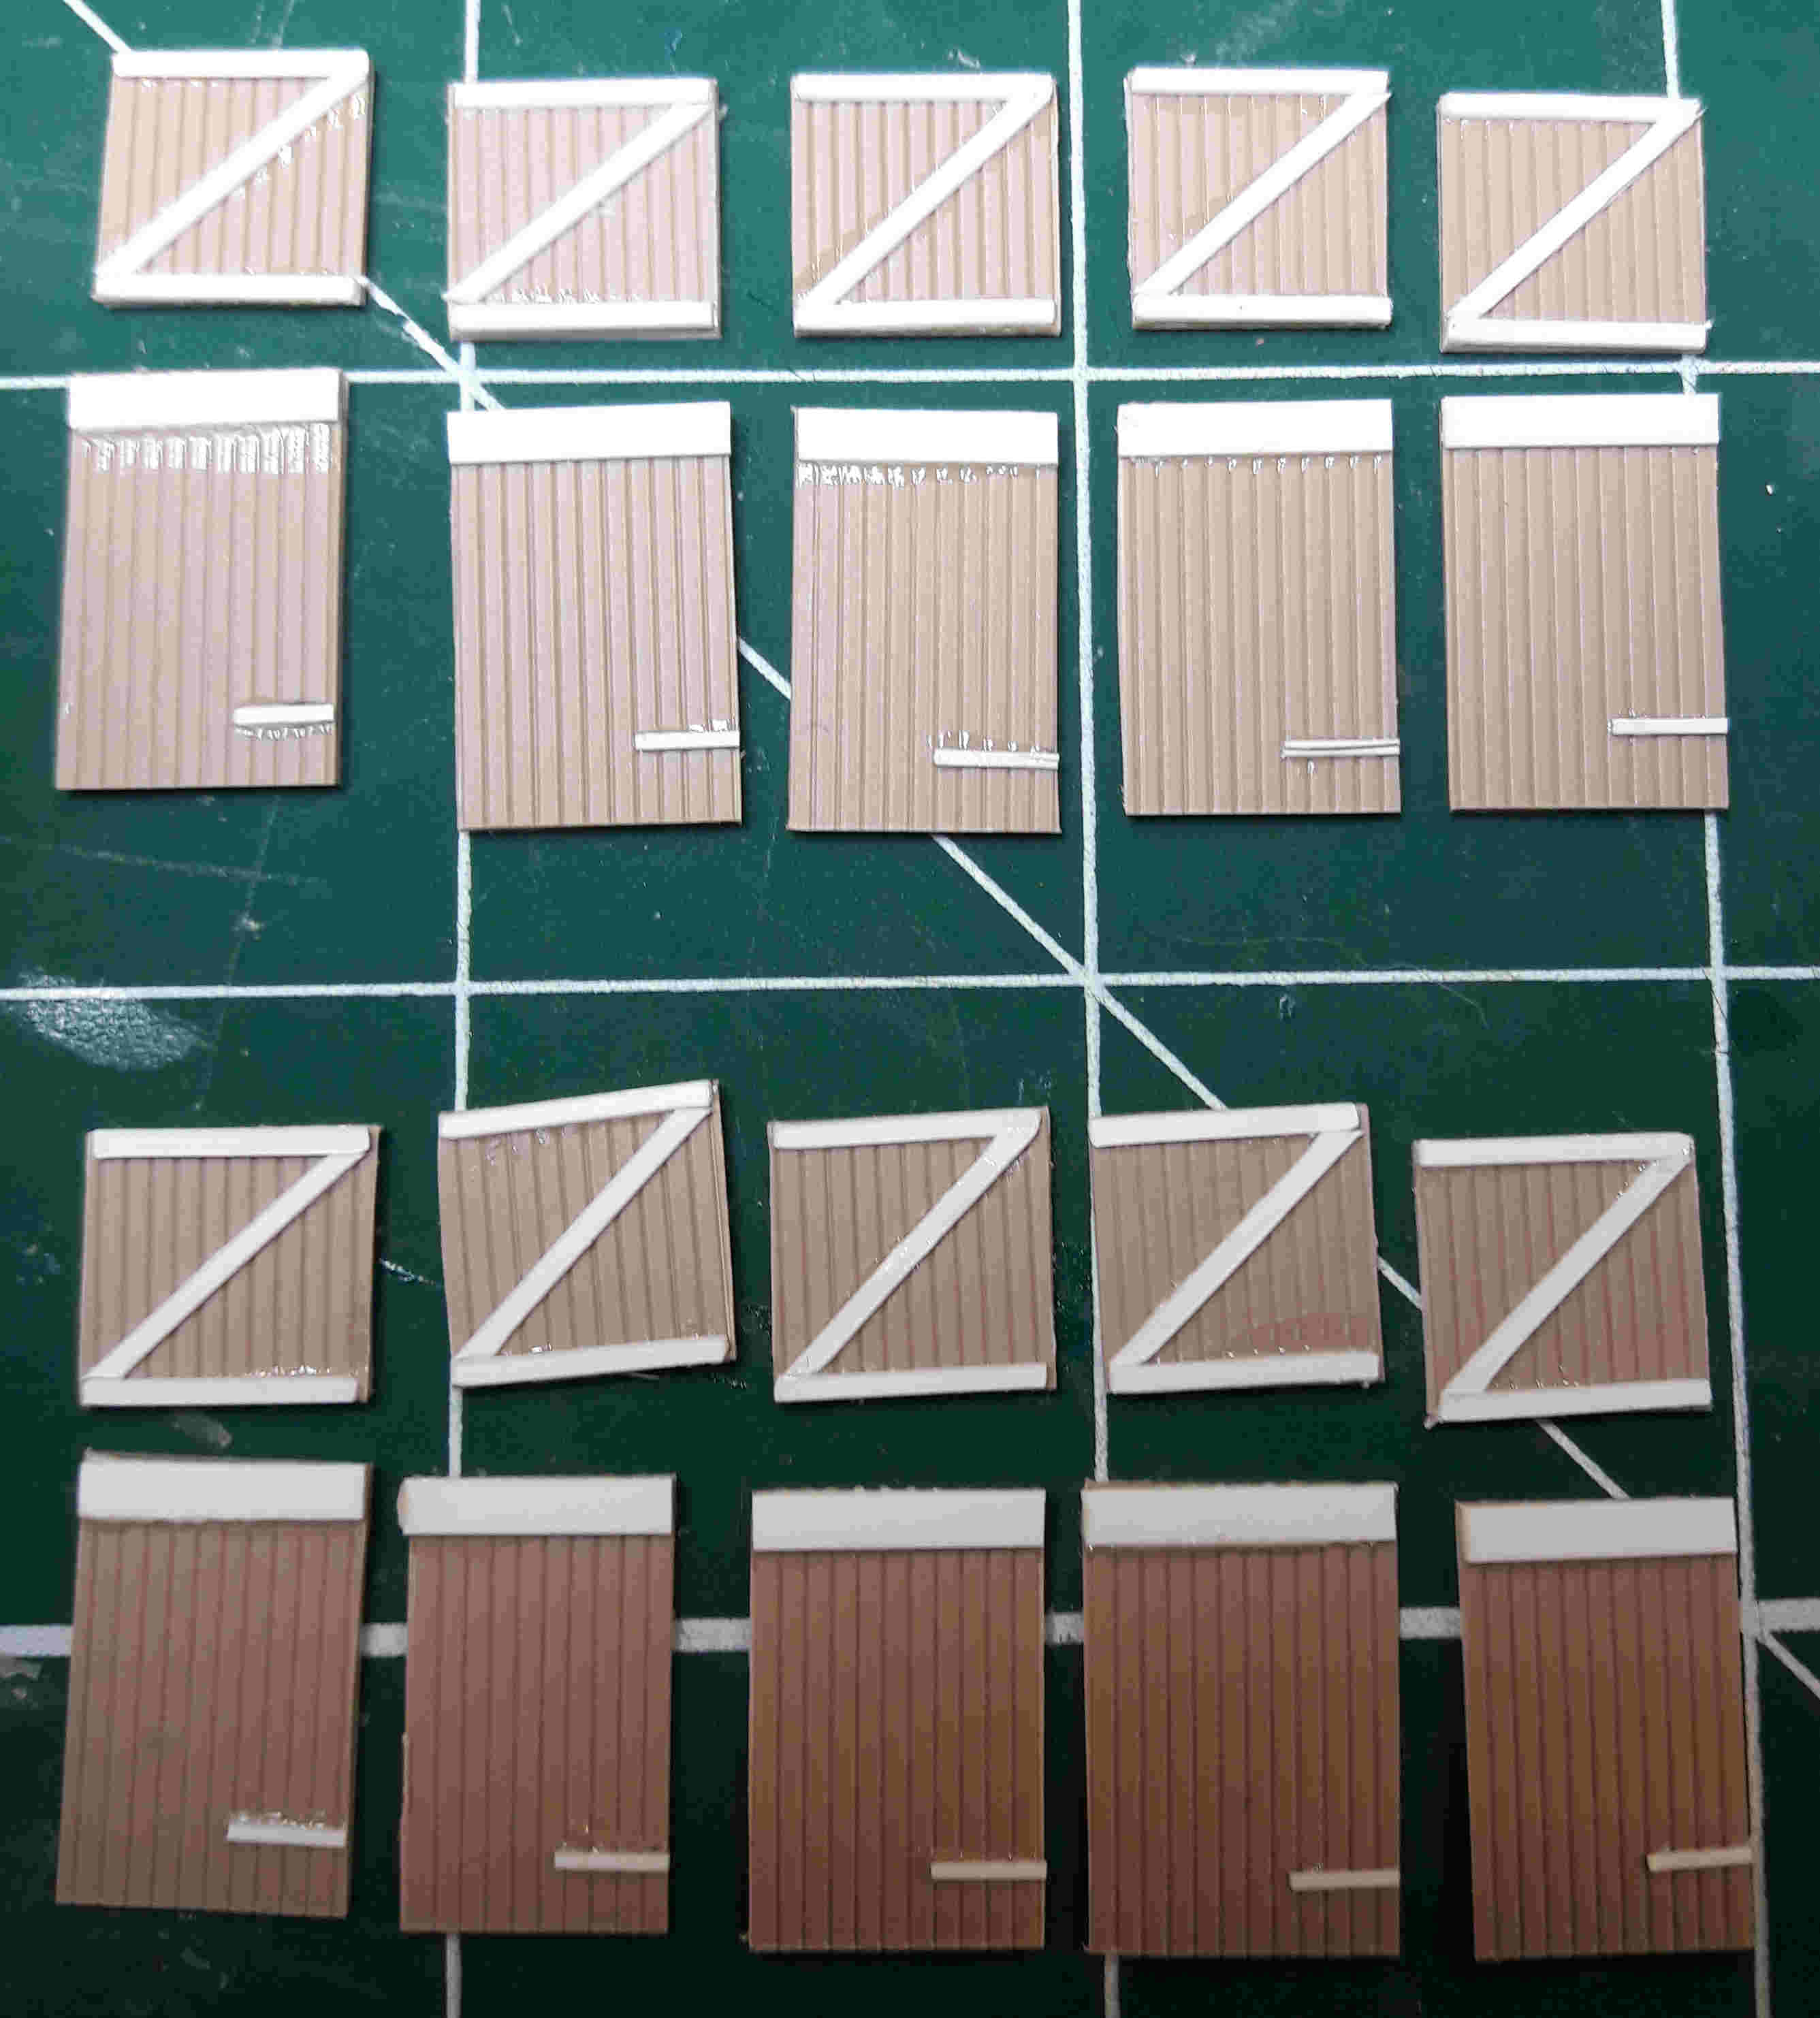
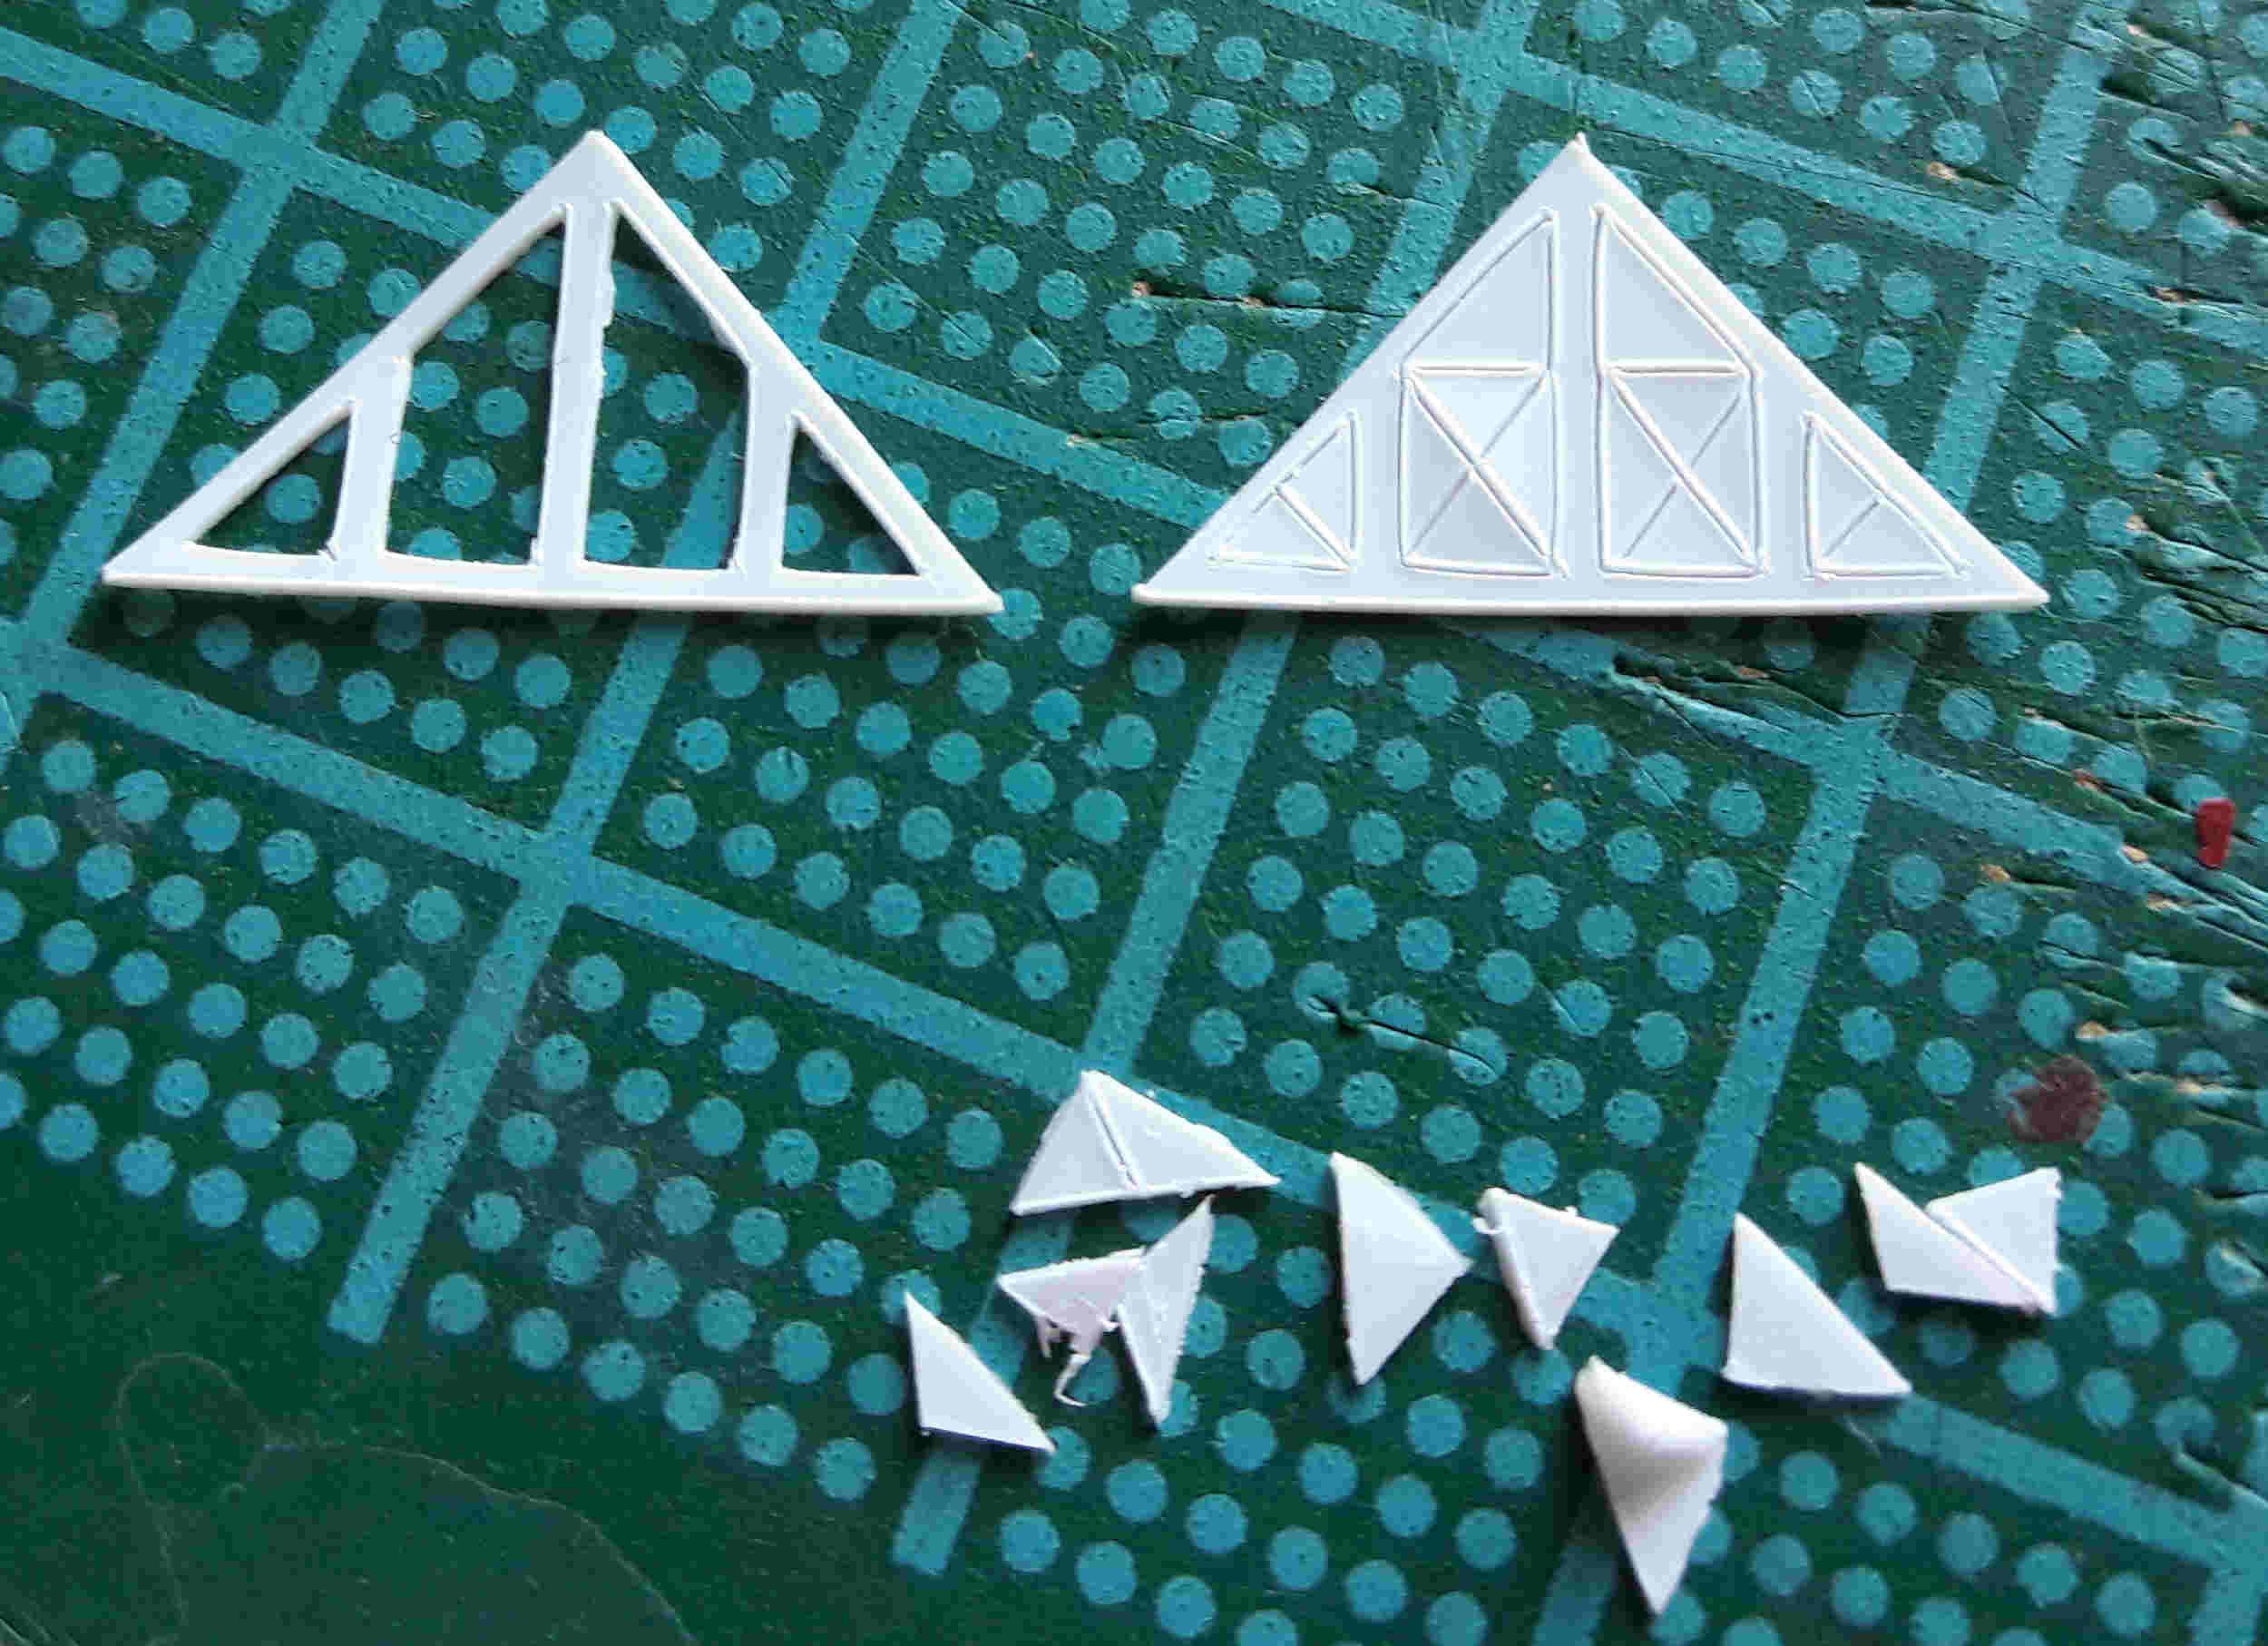
This building is a scratchbuild of plasticard construction. The core is 1mm plasticard, with an overlay of Slater's embossed plasticard of various sorts. The repetitive nature of the build made it an ideal candidate for experimenting with the use of our 'Silouhette' cutter - basically a printer that prints the image drawn as a cut onto plain or embossed plasticard. Experiment is the word, as many lessons have been learned in the process about how this is best utilised, as the cut is no more than an etch on card thicker than 0.25mm/10 thou!
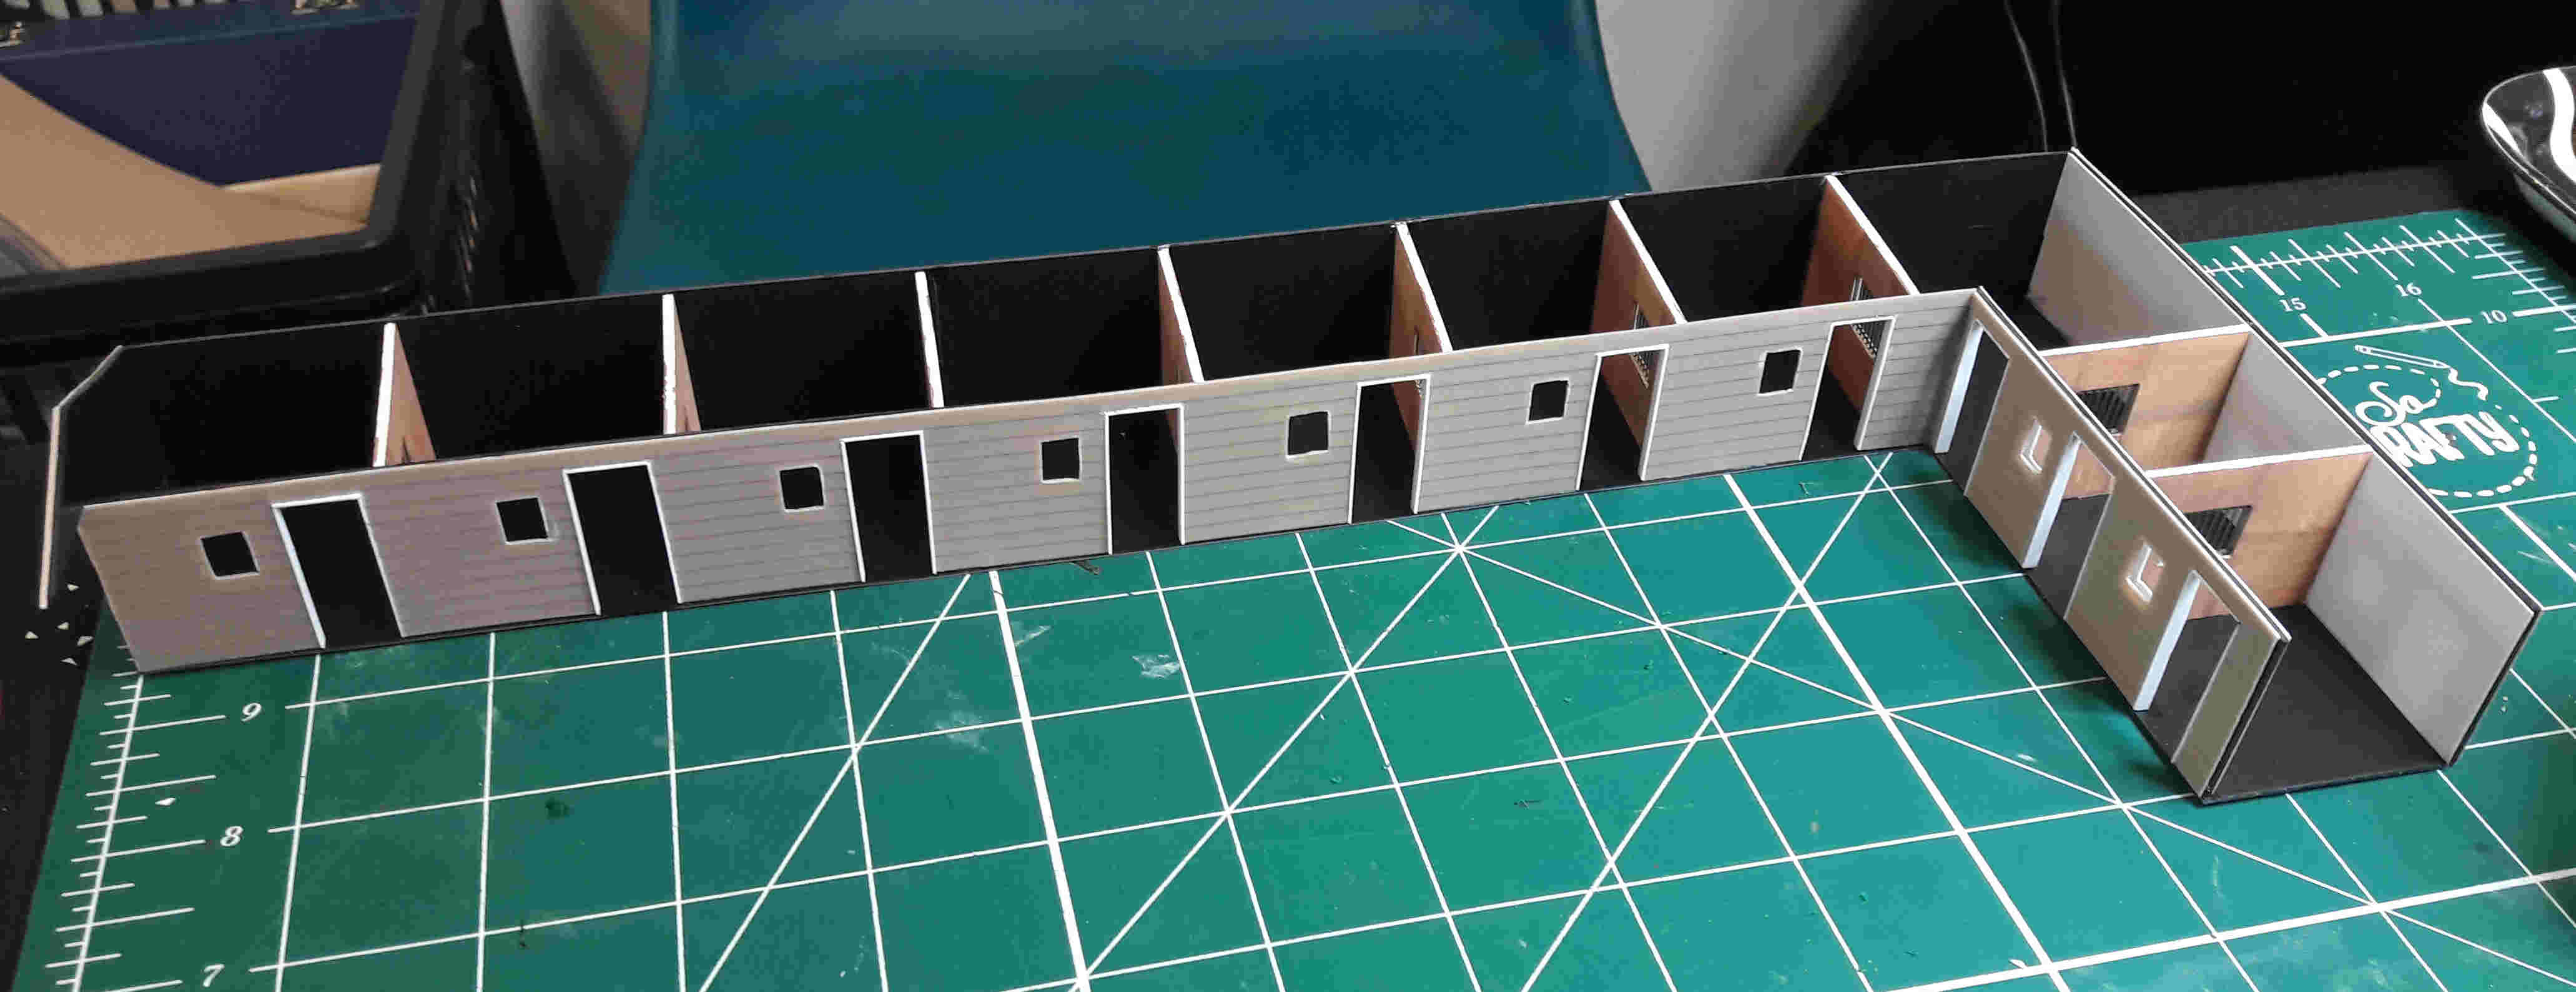
Construction has been mainly completed as part of our demonstrations at shows and I must appologise to Noah, a young lad who sat enthralled with his Grandmother at the Nailsea show for several hours, on both days! I had promised an update on the website and have been delayed, as progress has been put on hold as other projects have taken over for upcoming shows. So here are some photos to show how things have progressed:
Initial walls and overlays were prepared at the Weston show, with window and door openings added at Erith, Longfield in January

Parts created by the Silhouette cutter:
Progress at the Nailsea Show:
Summer progress, including a preview of the next stage, once lighting has been fitted.
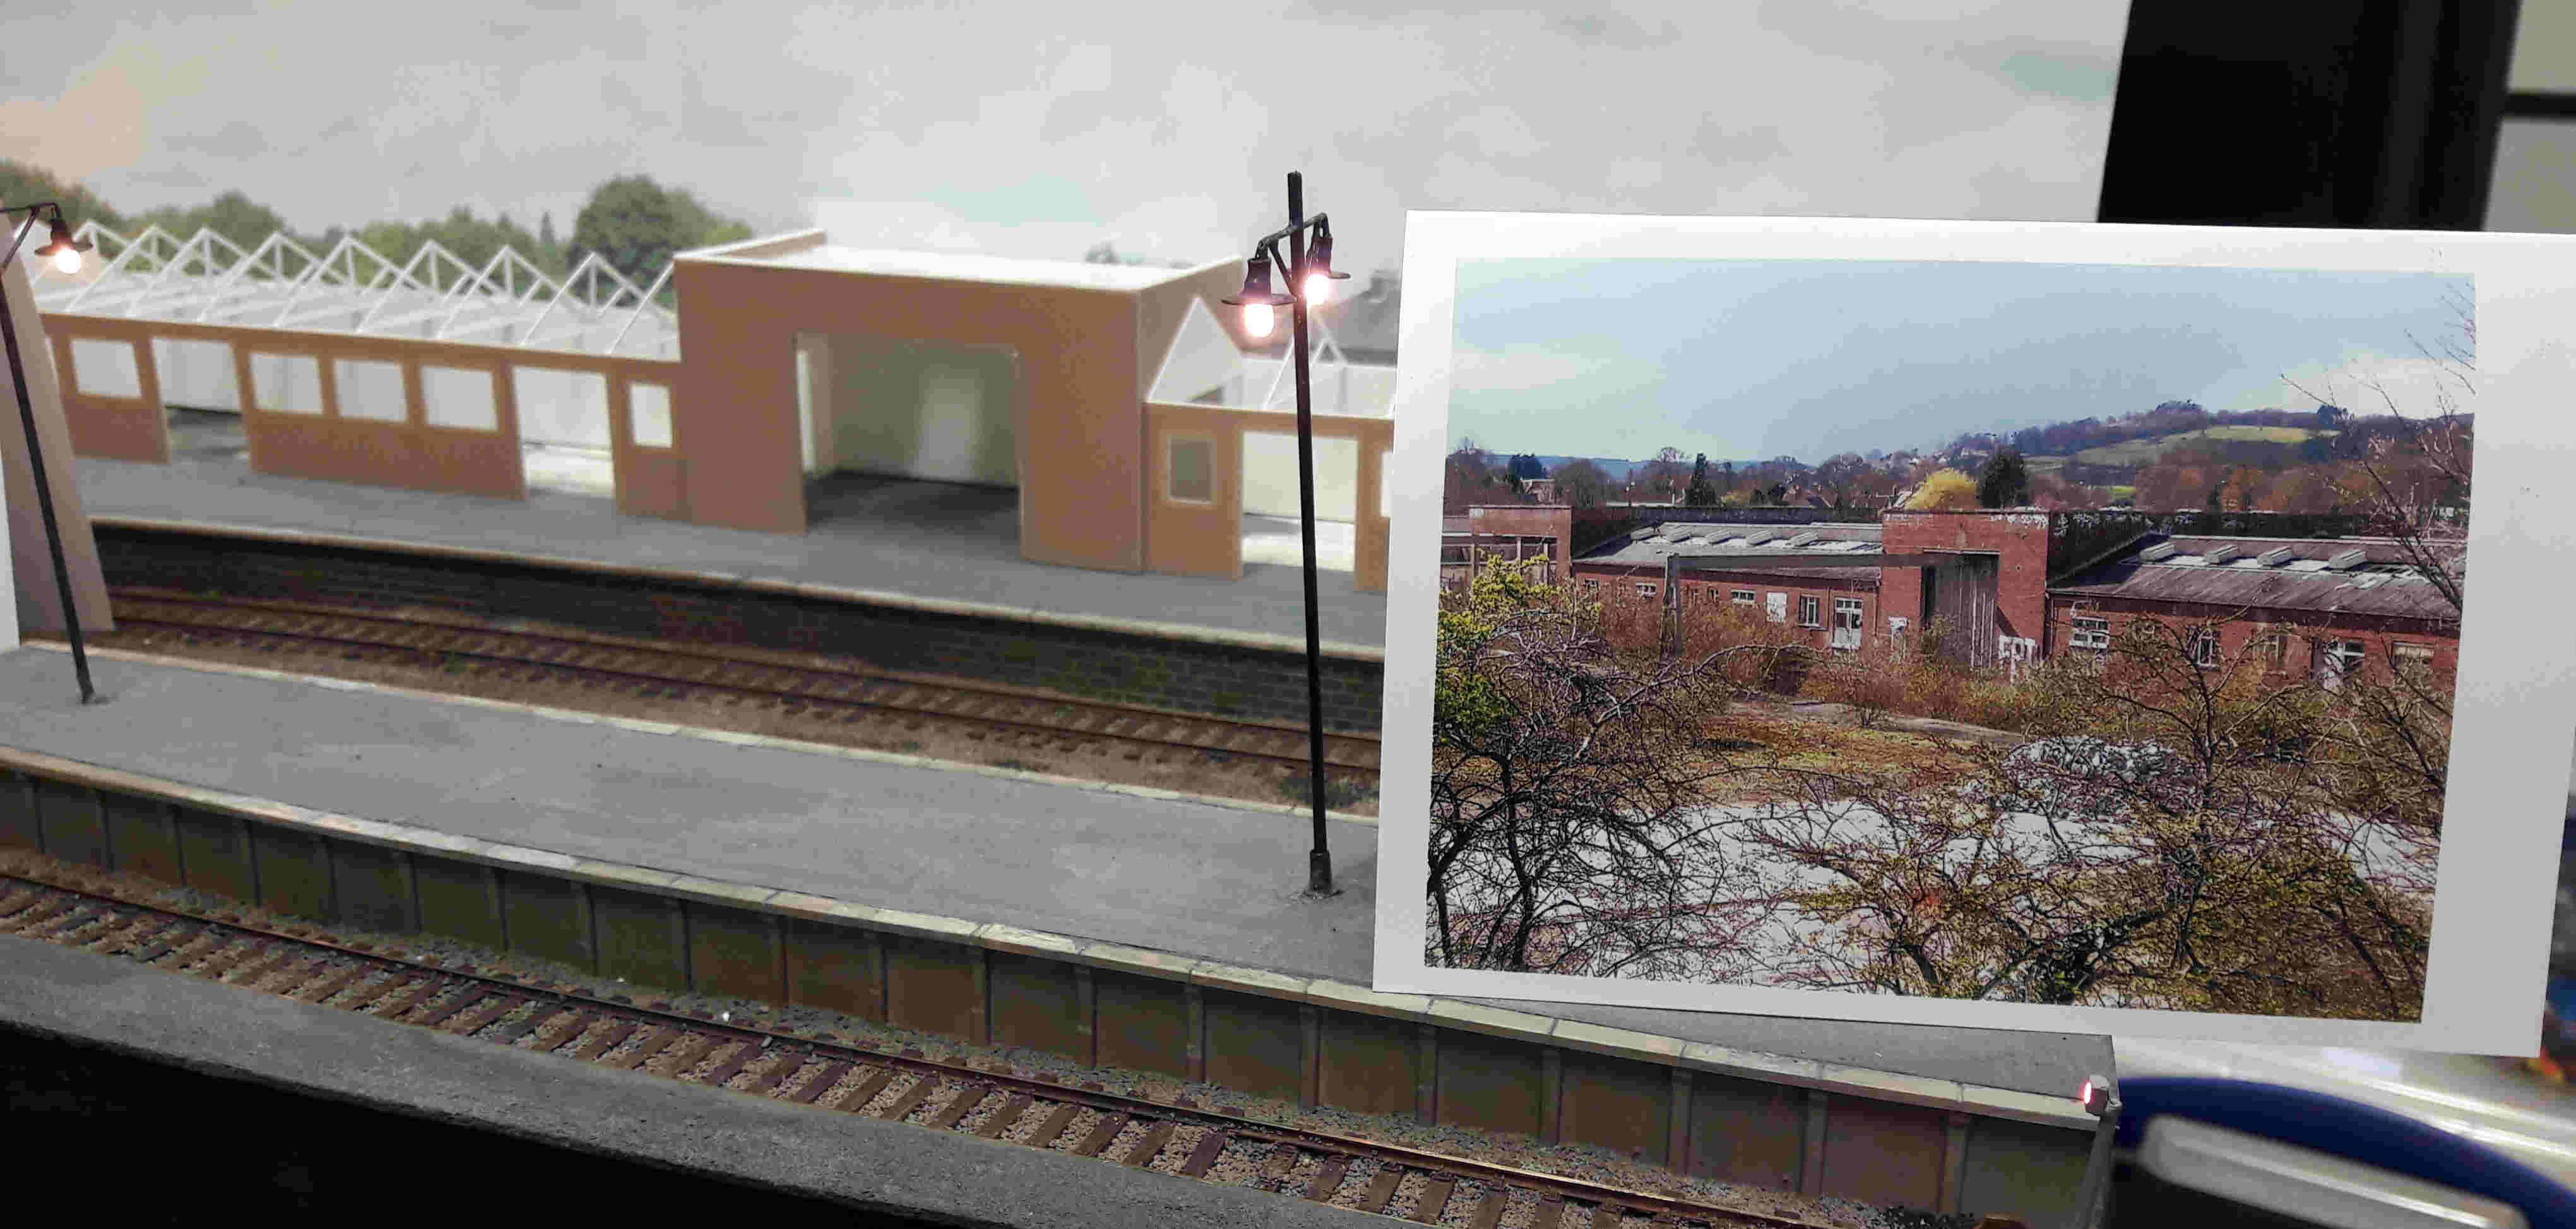
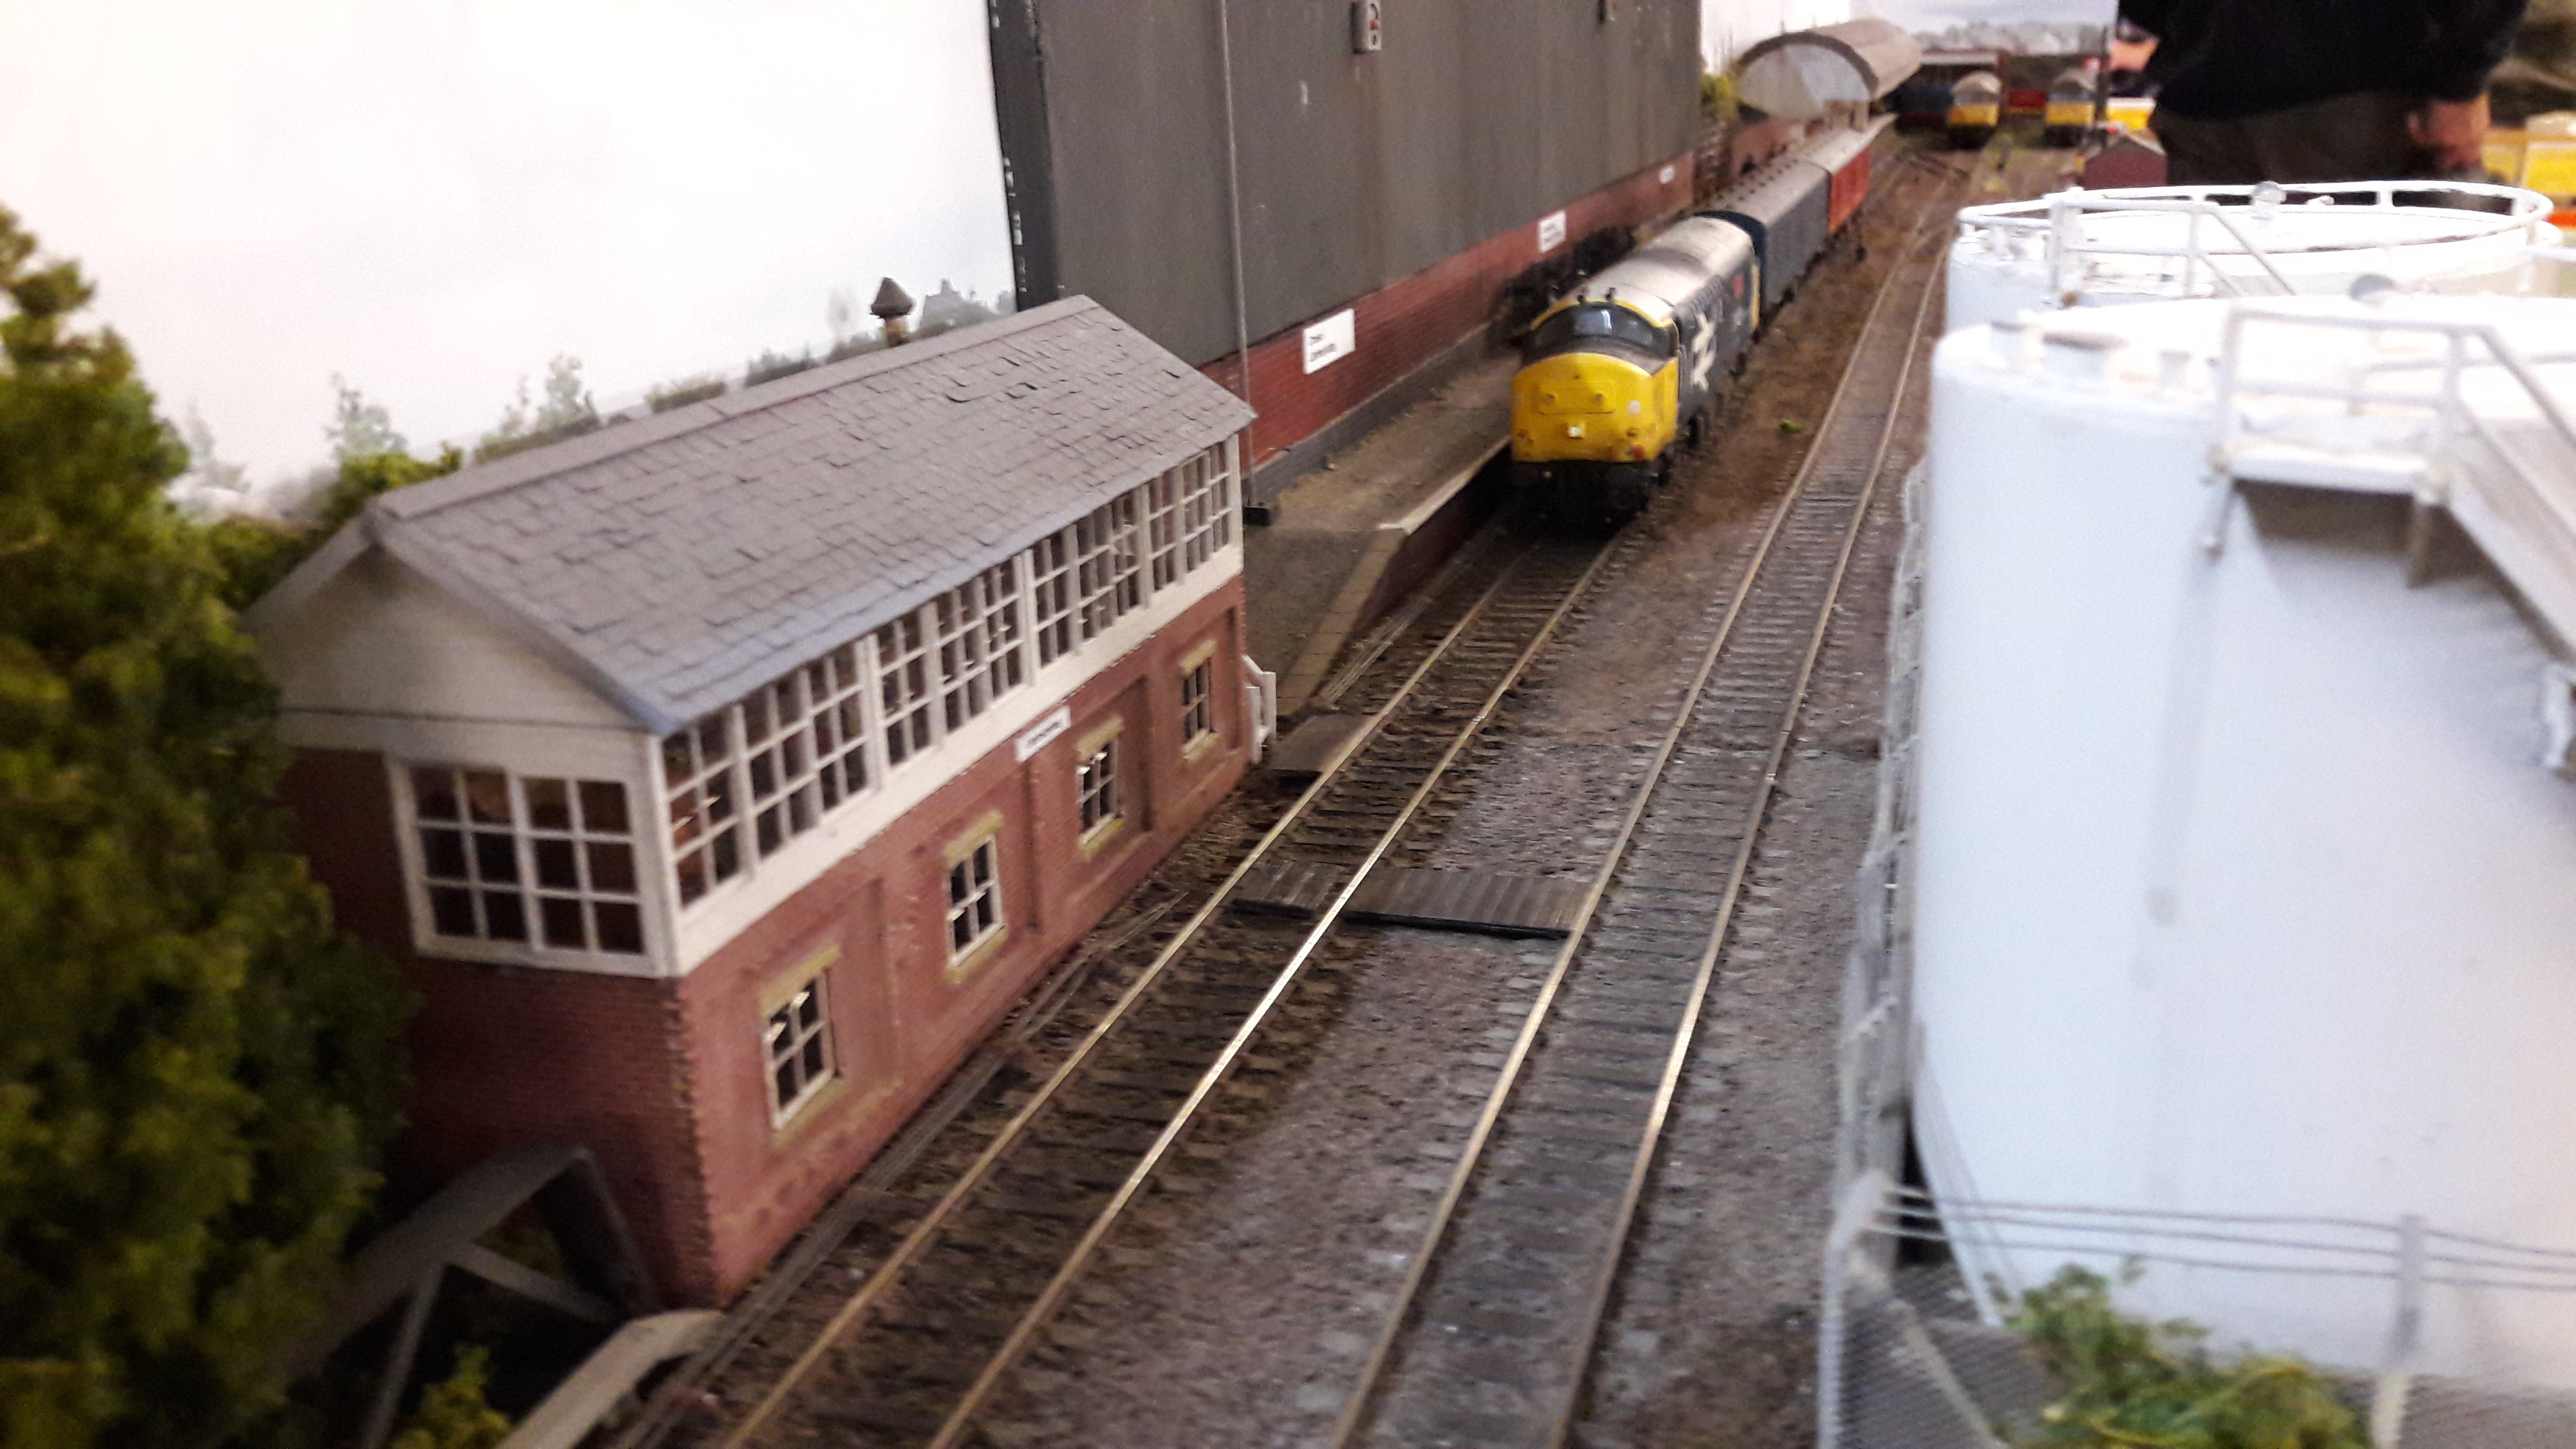
Out new micro layout is based on Ashton Meadows Engineers Depot in Bristol. Two photos were found online and these have formed the basis for the construction of the main building:
http://bristol-rail.co.uk/wiki/File:Ashton_Meadows_Sidings10.jpg
http://bristol-rail.co.uk/wiki/File:Ashton_Meadows_Sidings11.jpg
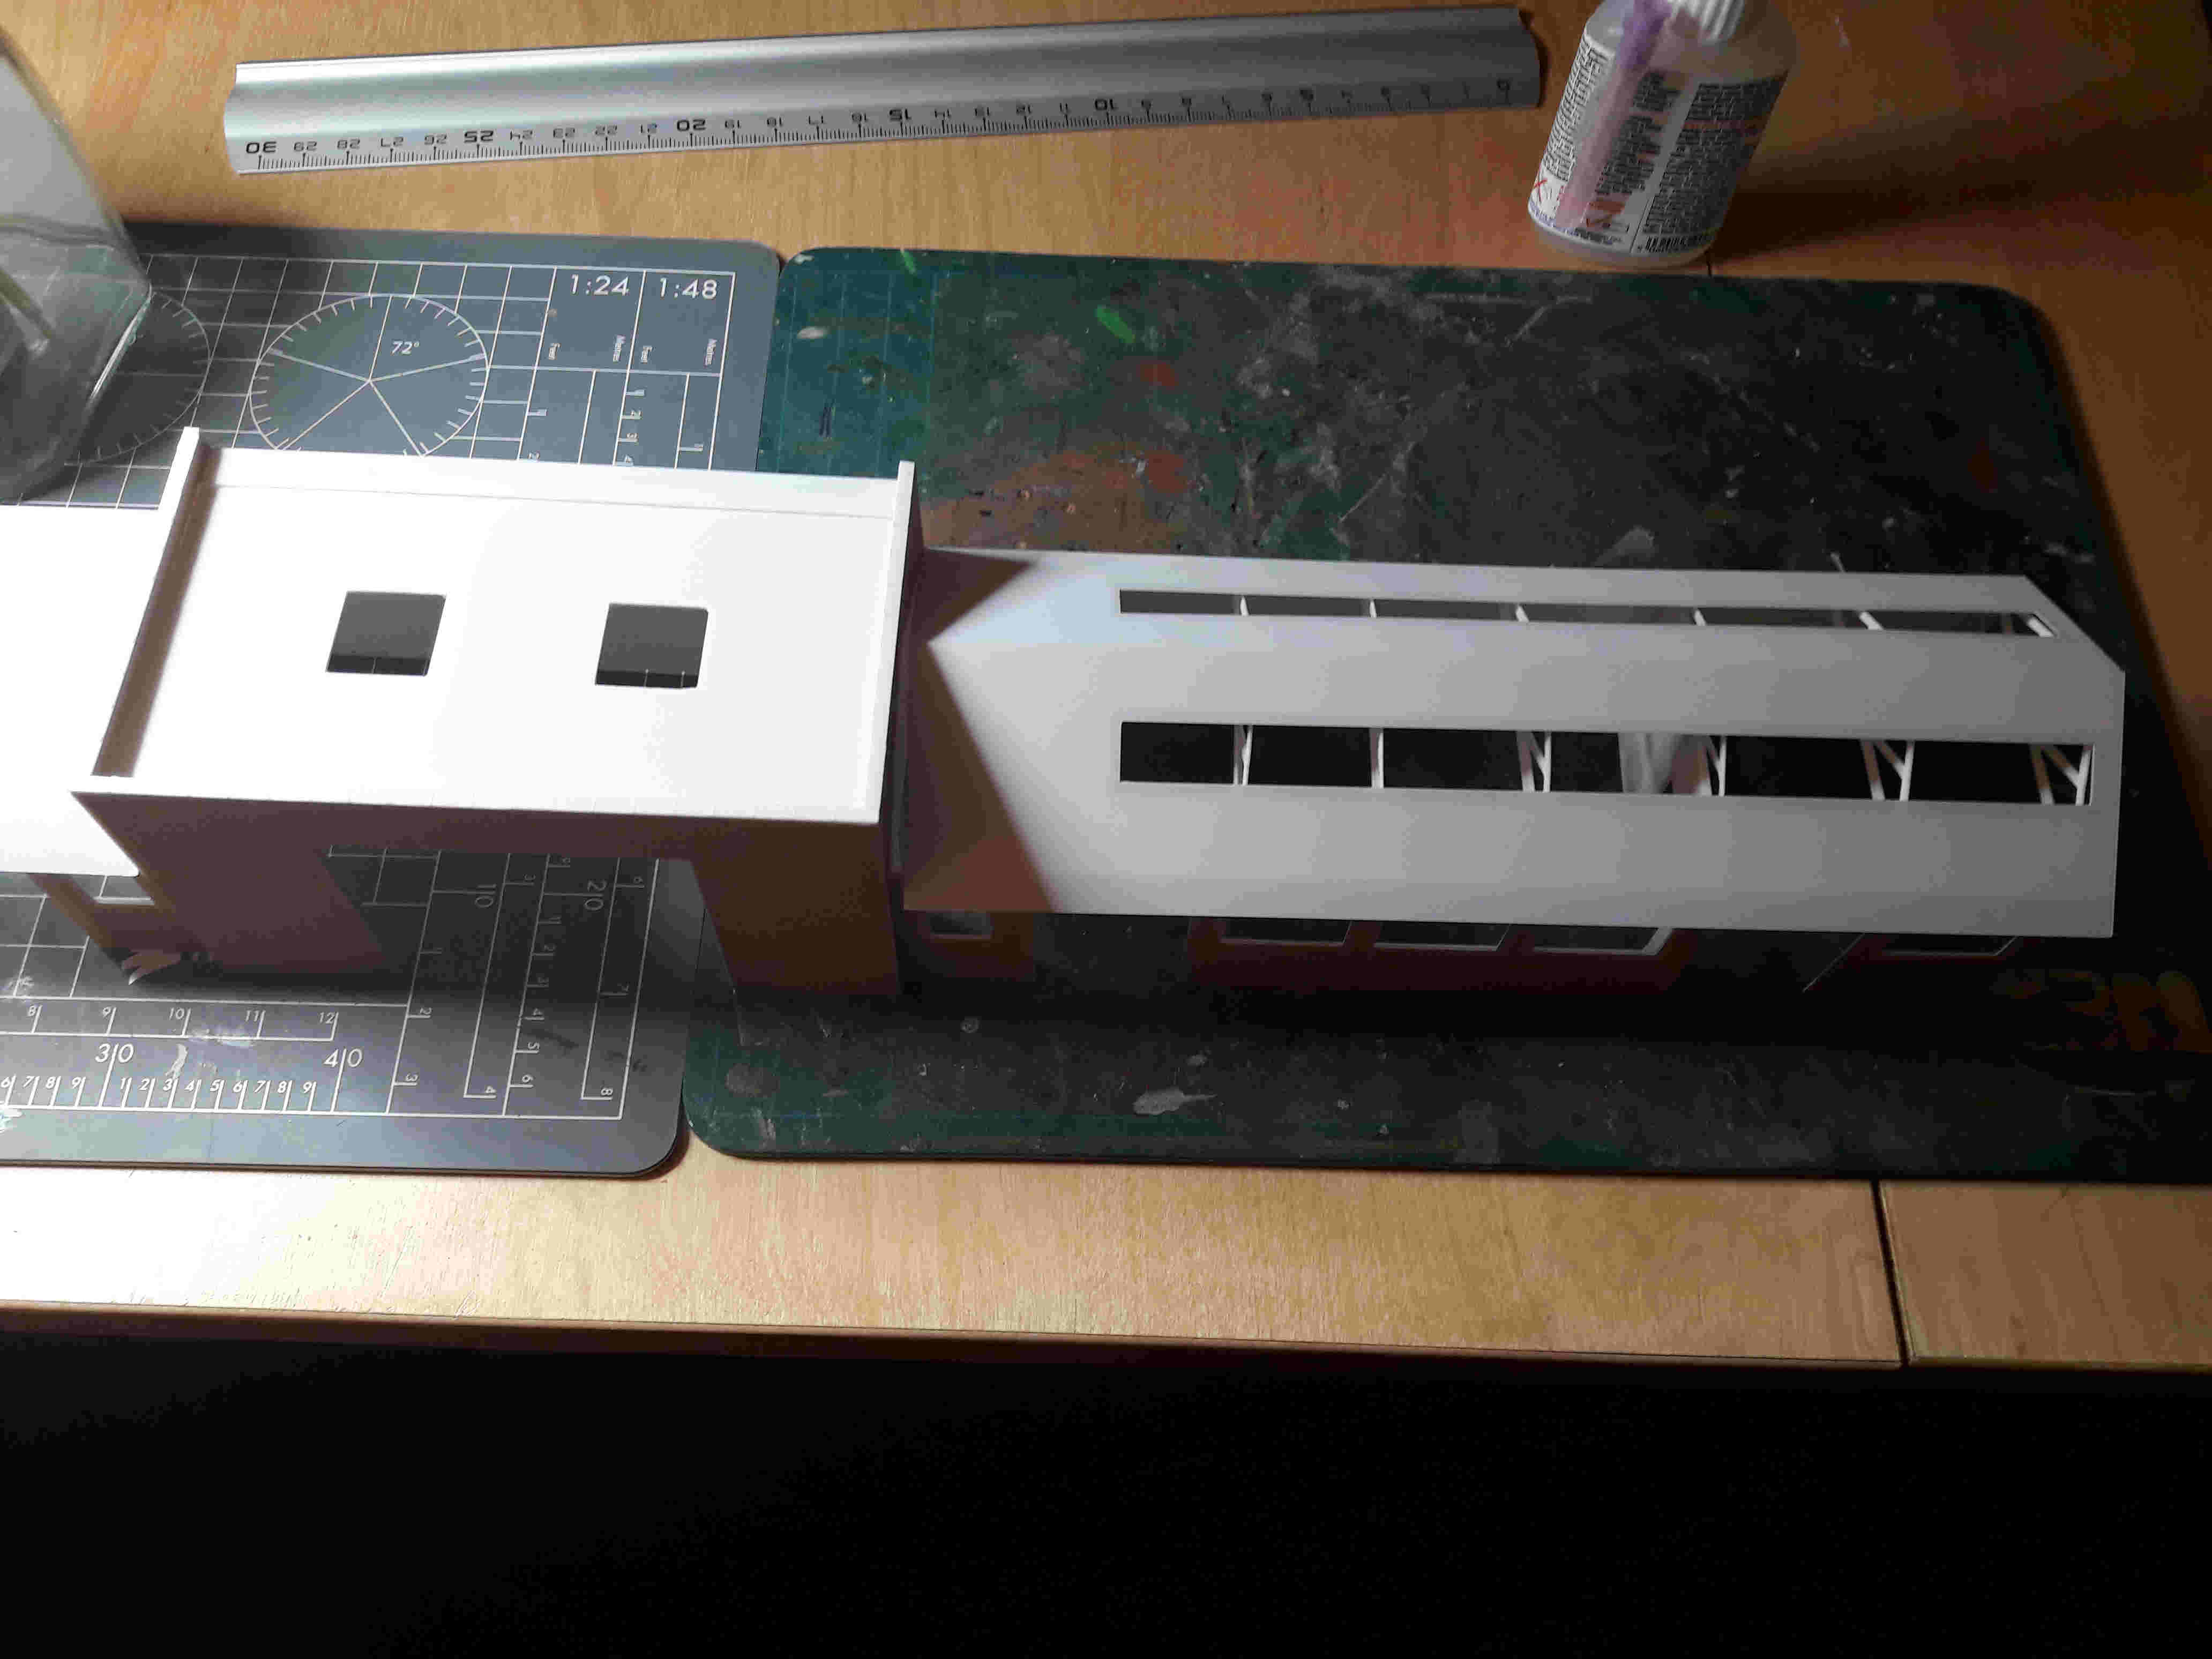
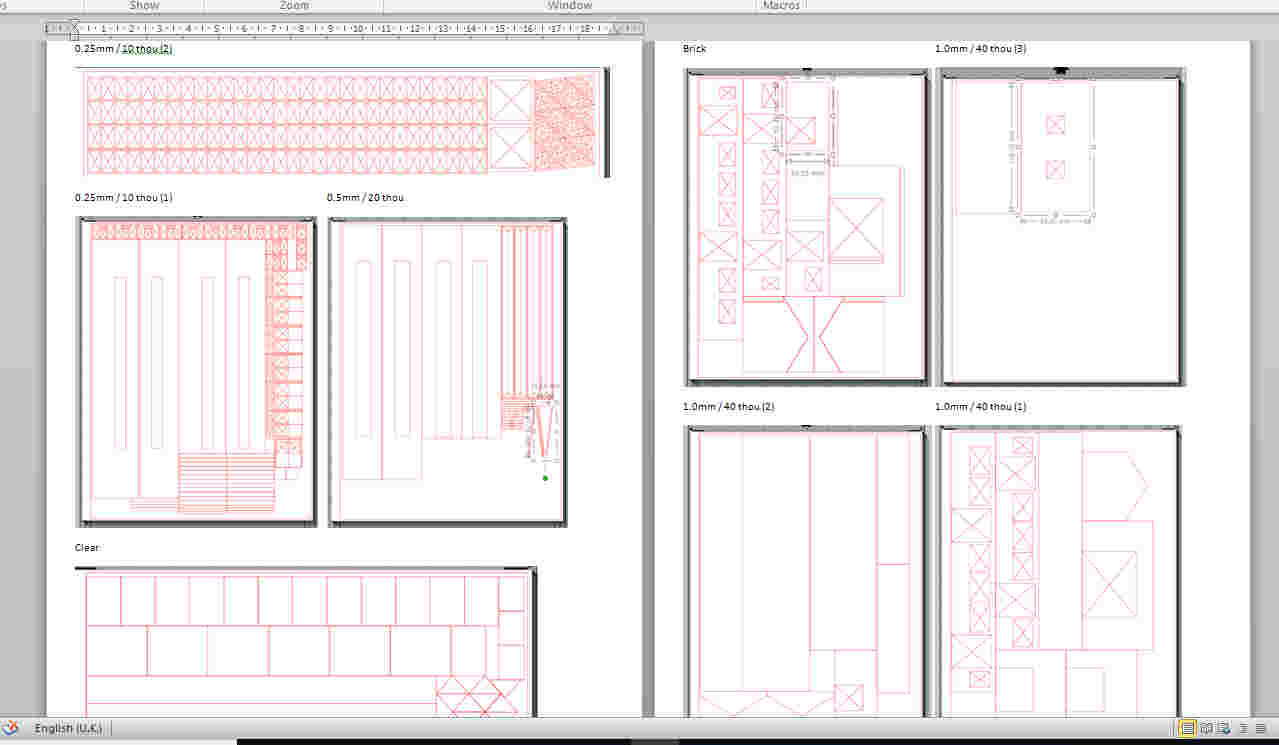
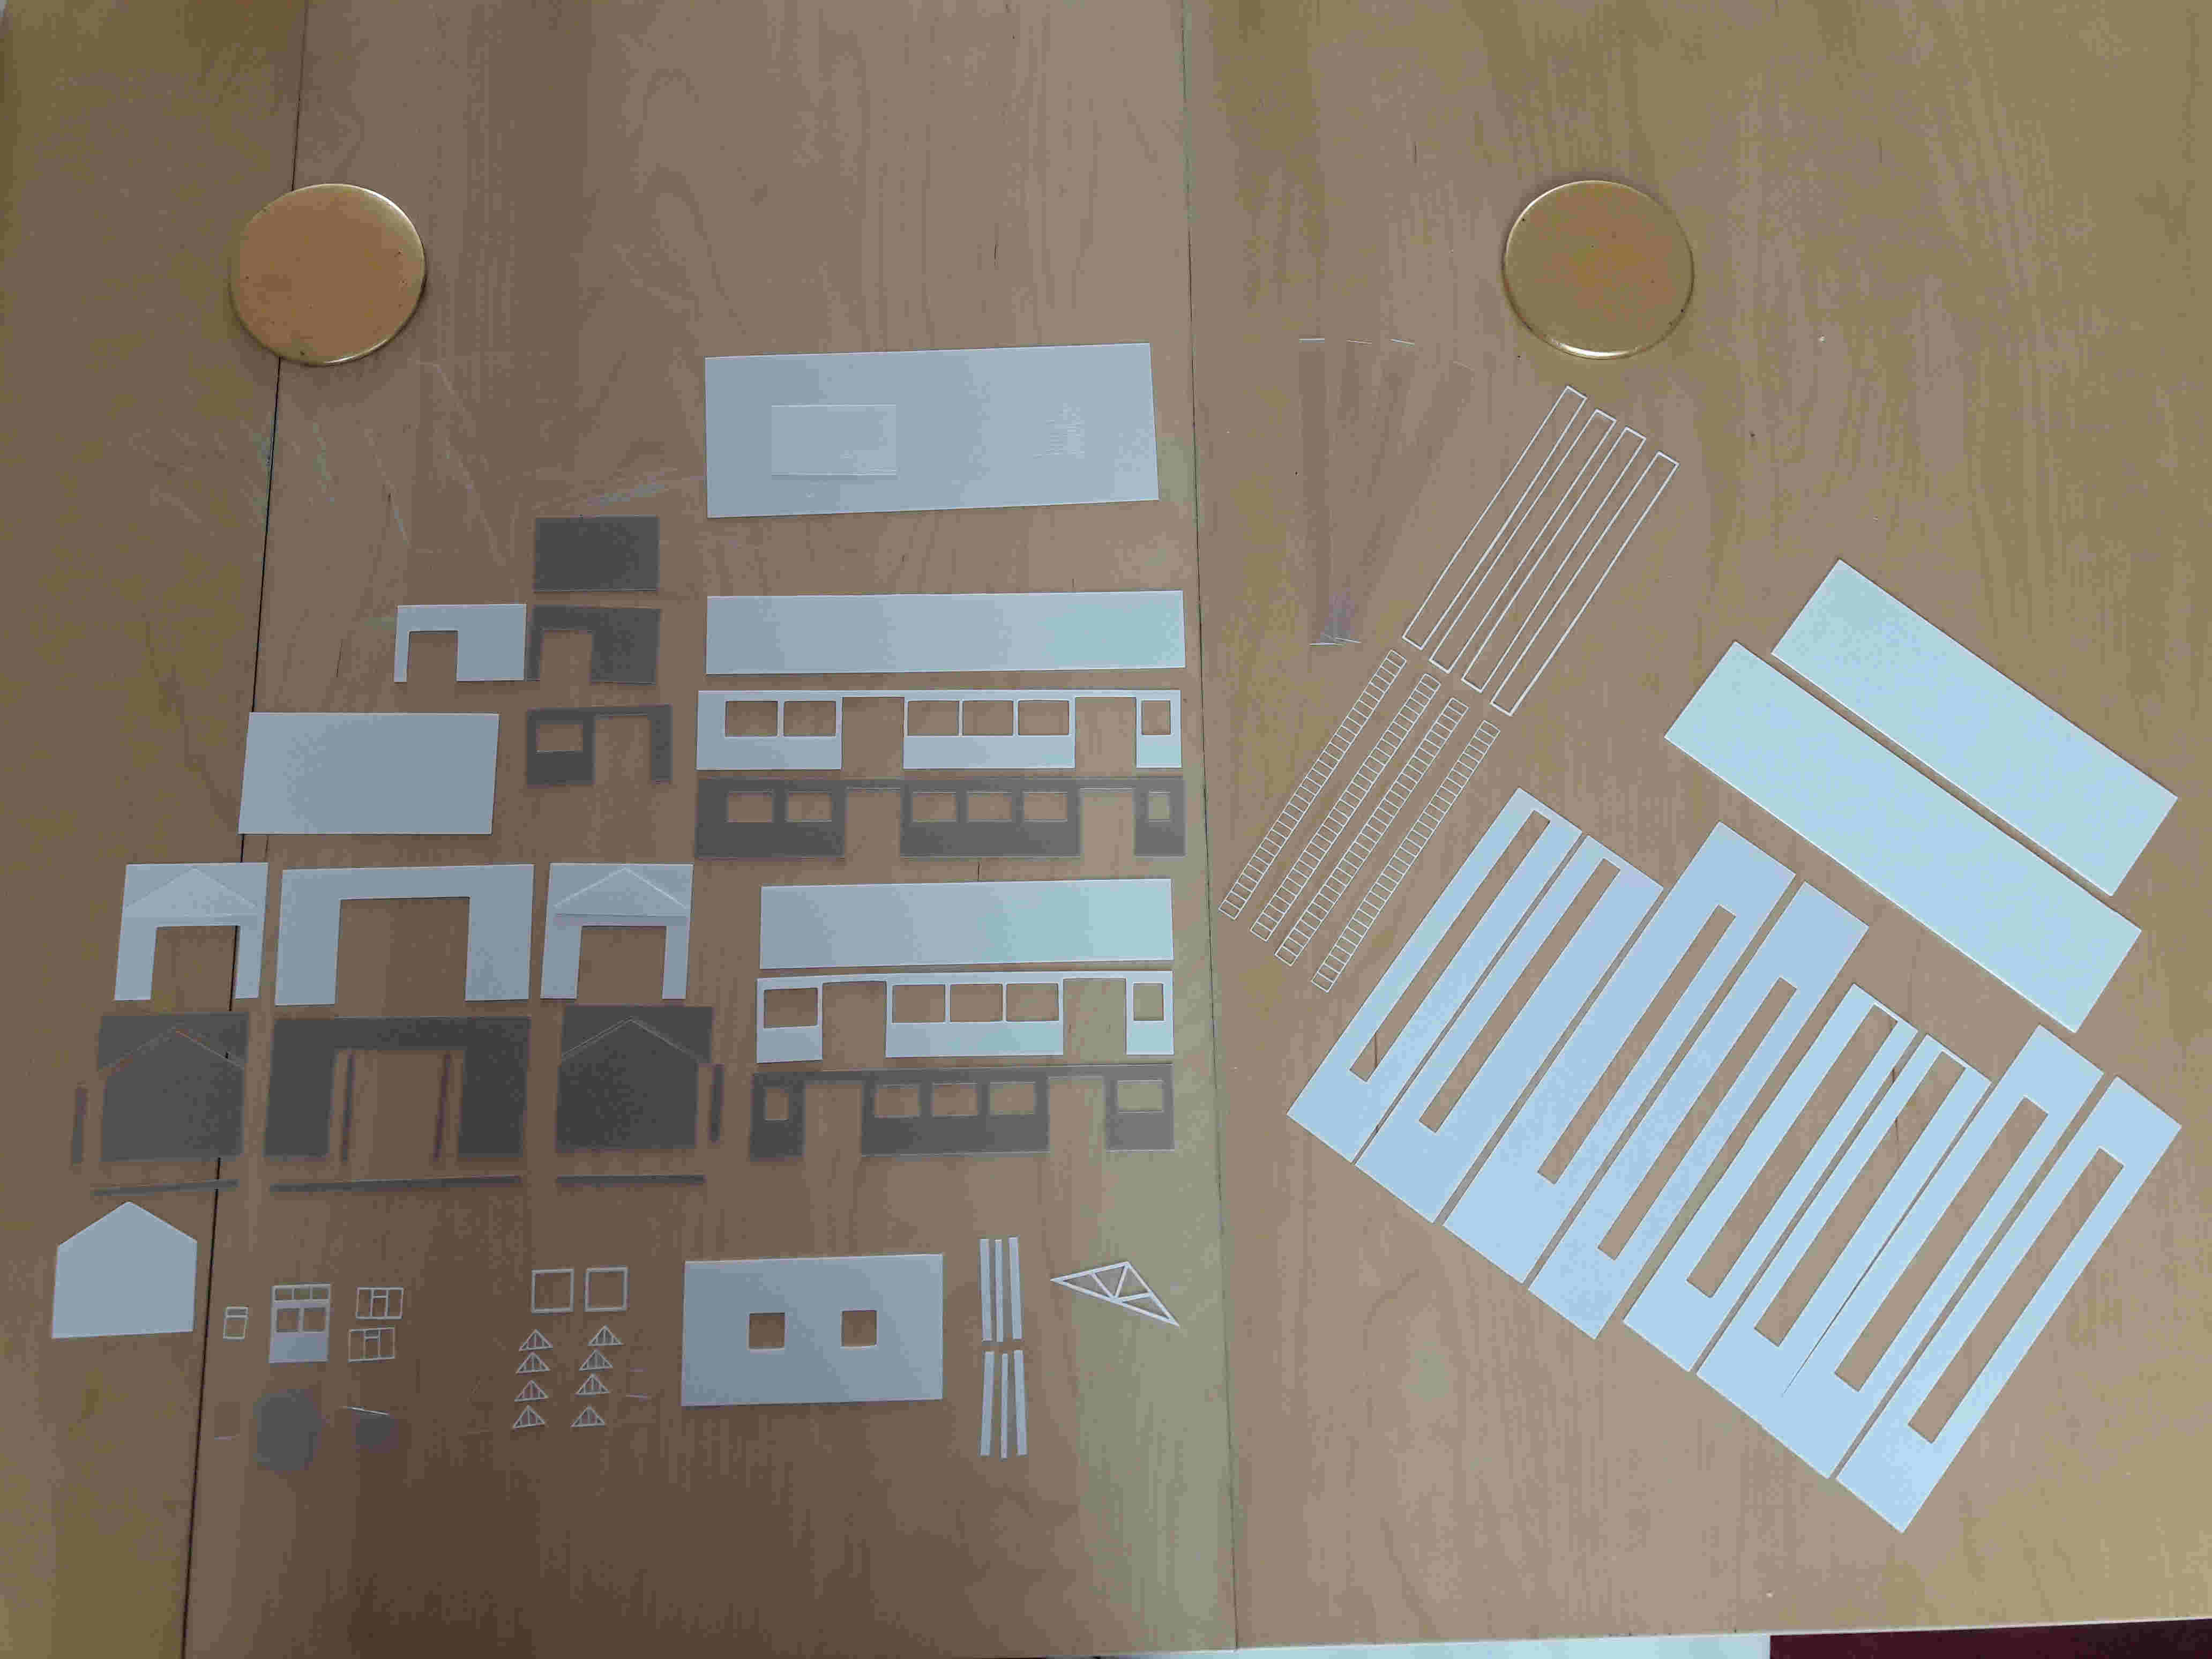
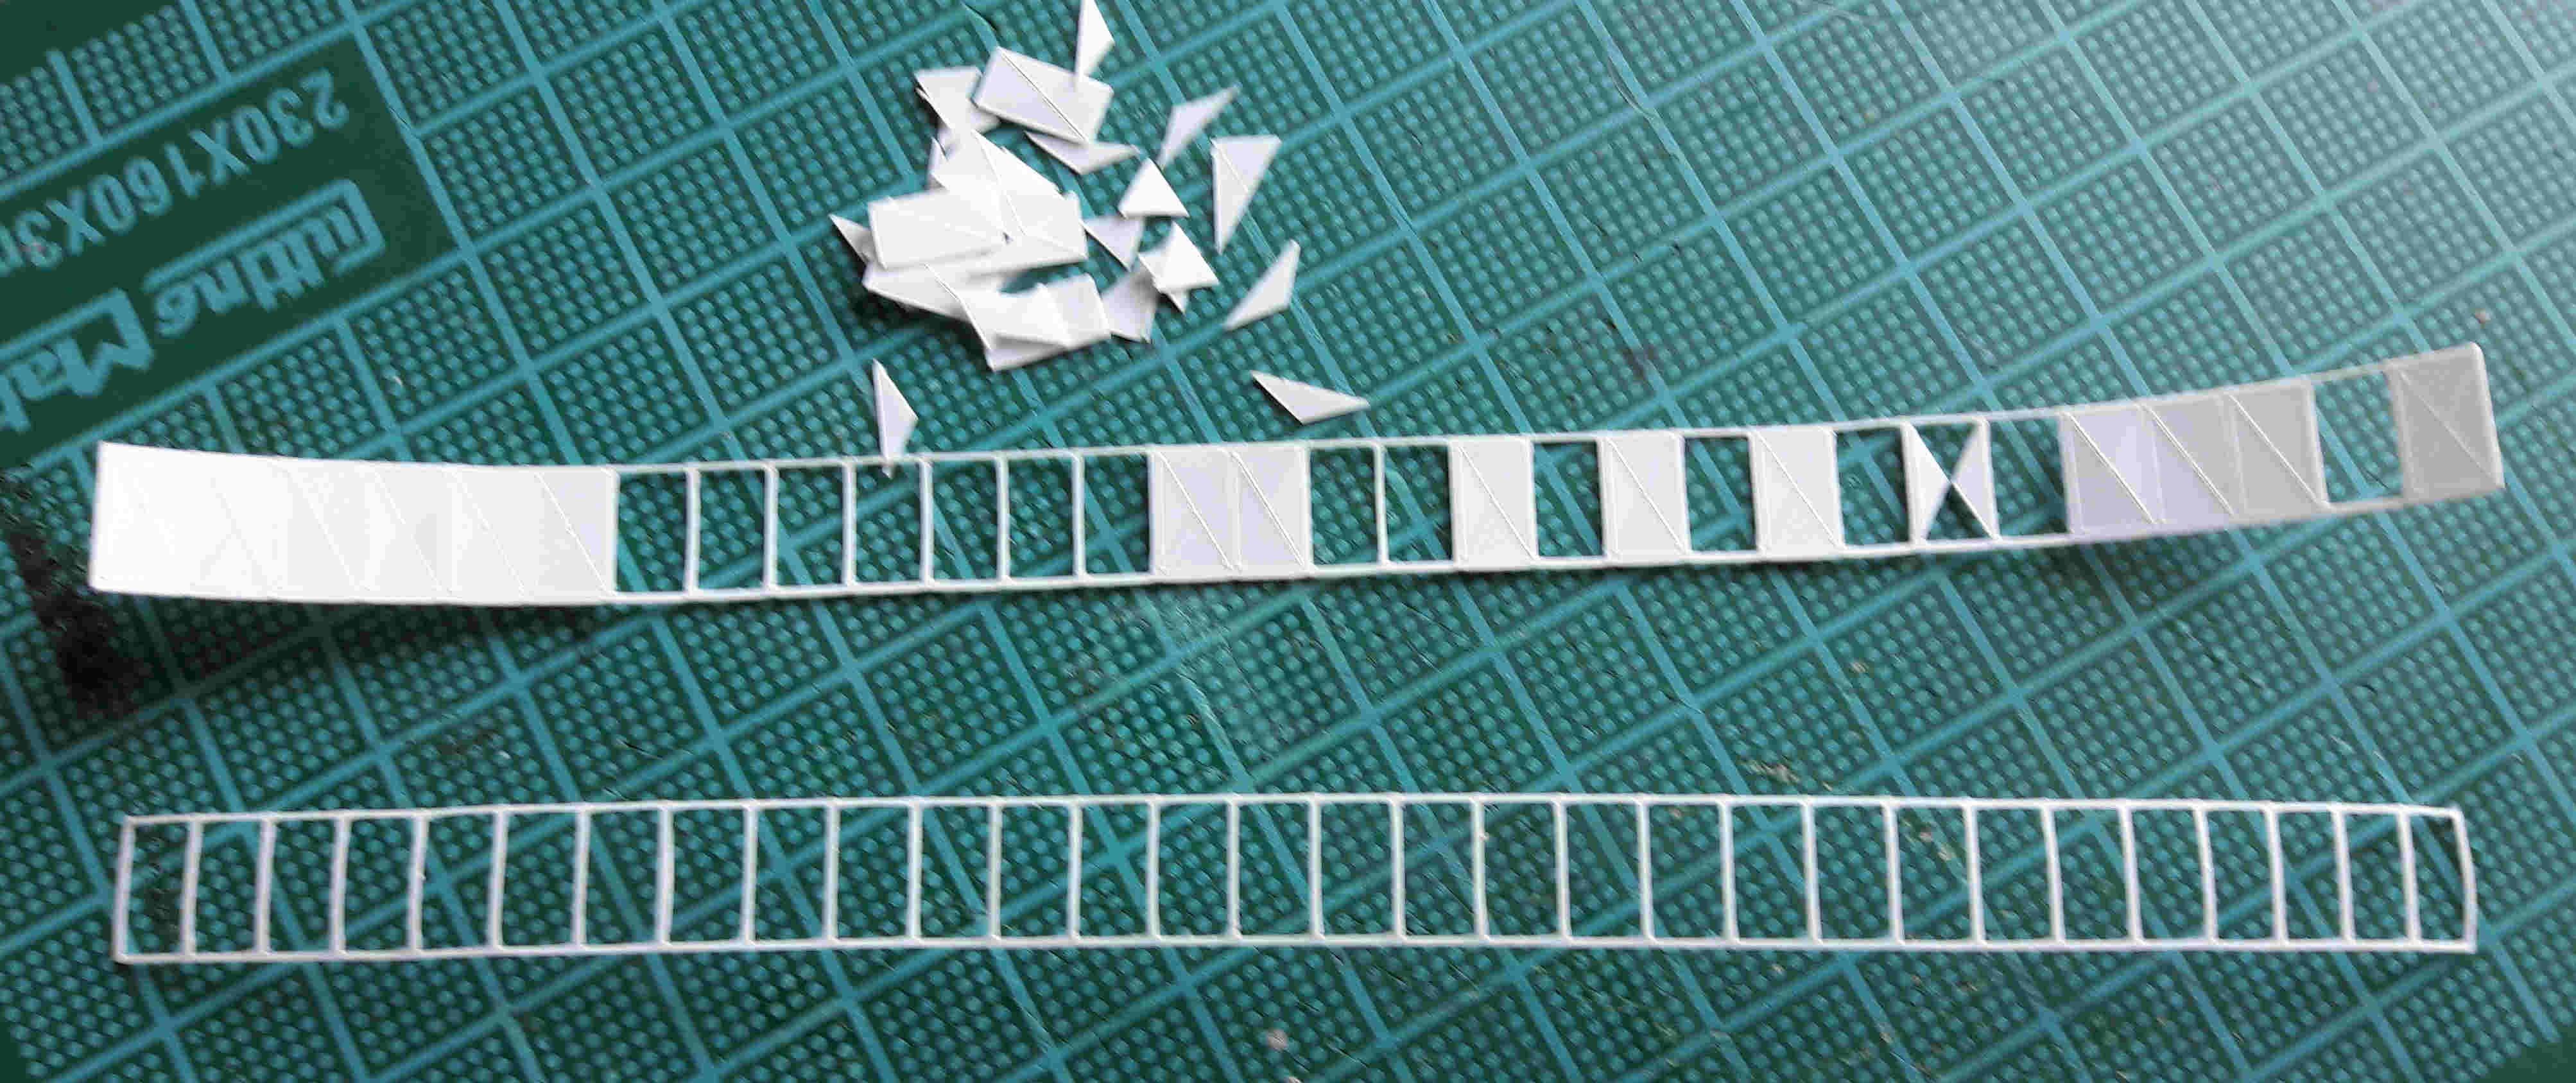
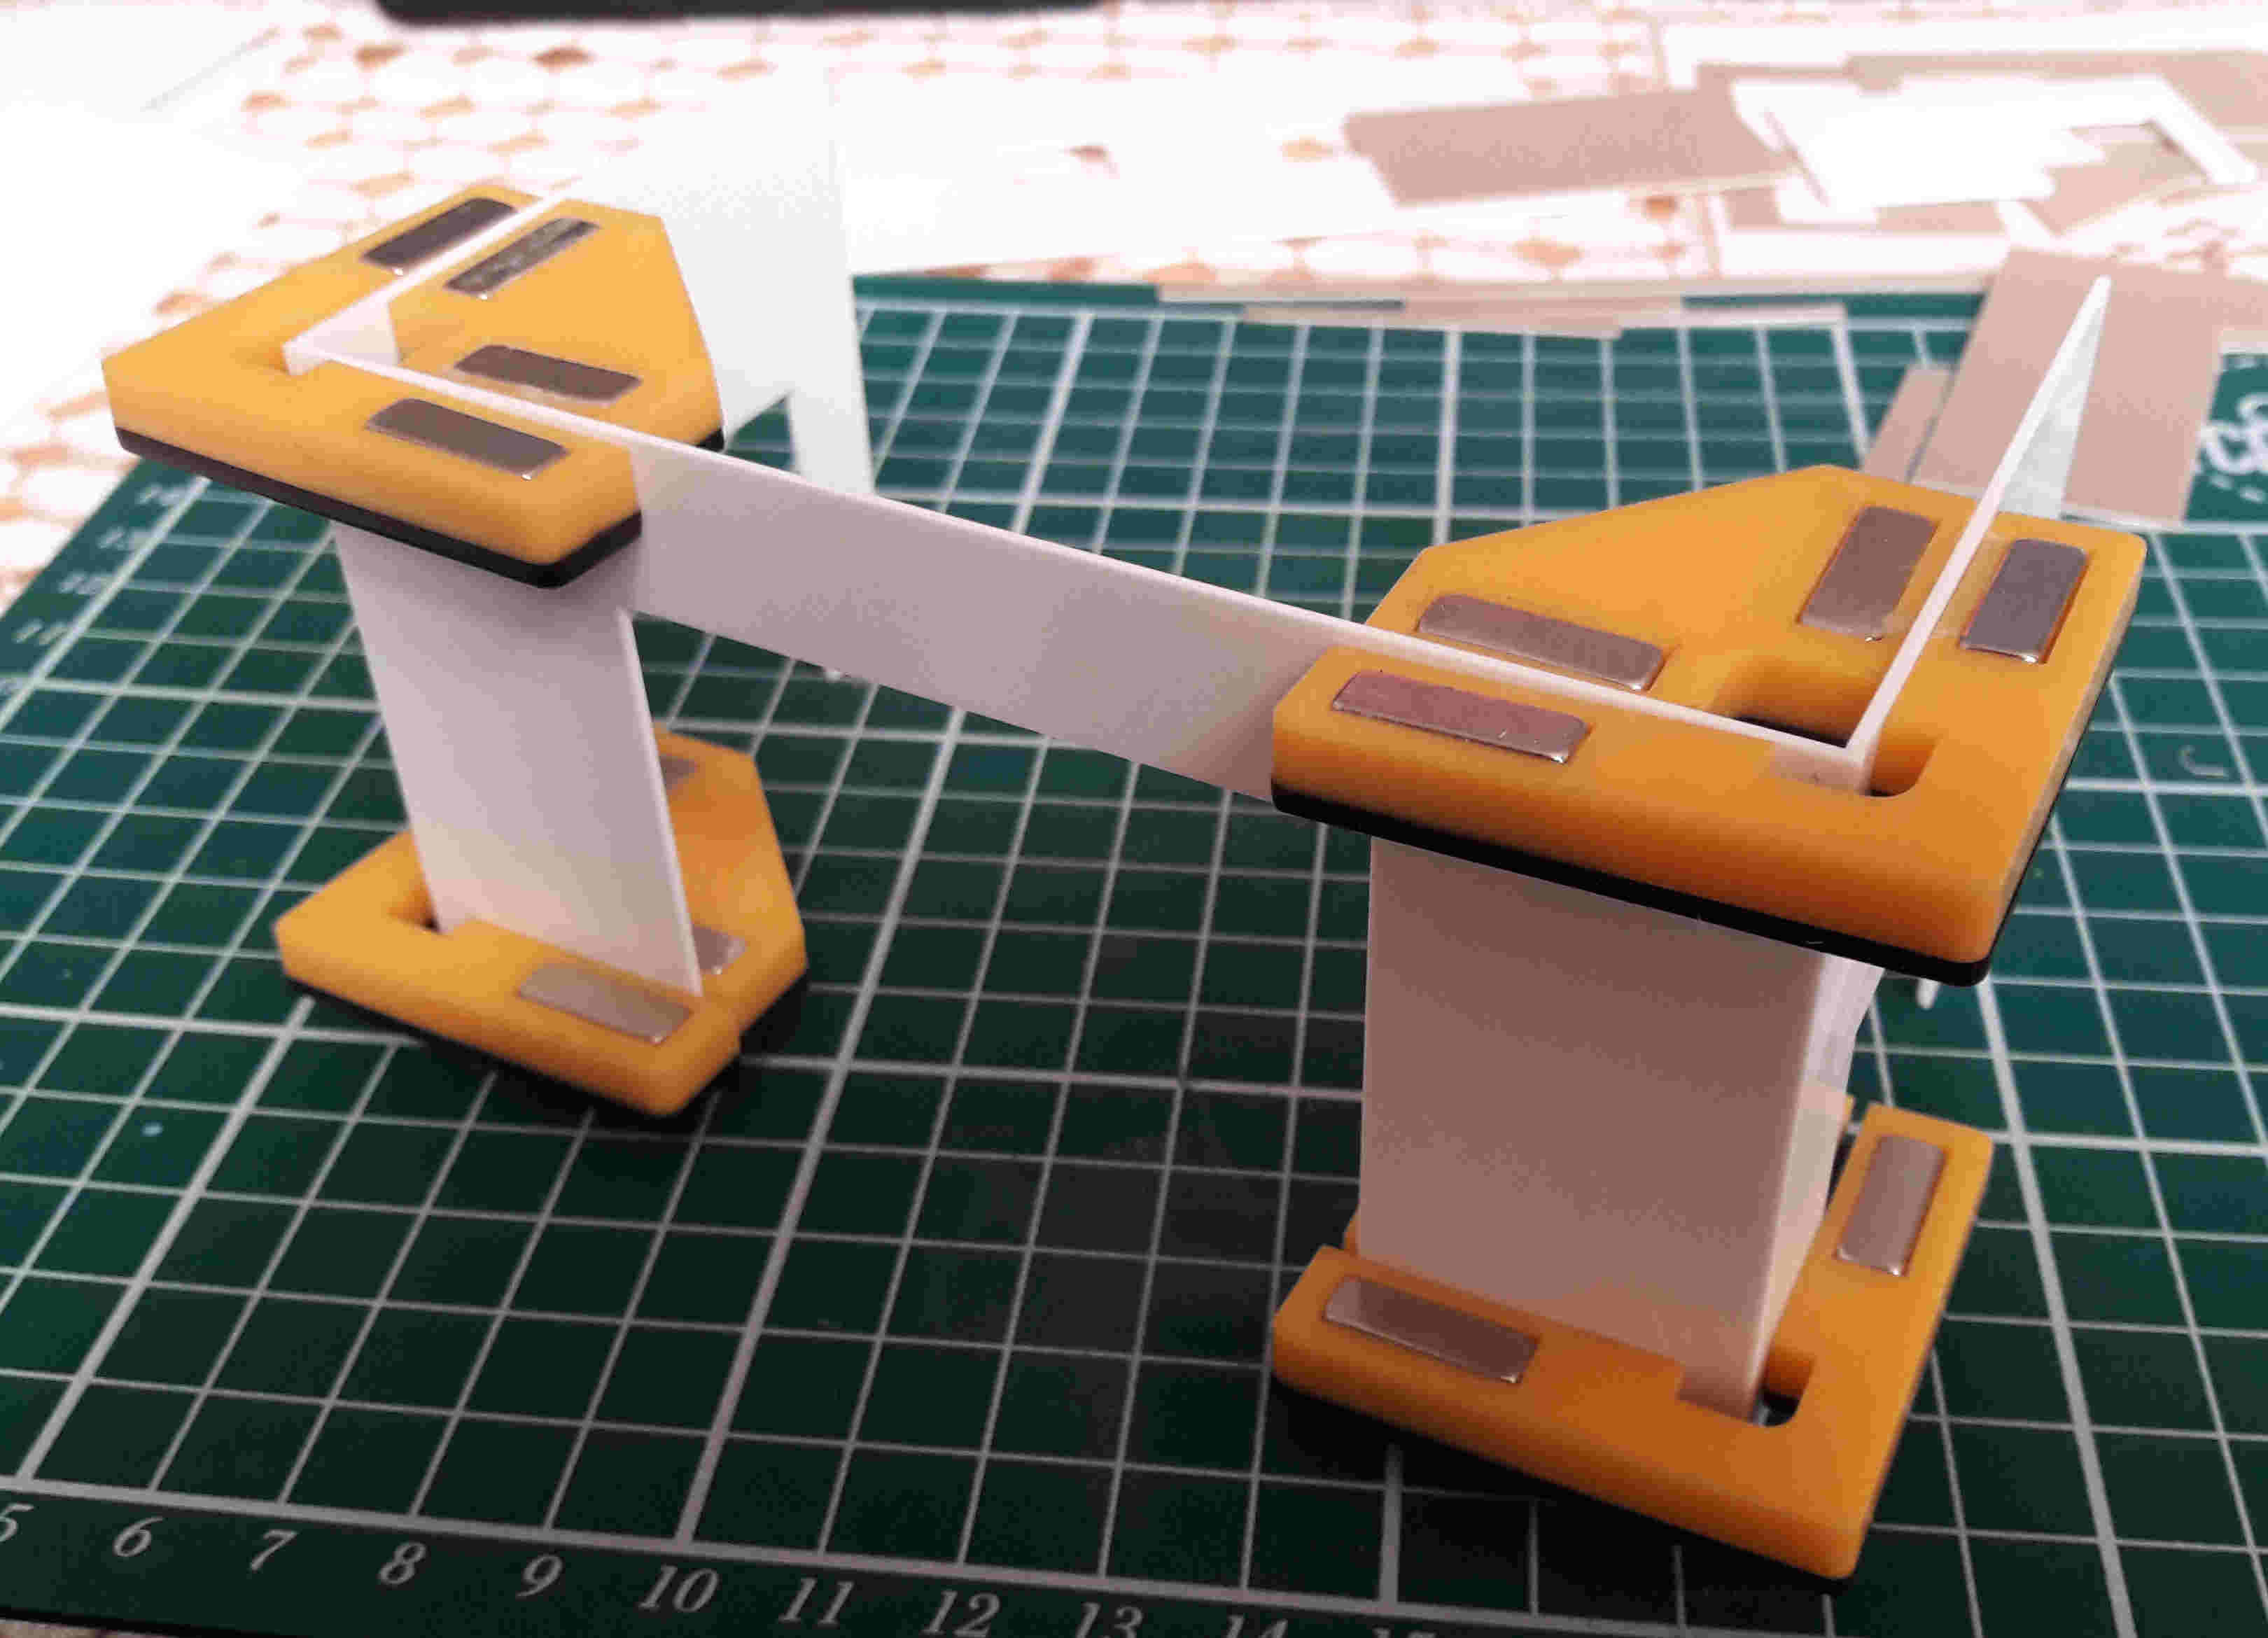
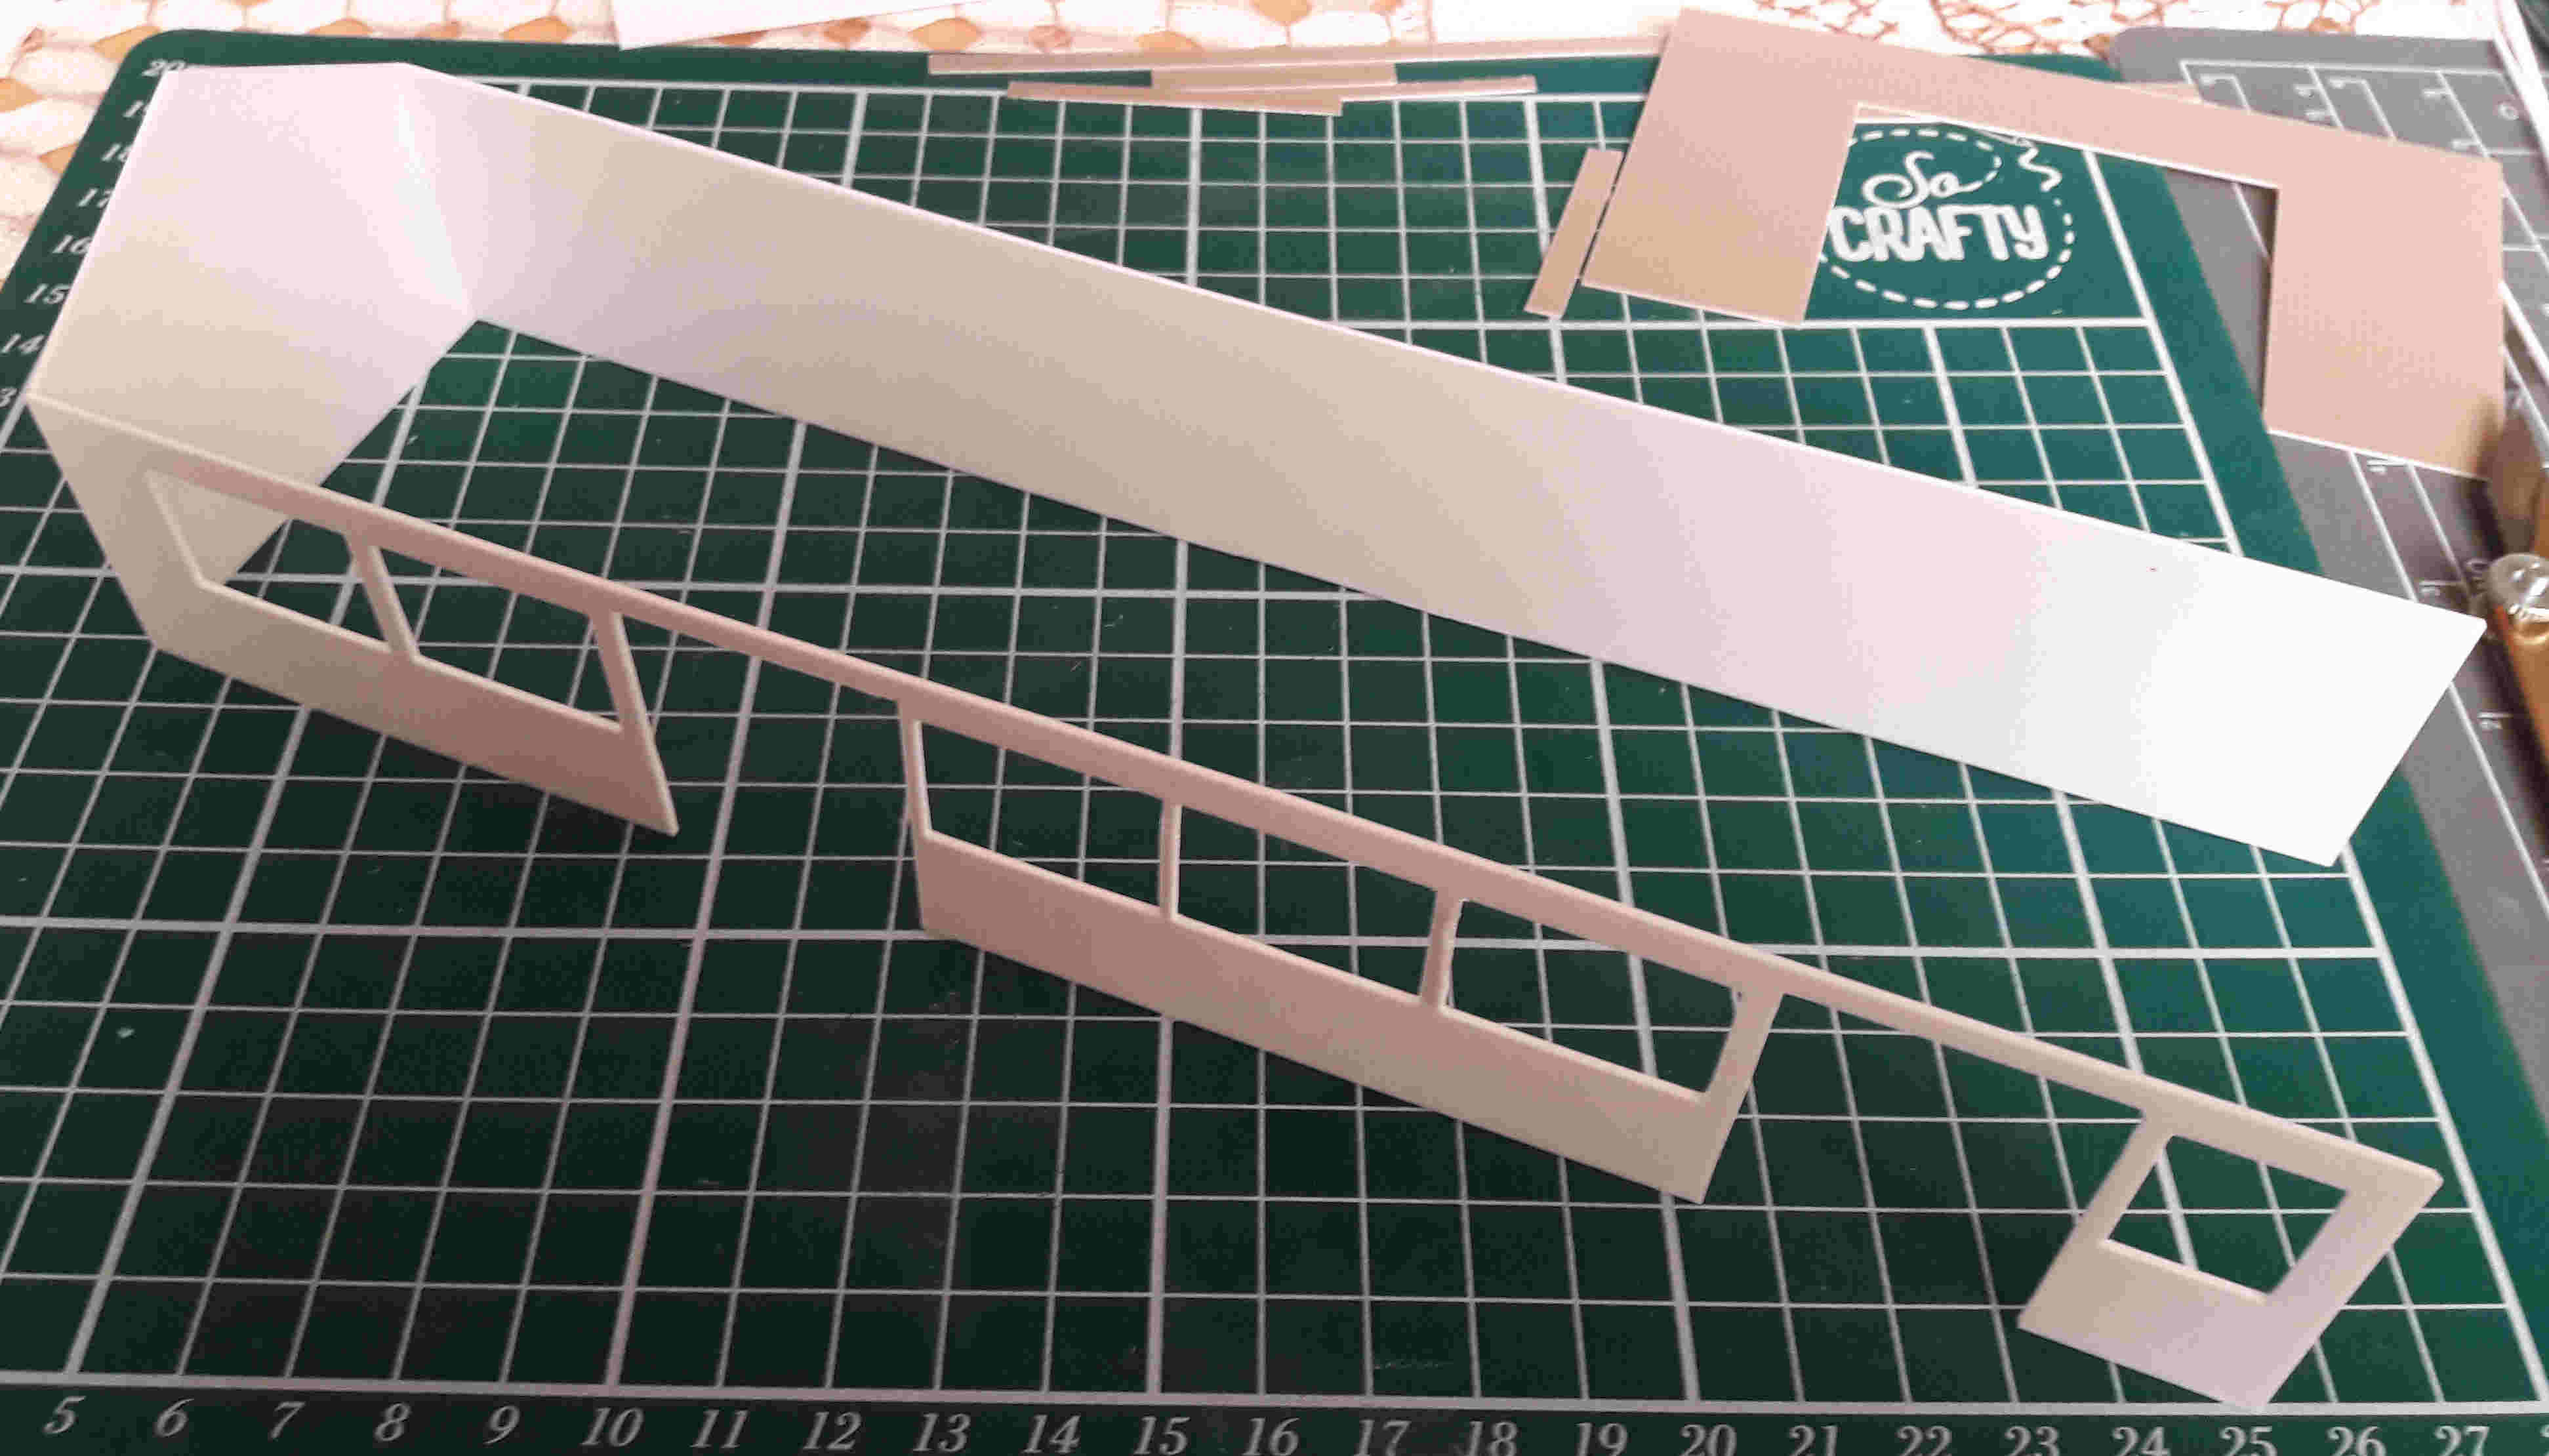
This build is again a scratch build in plasticard but in this case the design has been completely designed as a kit of pieces that are cut from various grades of plain, clear and embossed plasticard using the Silouhette cutter. Another new learning experience! All of the sheets were 'cut' - in reality etched - and taken on holiday to be removed from the sheets whilst enjoying a glass or two of the local wine! this is the end result, along with some before and after shots to show how the frames were created:
Construction started using magnetic clamps for the main frames:
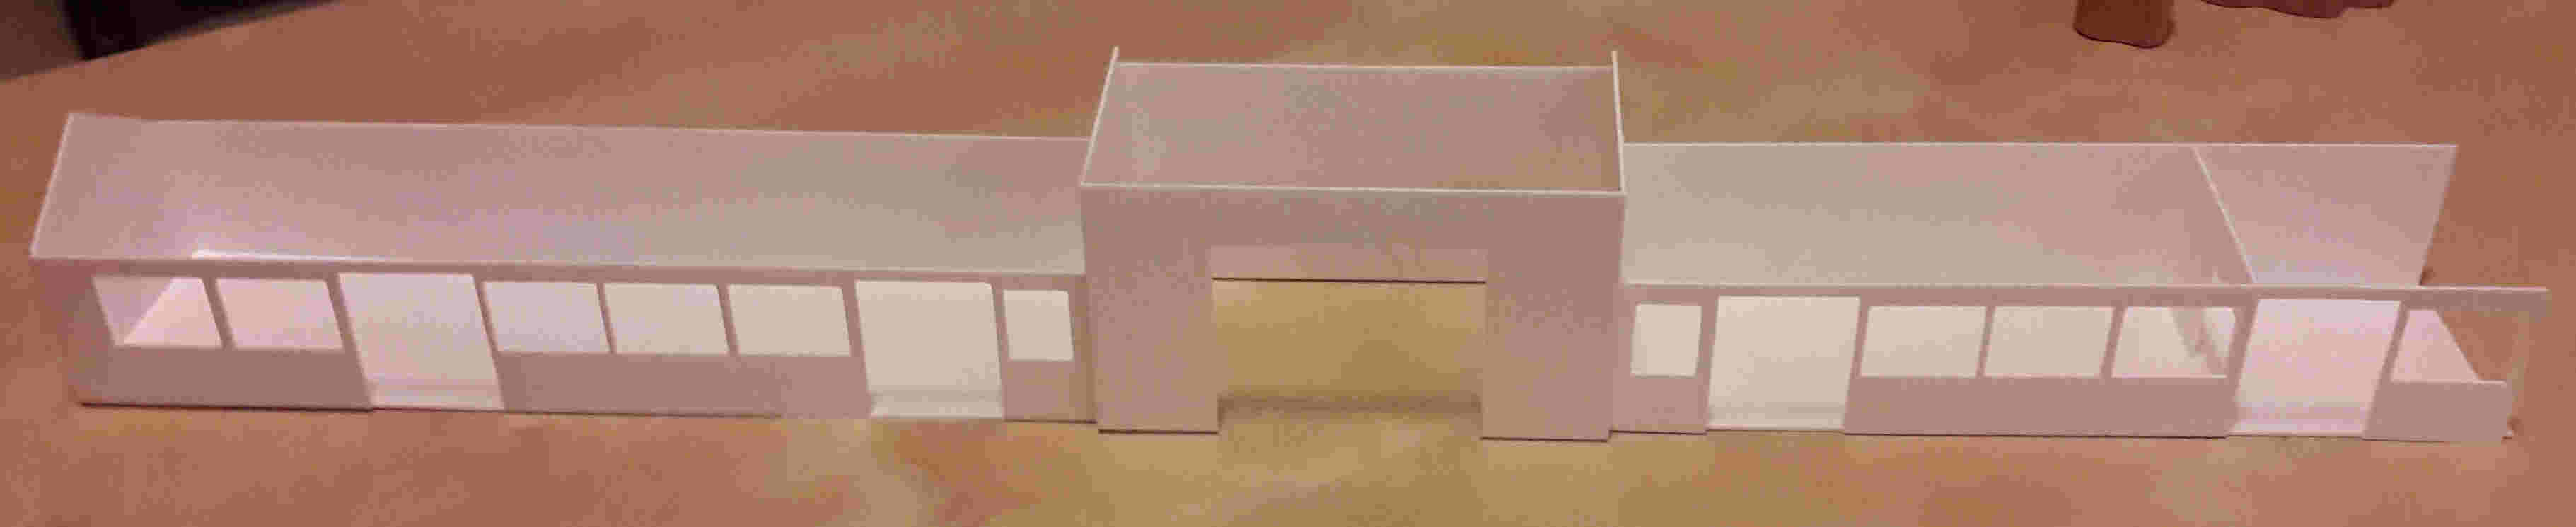
At this stage test its on the layout were possible:

Car yopu see what it is yet?